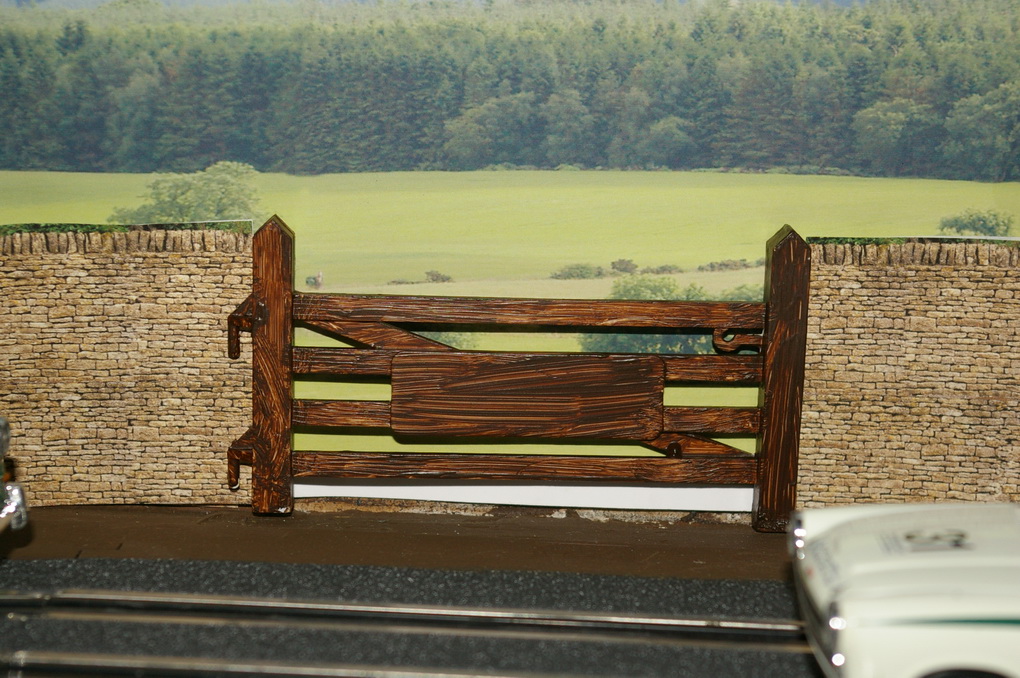
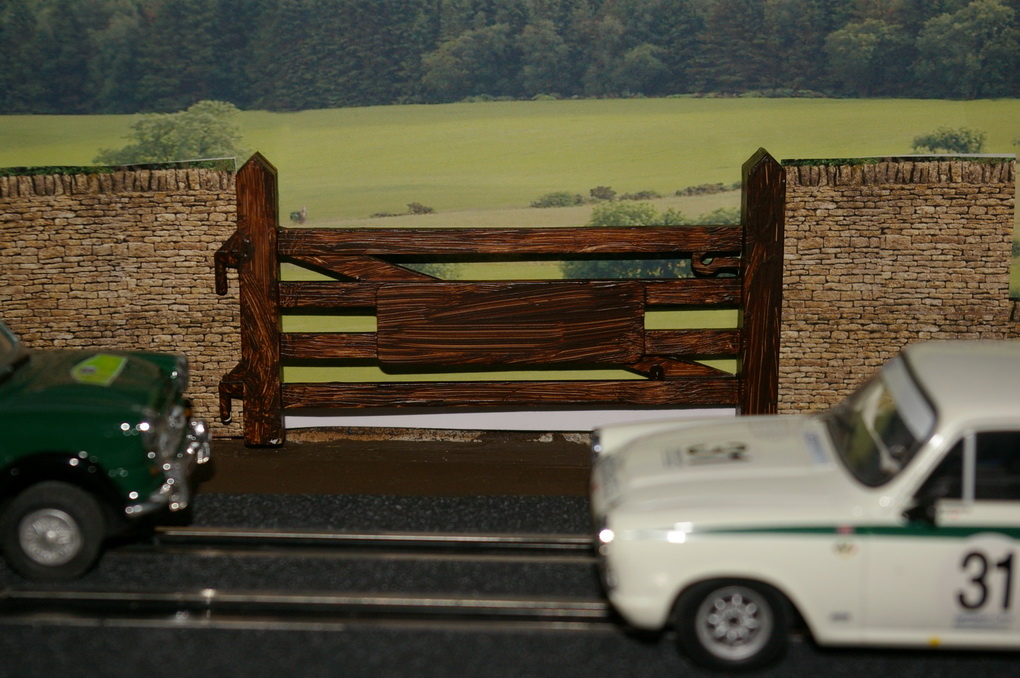
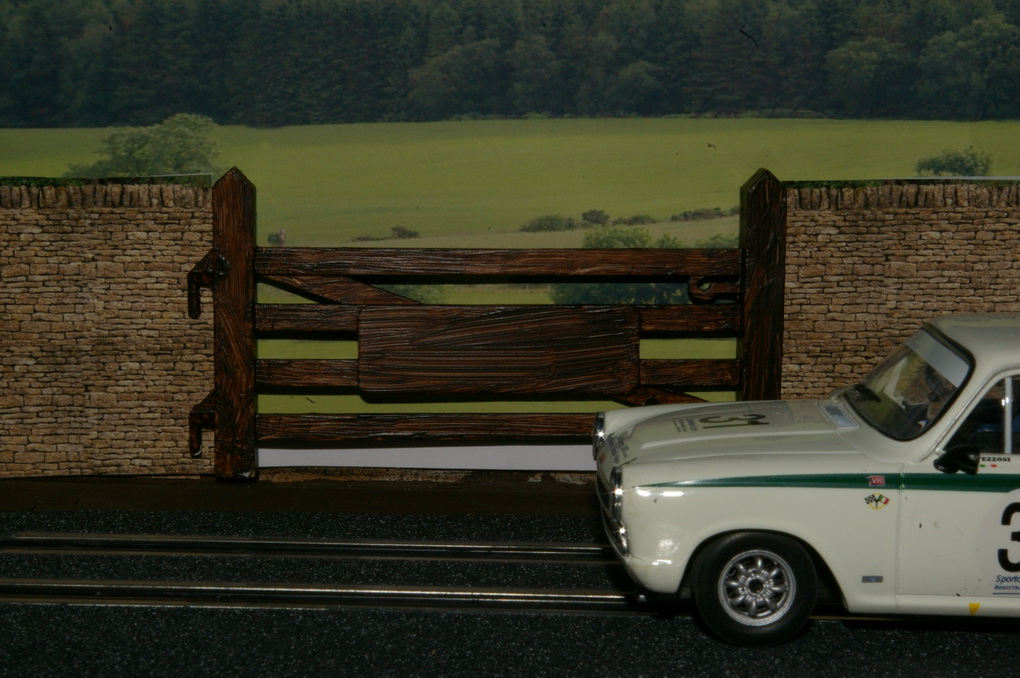
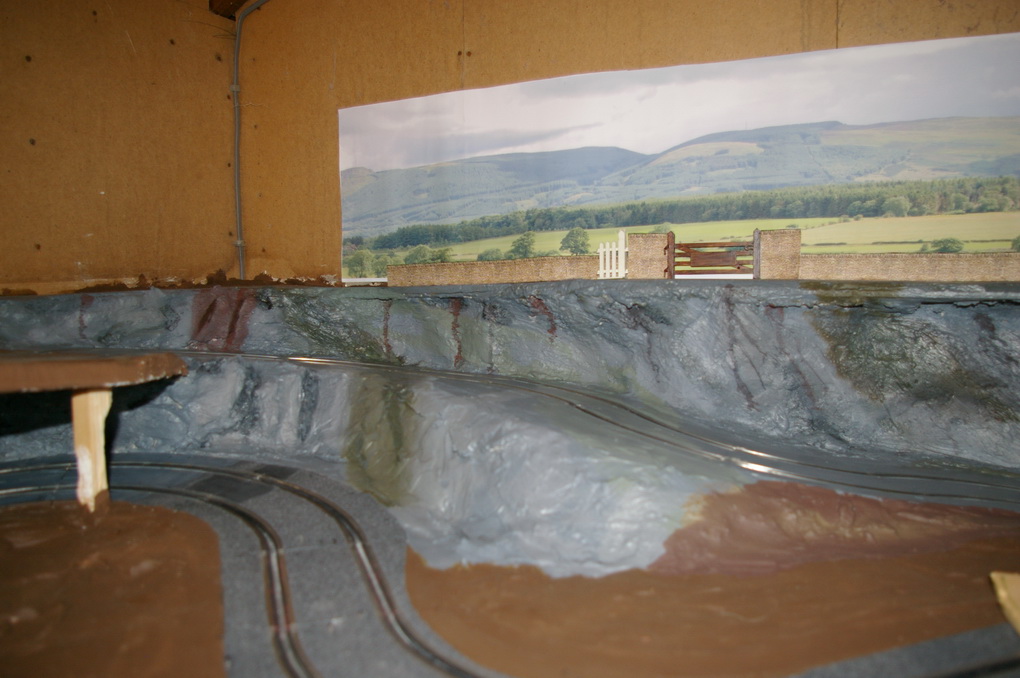
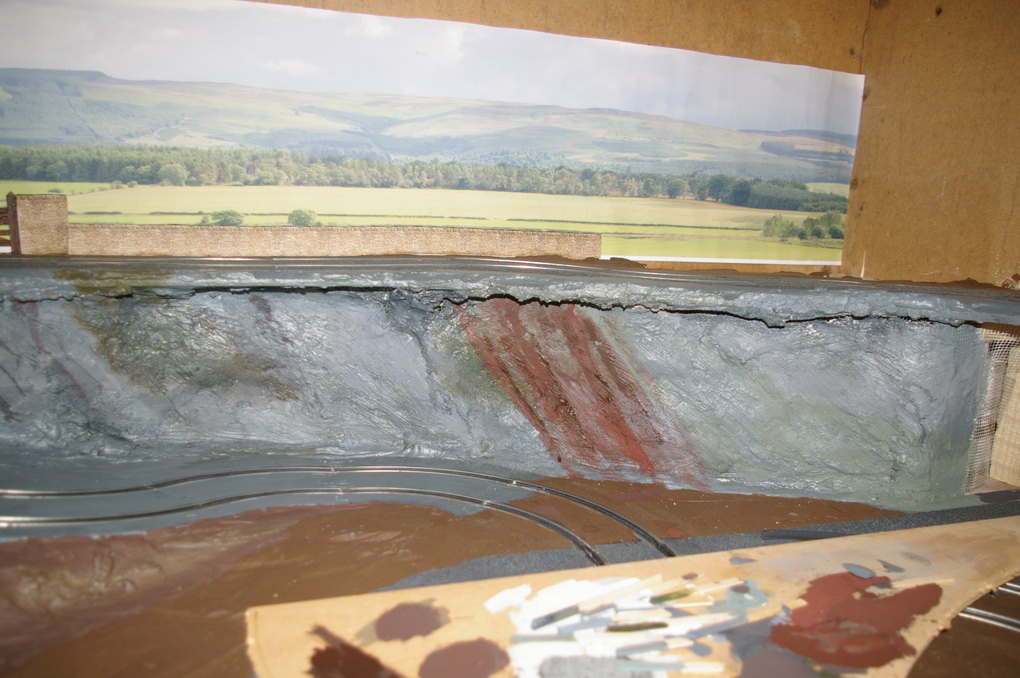
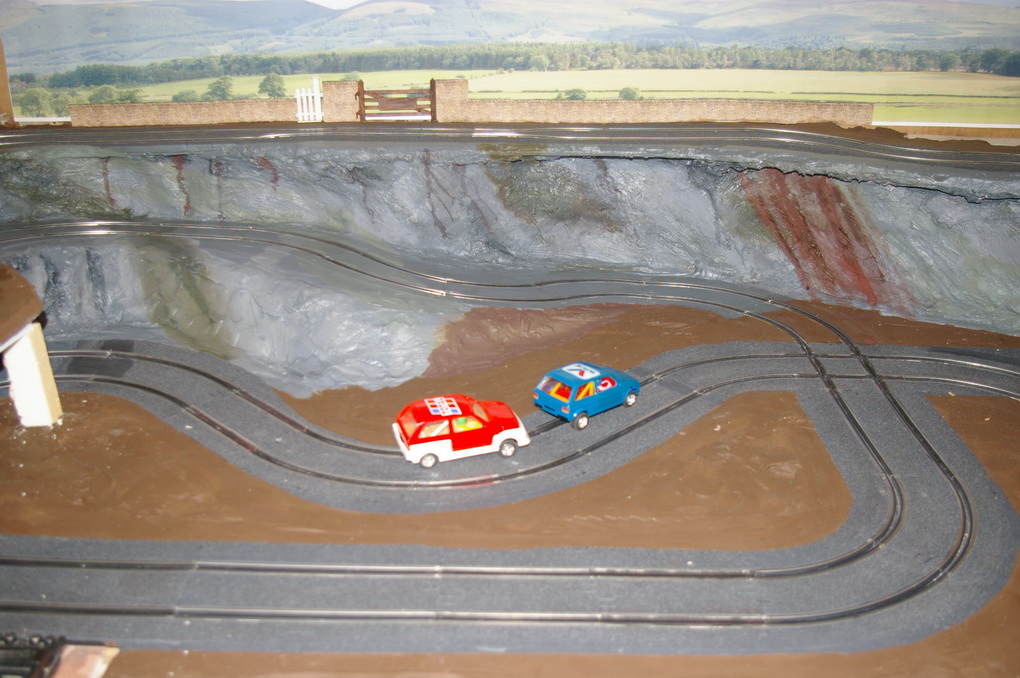
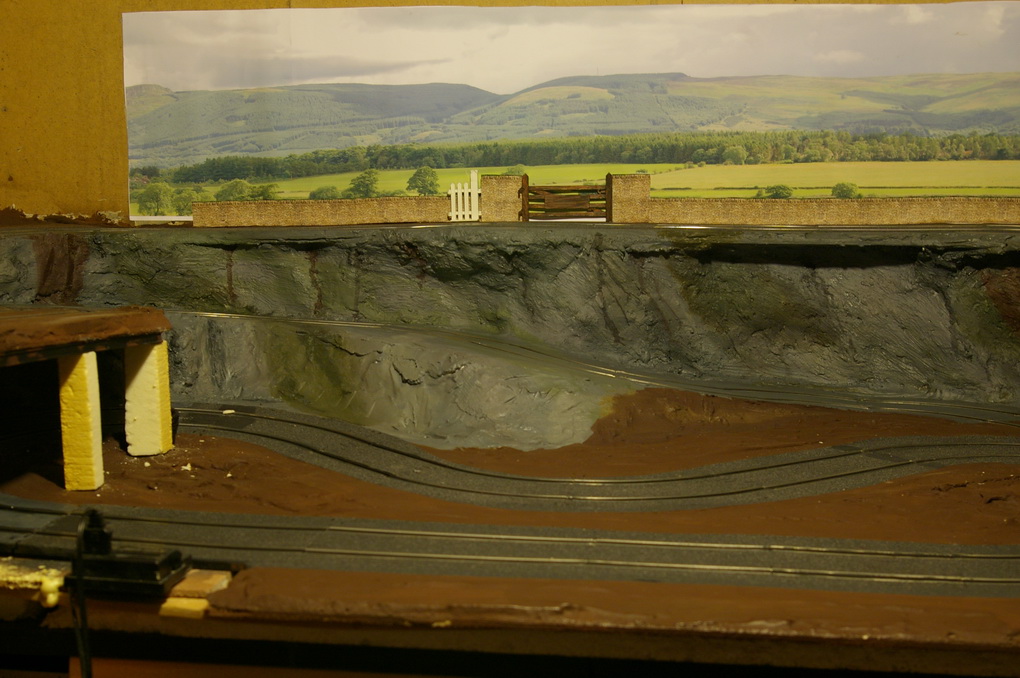
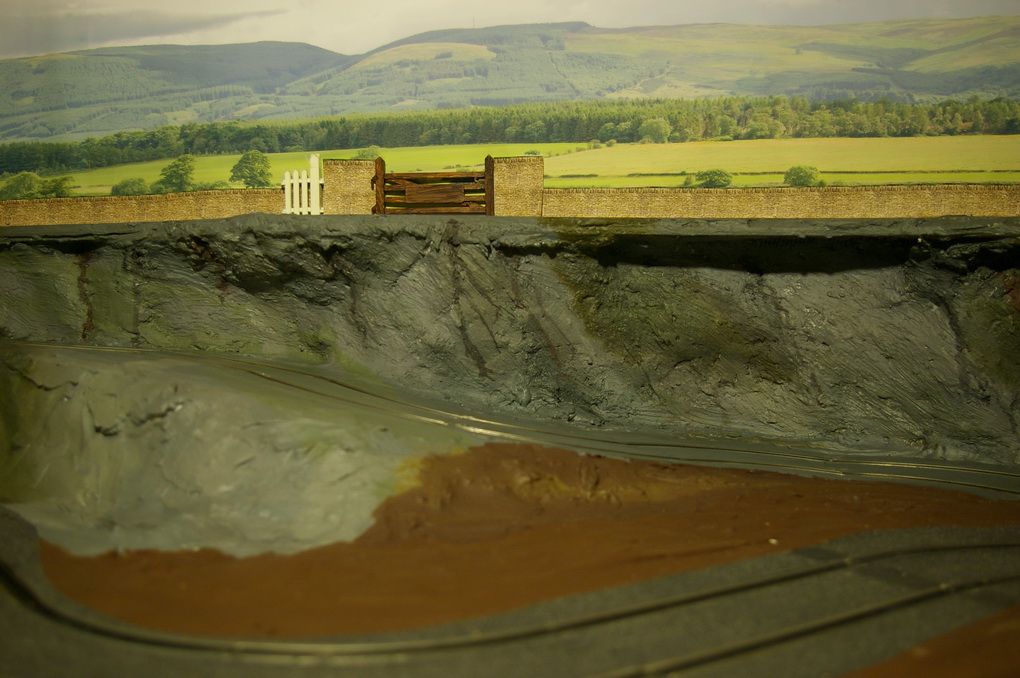
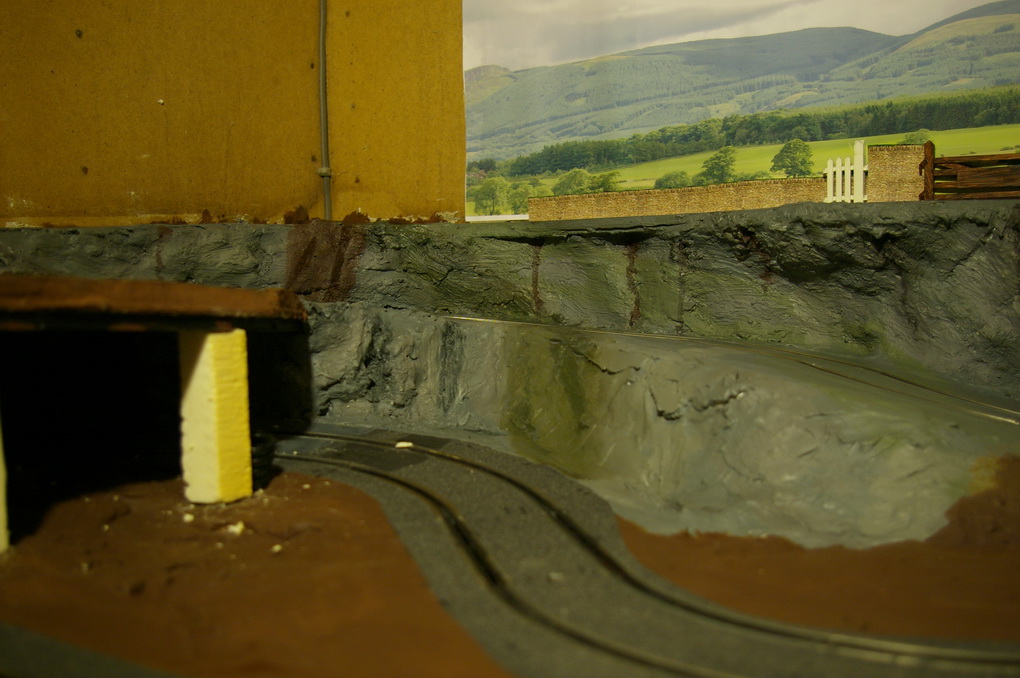
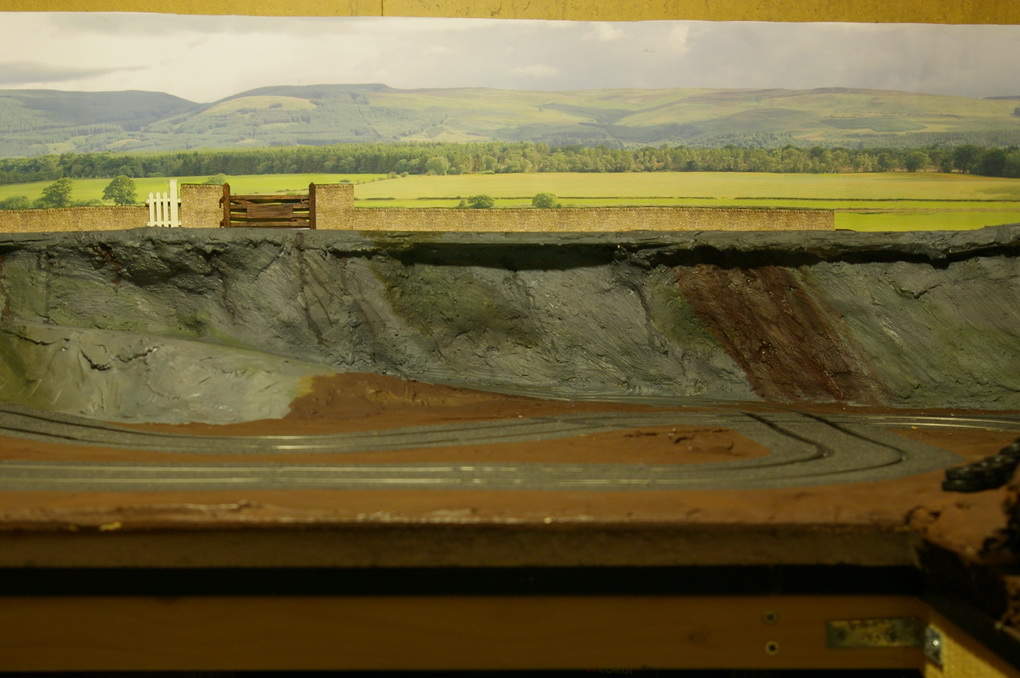
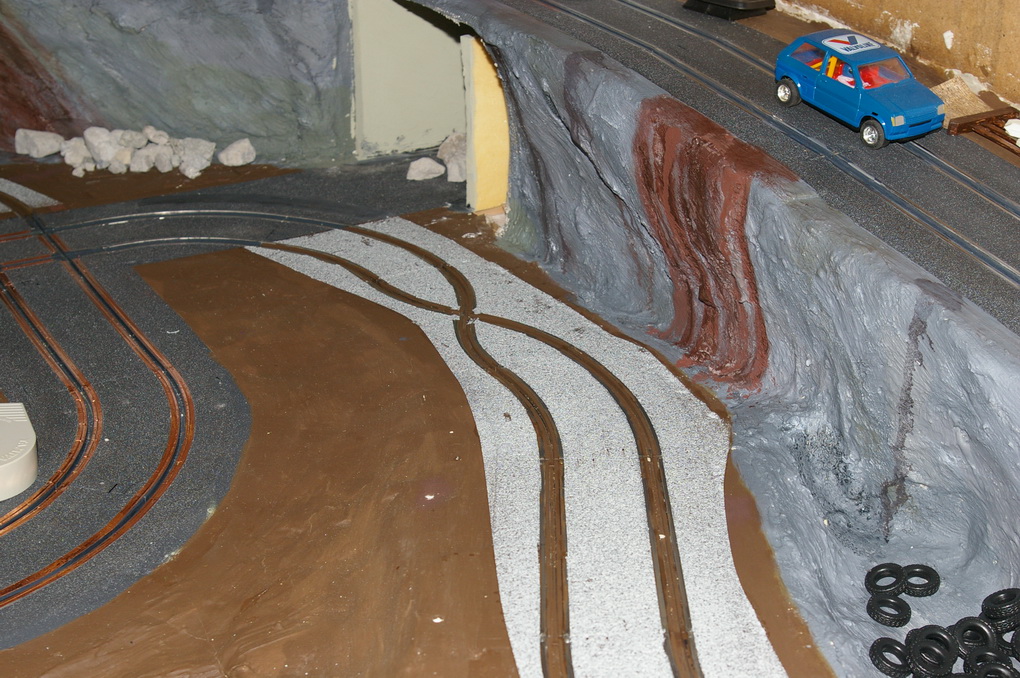
Painted the gate which now looks like wood, I've also removed the 'Scalextric' from it and made the wall taller.
rally in a shed 2 0521
rally in a shed 2 0522
rally in a shed 2 0523
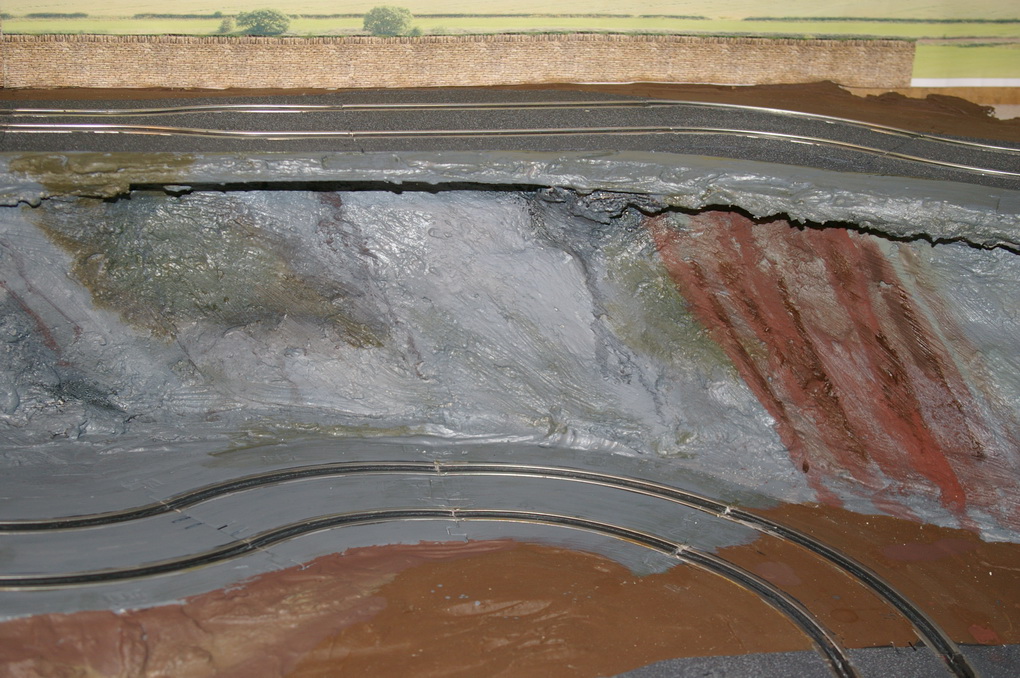
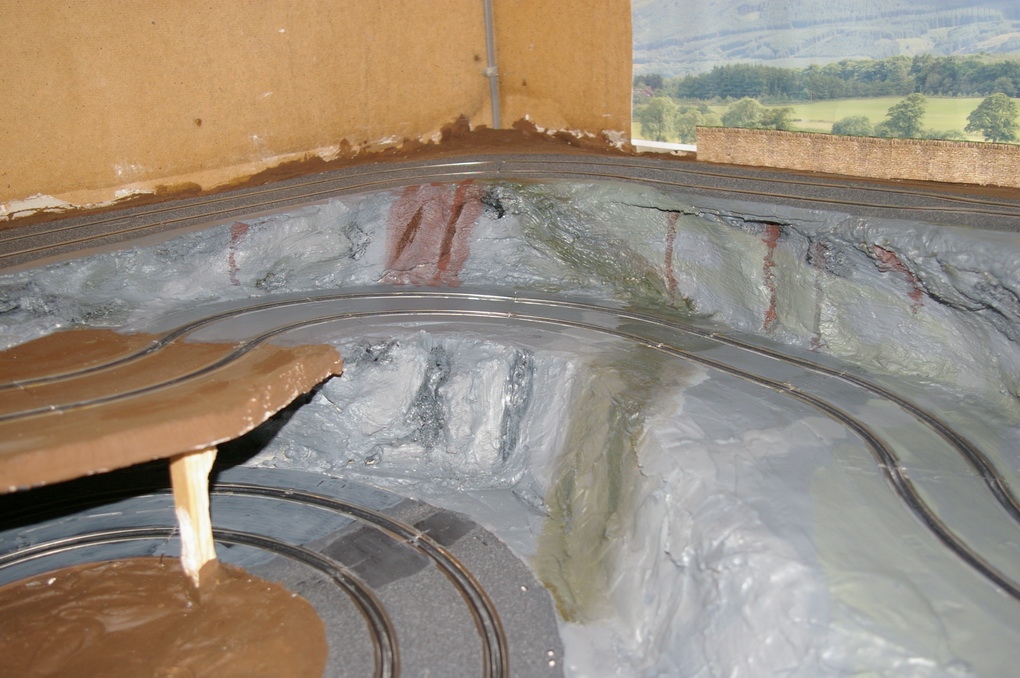
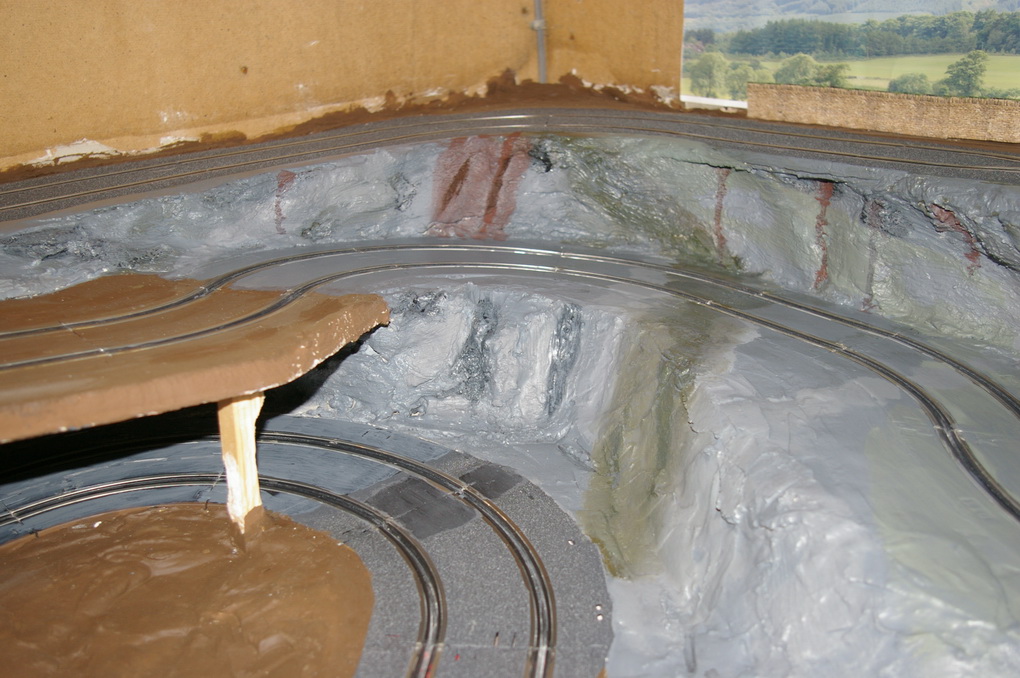
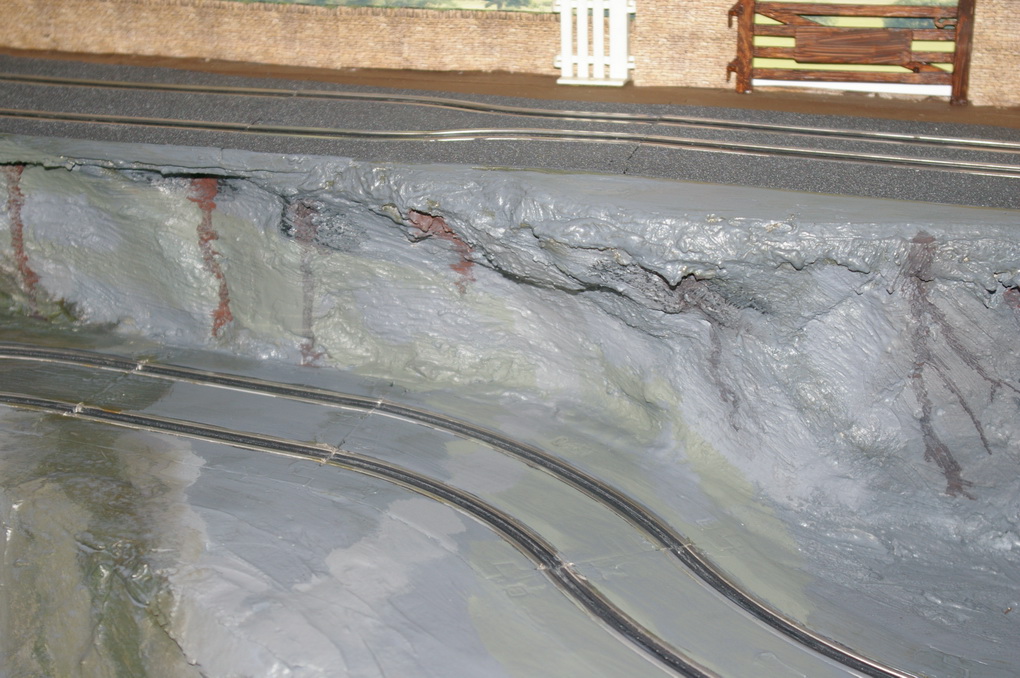
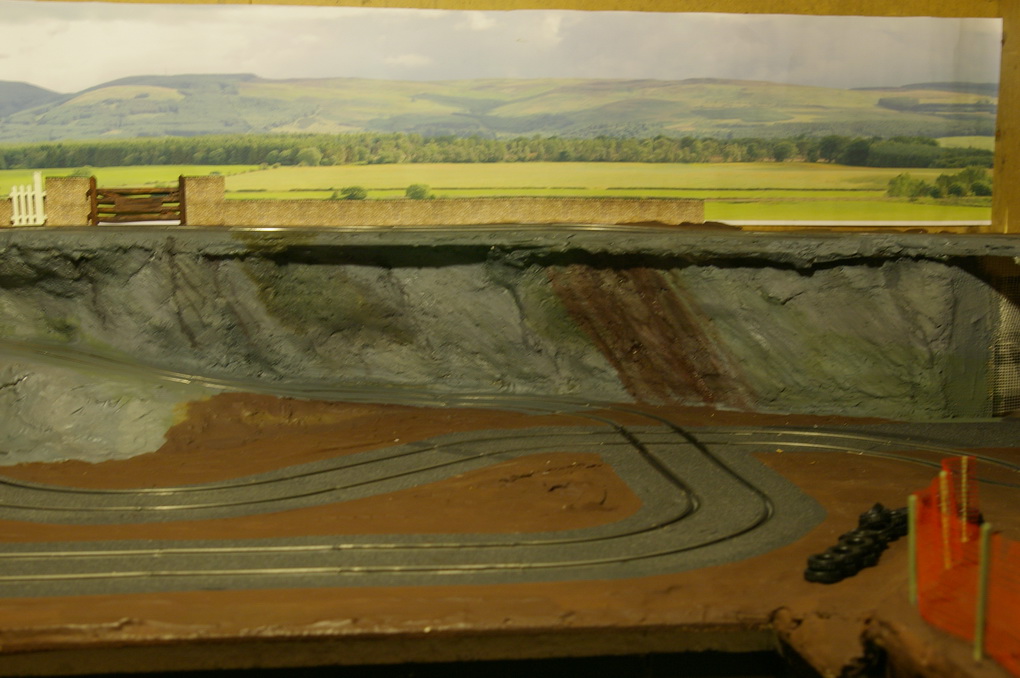
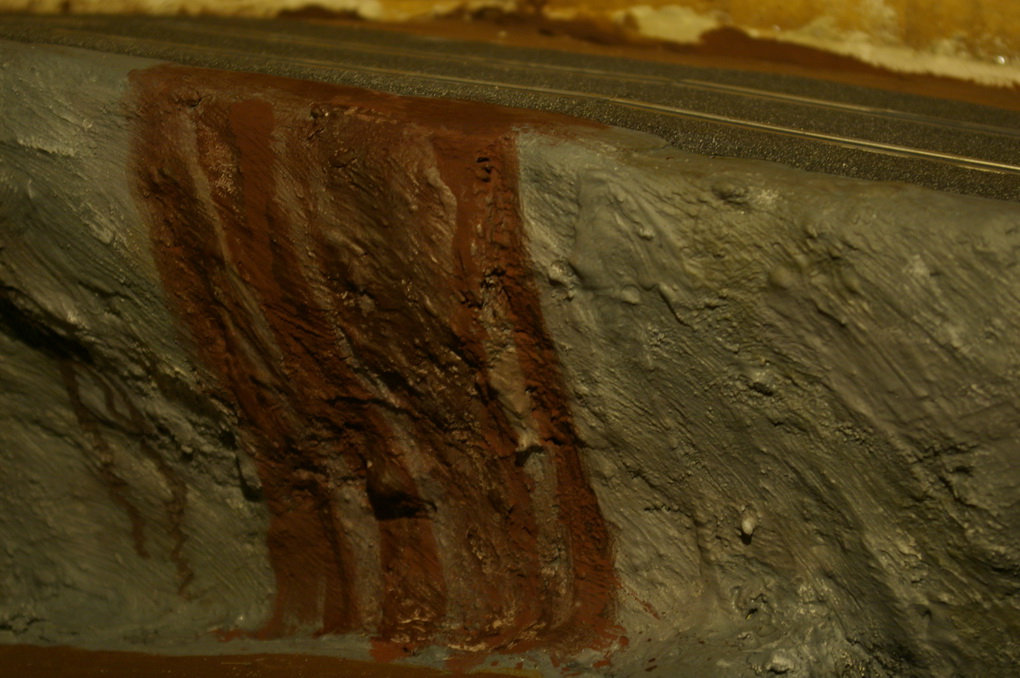
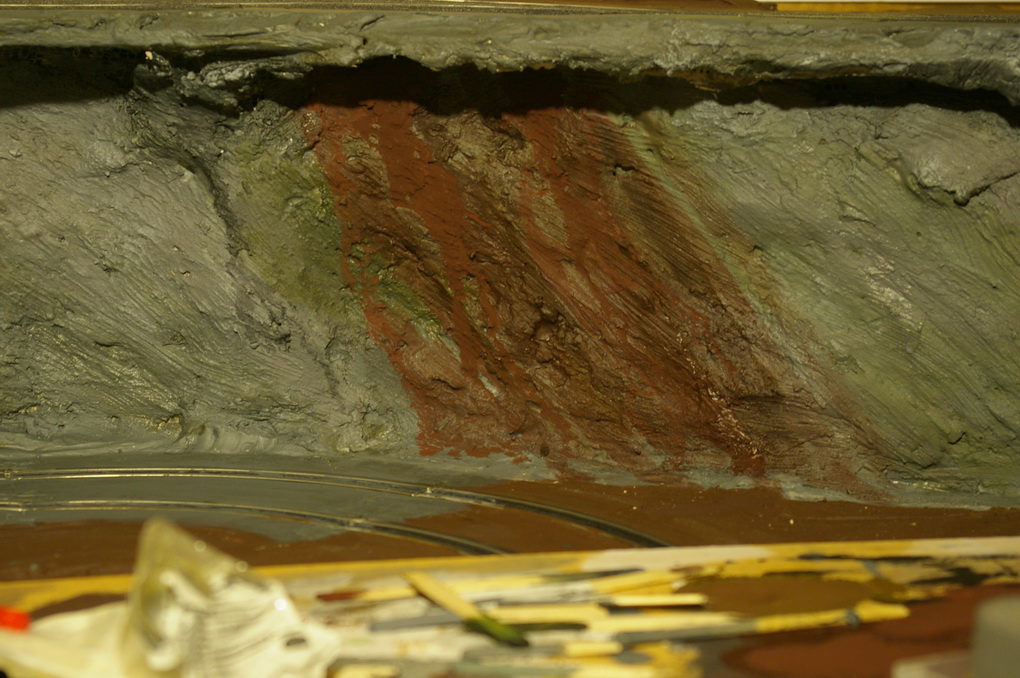
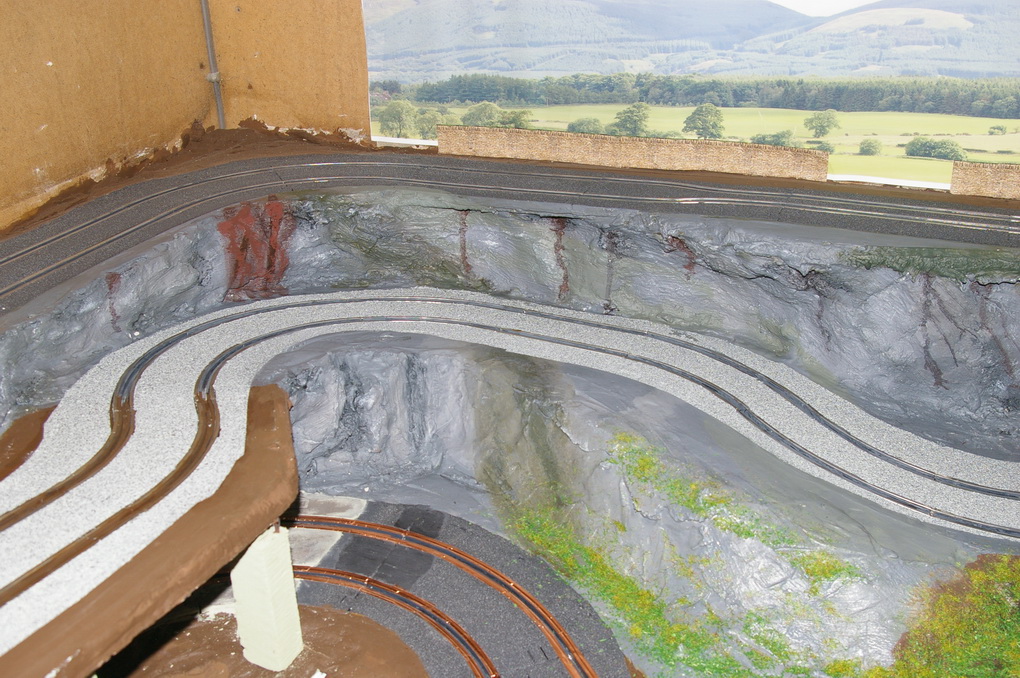
I've been playing with the cliffs and colours. I've tried lots of different shades of grey and I'm now on about my third mix. Can't say I'm completely happy but I think this will be it, for the moment anyway.The colours used are a mix of matt and gloss and everythink has had a coat of the base colour was a almost water wash to blend it all in. Some of the rust and stain marks have been just let to run don the cliff face.
rally in a shed 2 0512
rally in a shed 2 0513
rally in a shed 2 0514

rally in a shed 2 0515

rally in a shed 2 0516
rally in a shed 2 0517
rally in a shed 2 0518
rally in a shed 2 0519
rally in a shed 2 0520
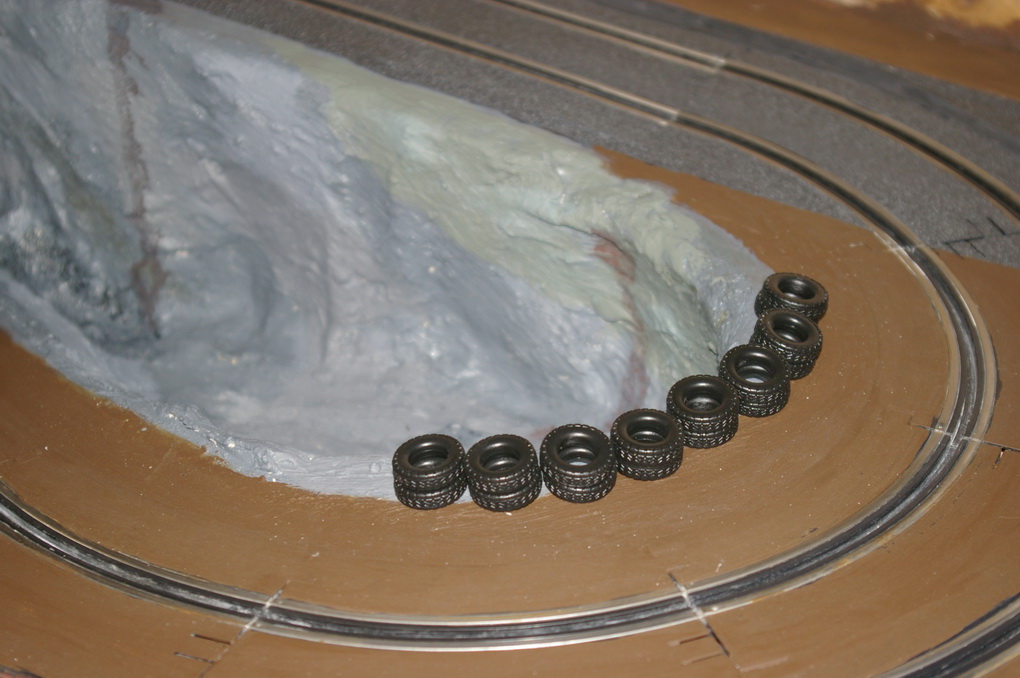
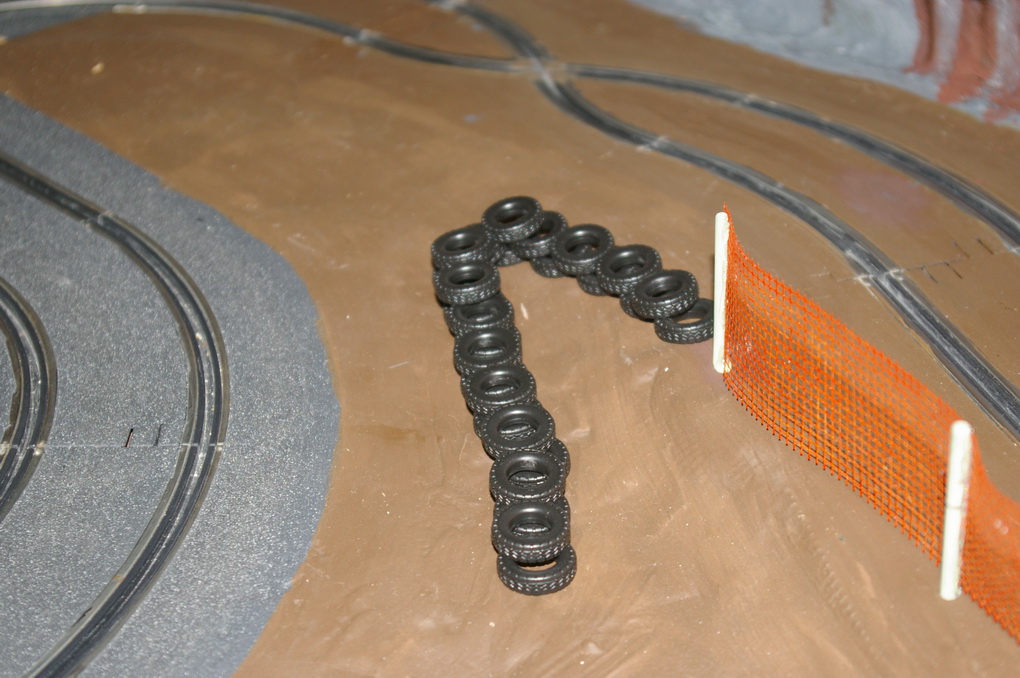
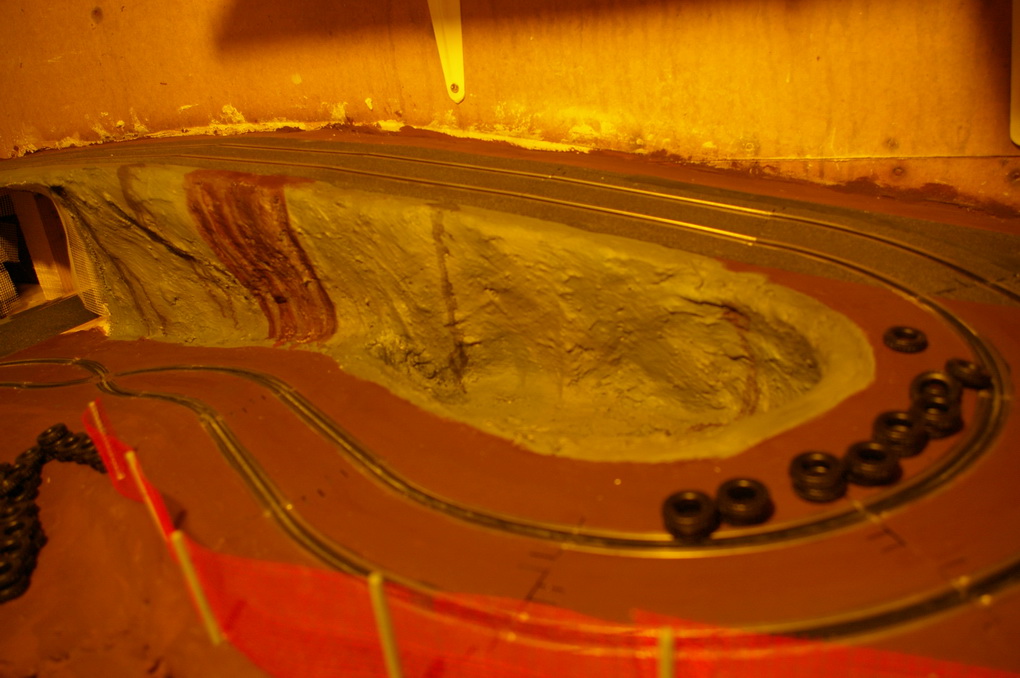
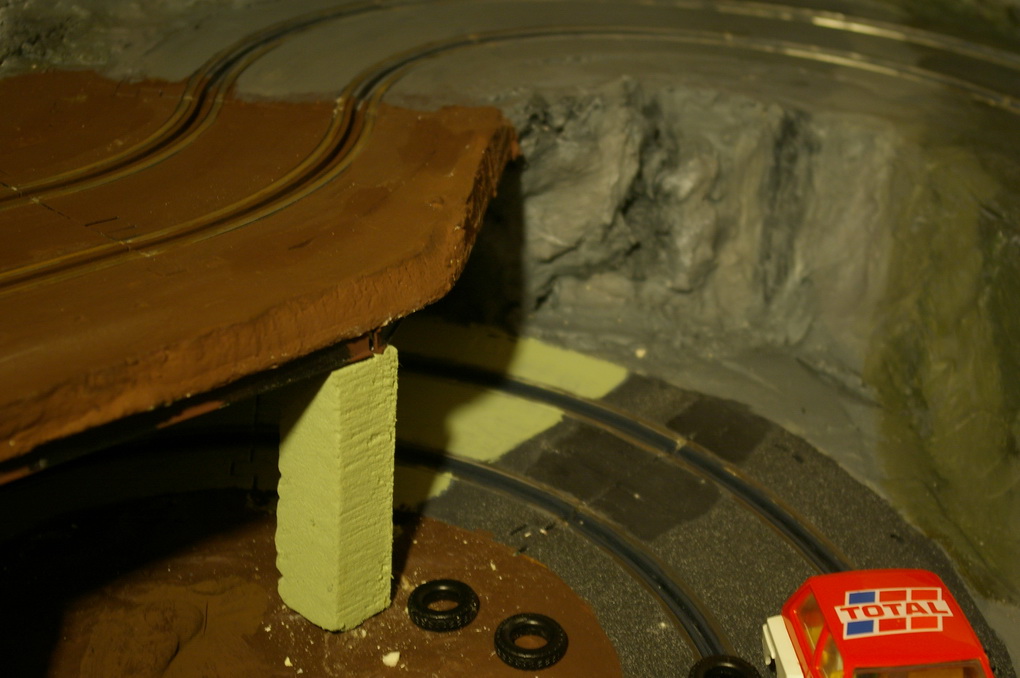
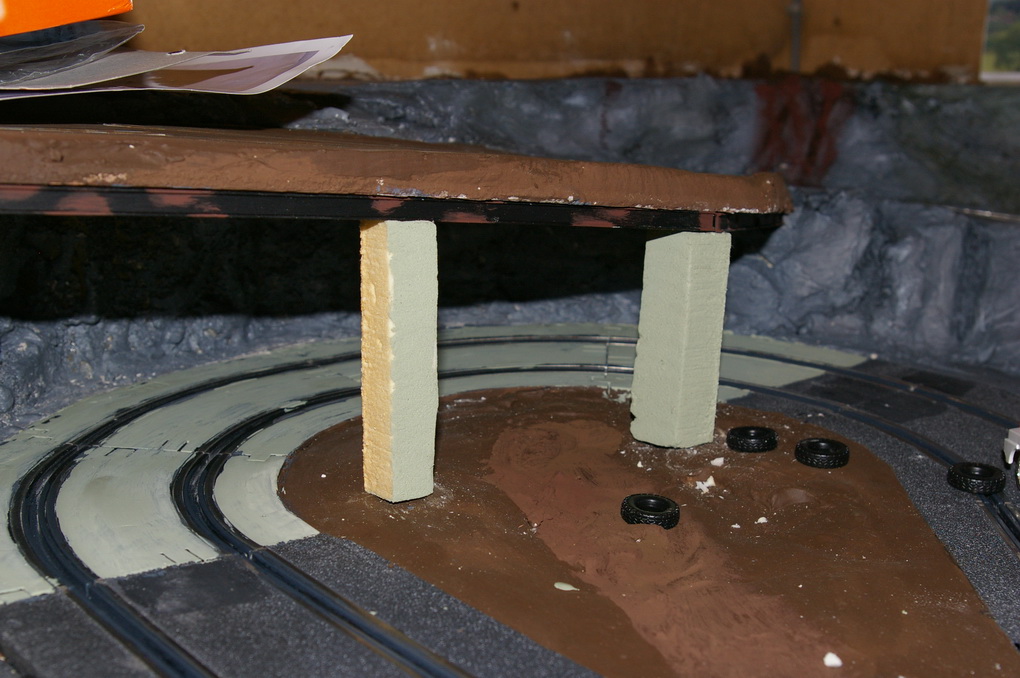
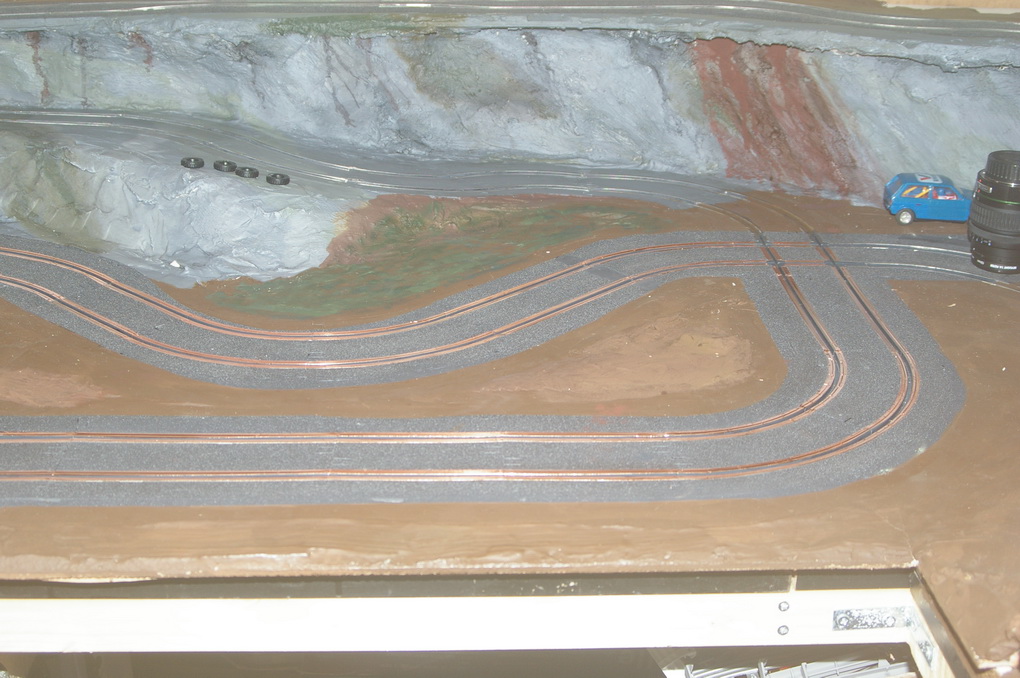
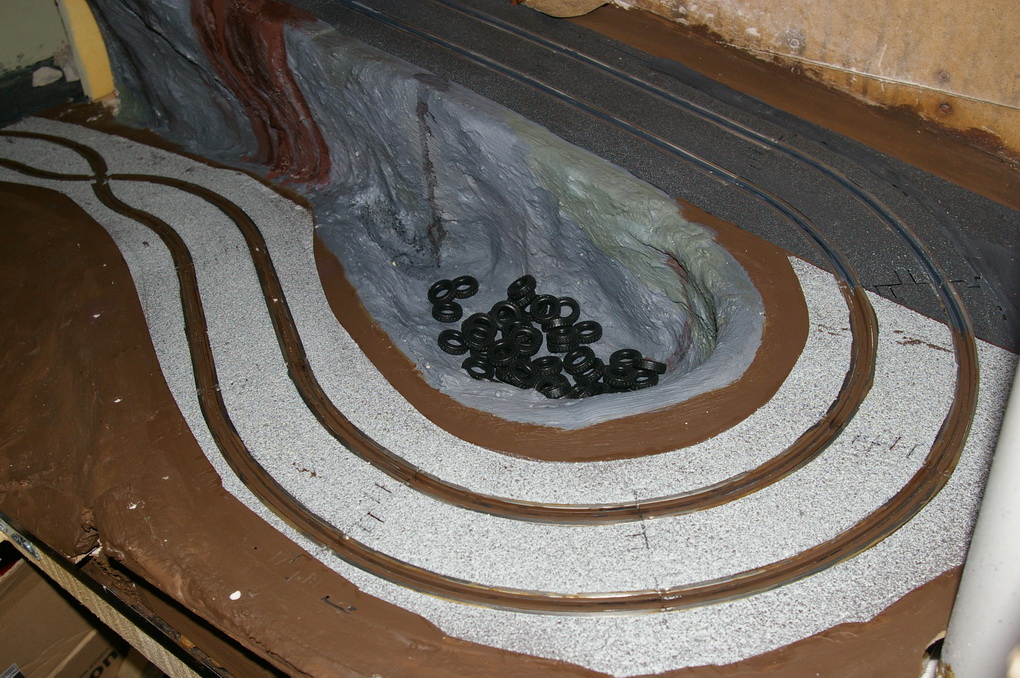
Ok we had a bit of trouble in the old quarry the other night, someone came and fly tipped a load of tyres. So we put them to use.
rally in a shed 2 0524
rally in a shed 2 0525

rally in a shed 2 0526
Get 50 tyres with a black plastic sheet for £4.99, designed for farm scenery, the tyres are to hold the black trapaulin down. Don't know final use of them yet.
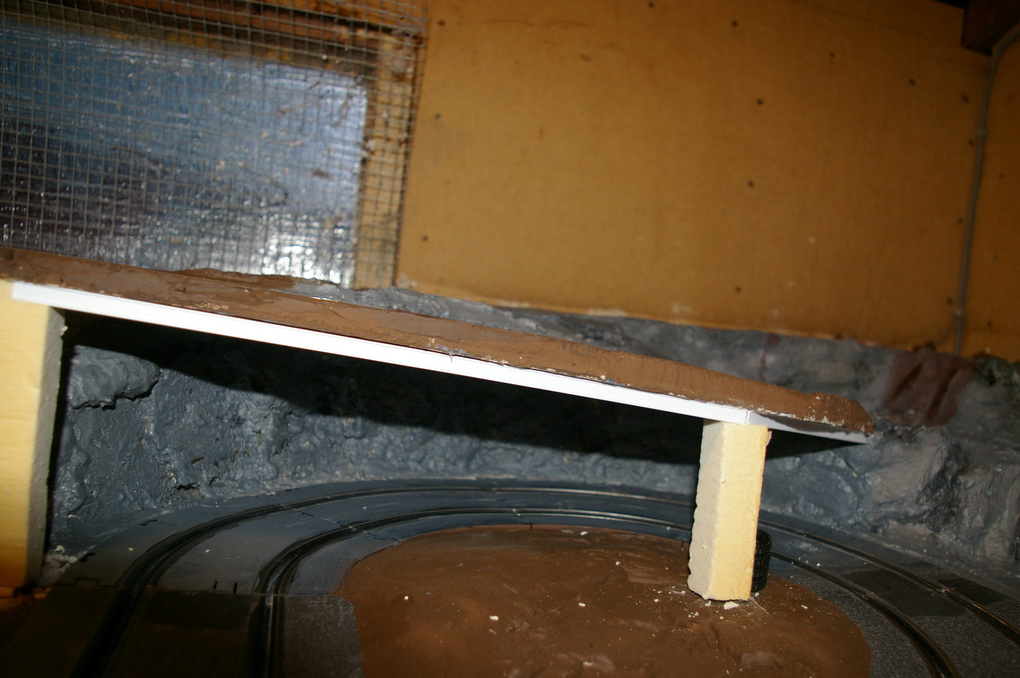
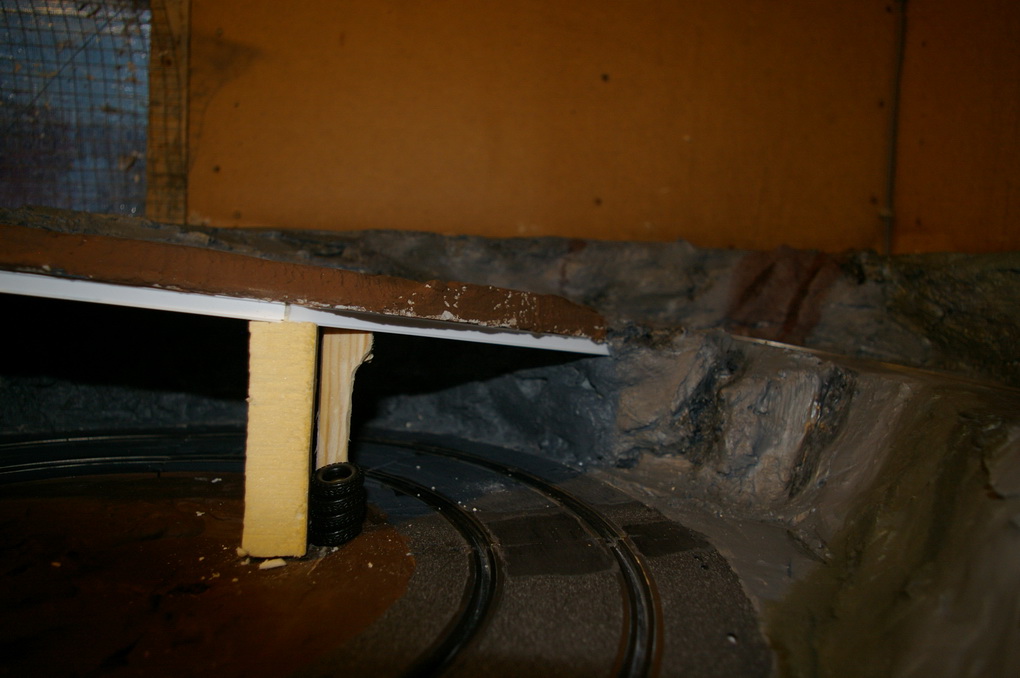
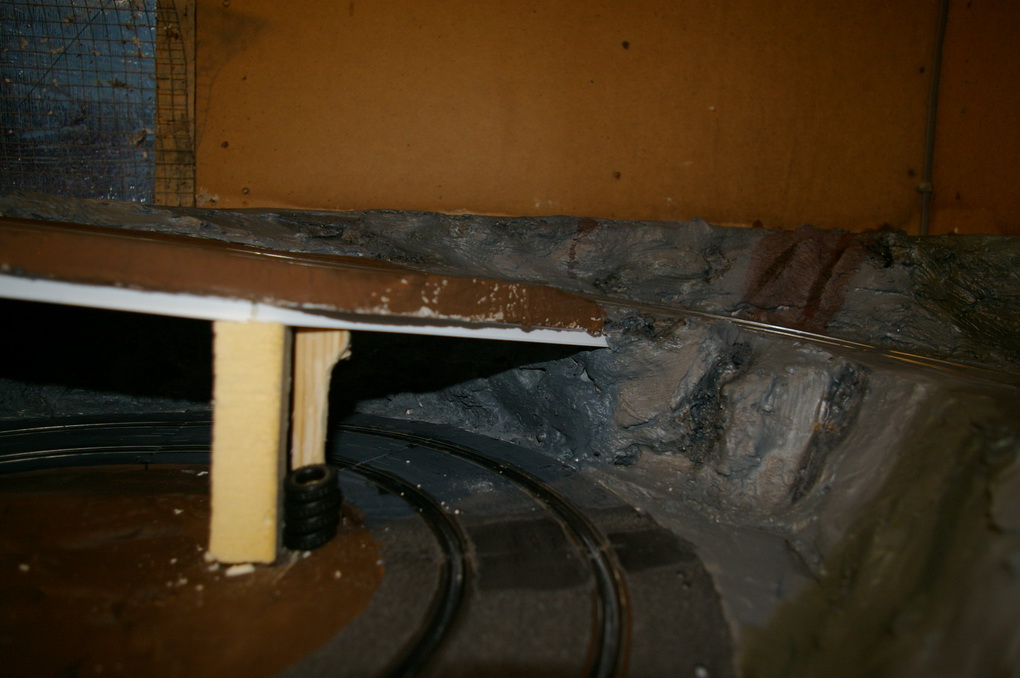
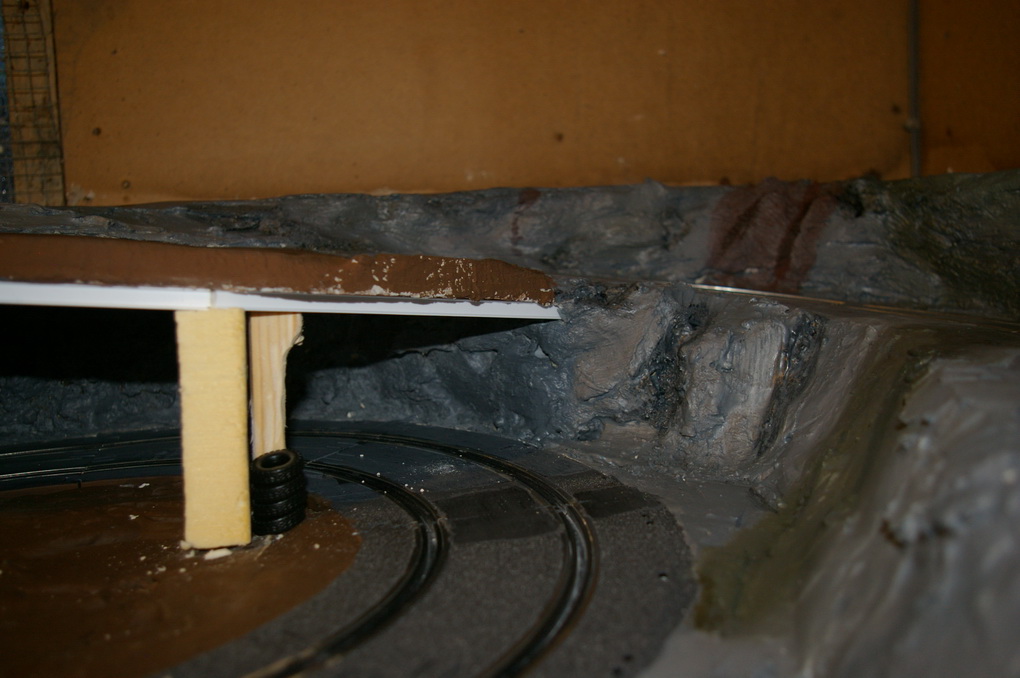
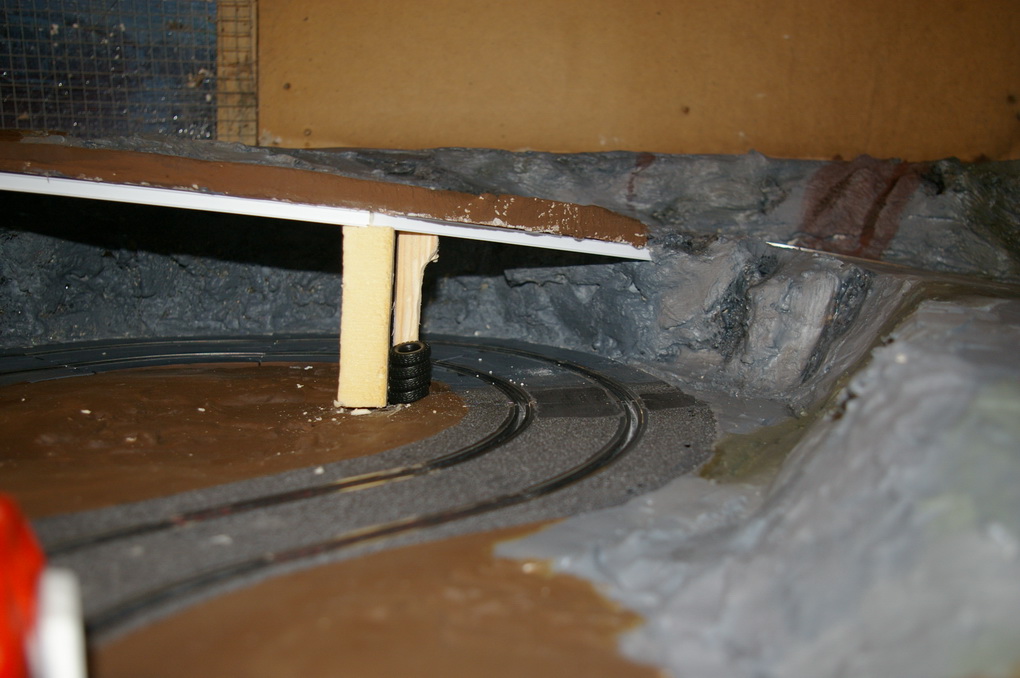
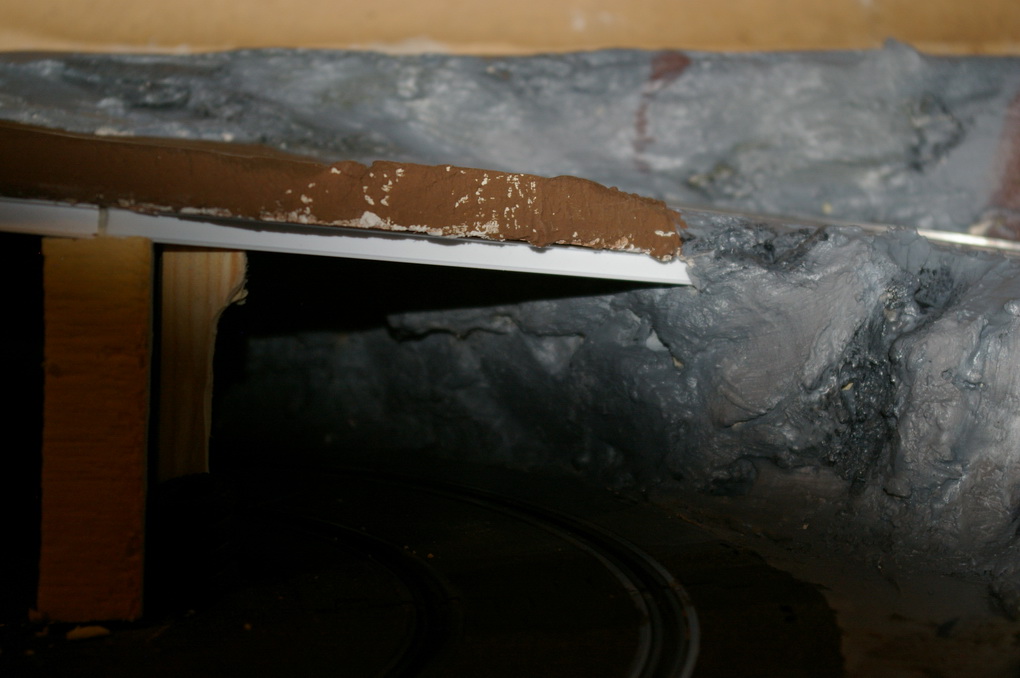
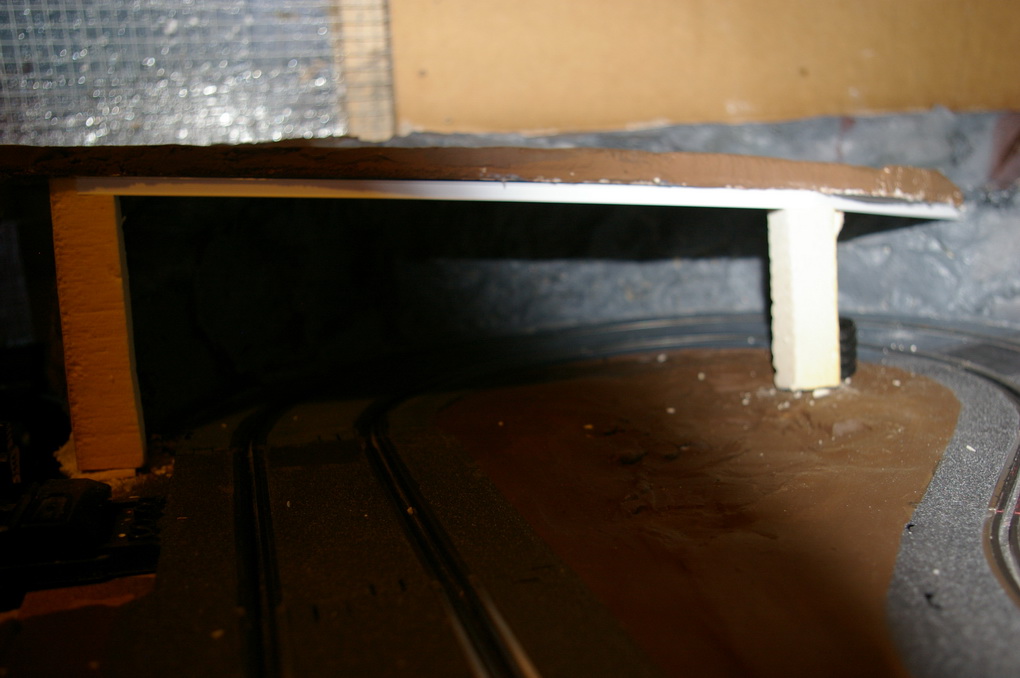
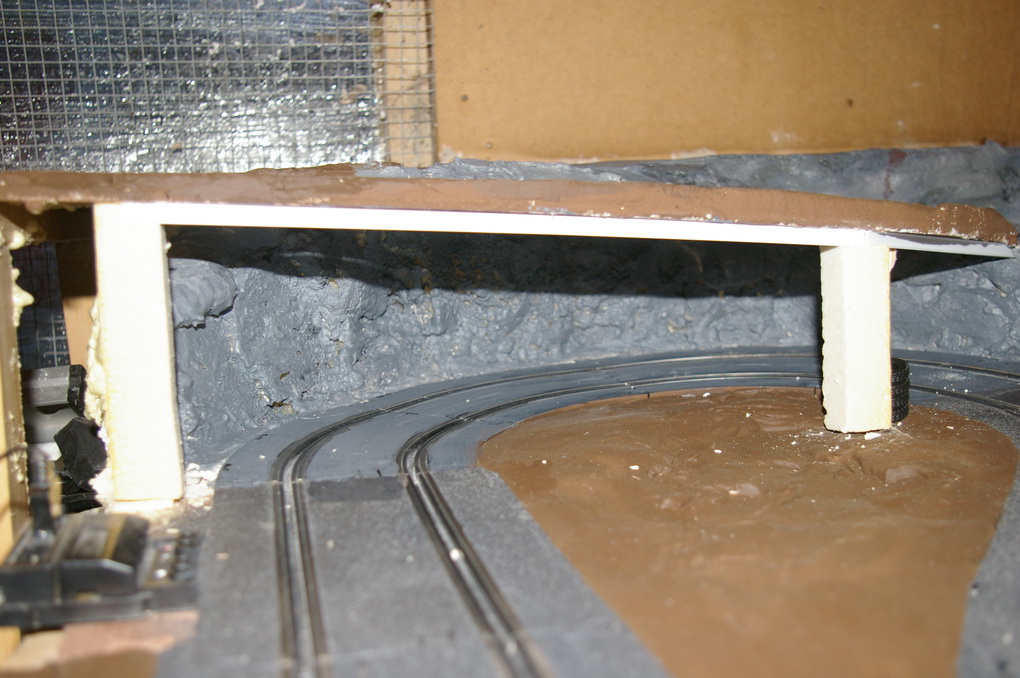
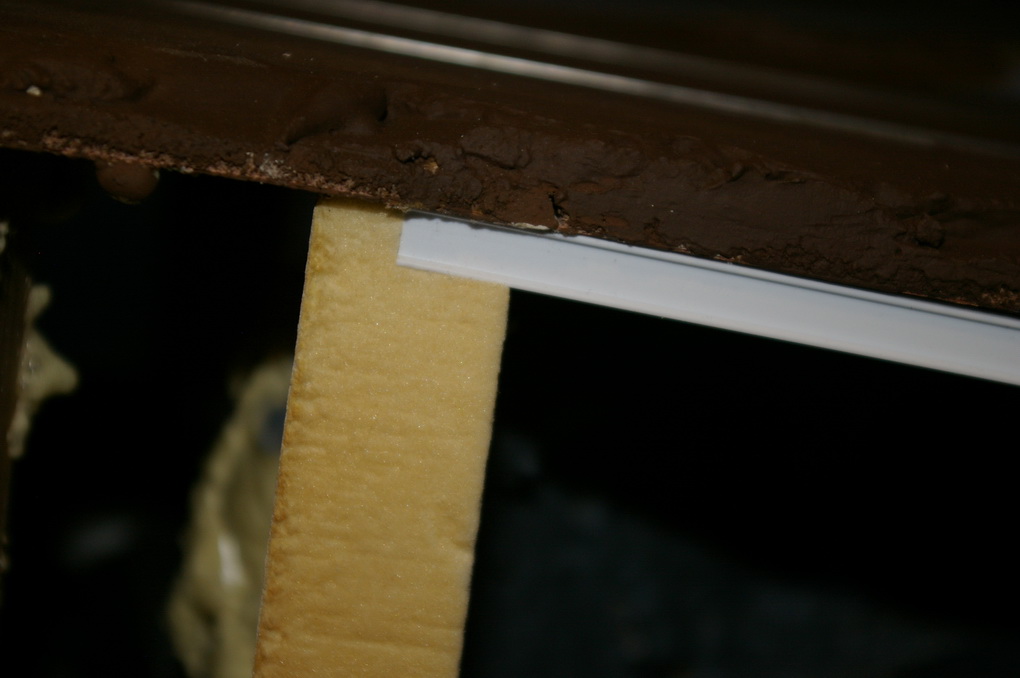
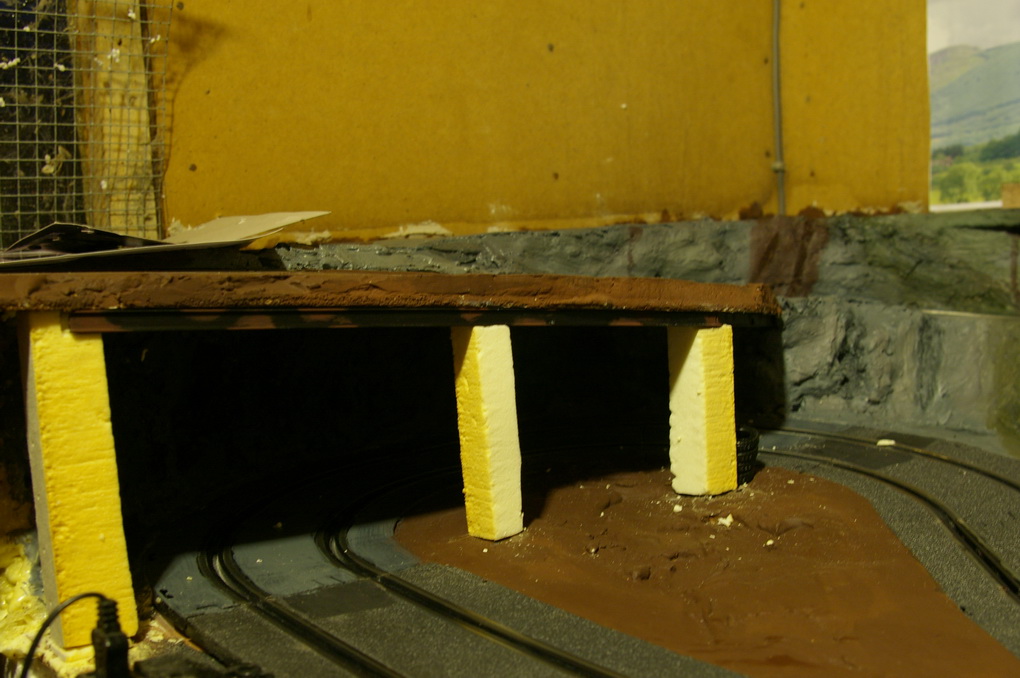
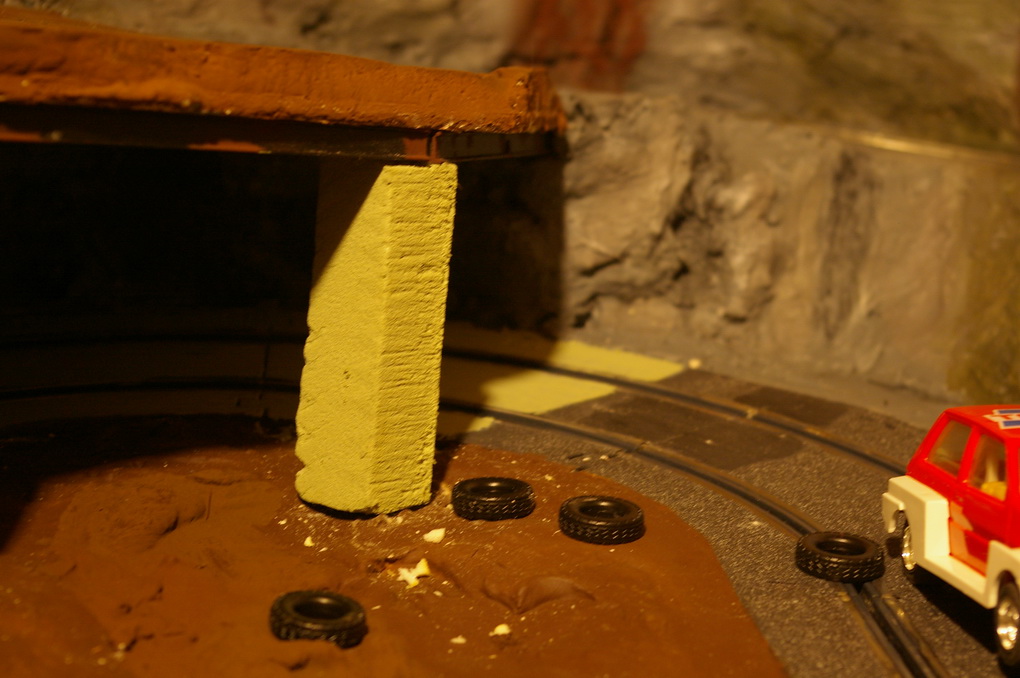
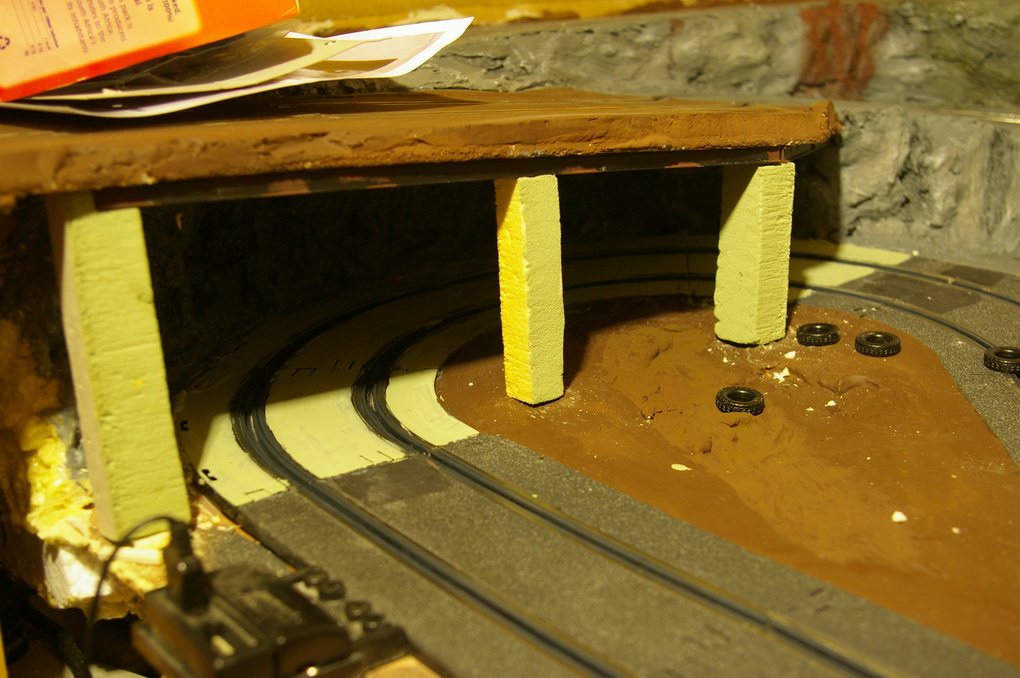
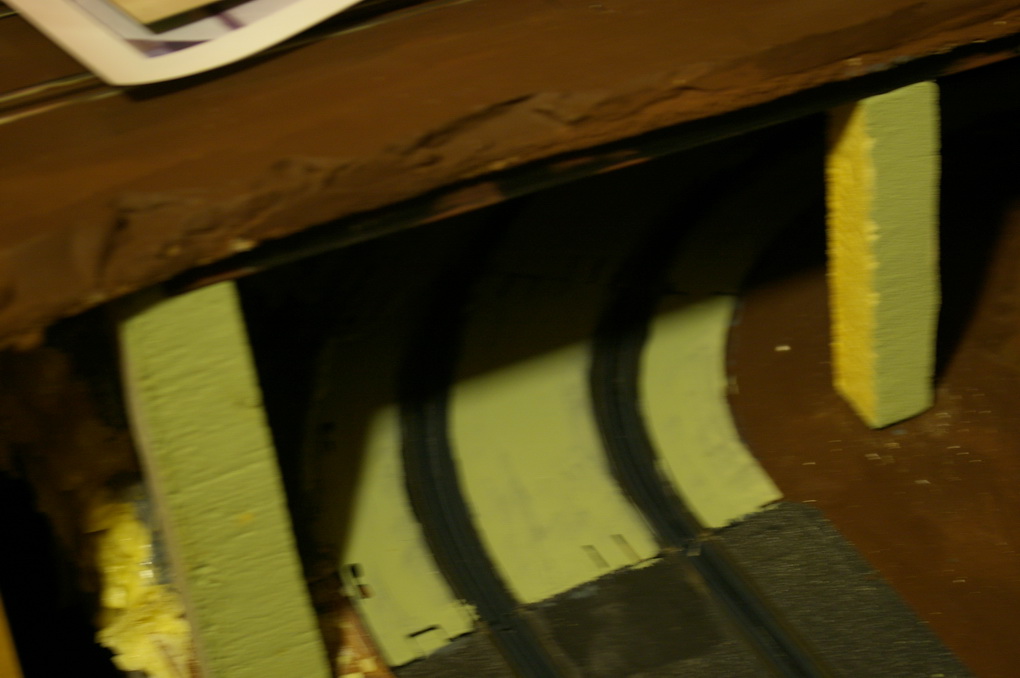
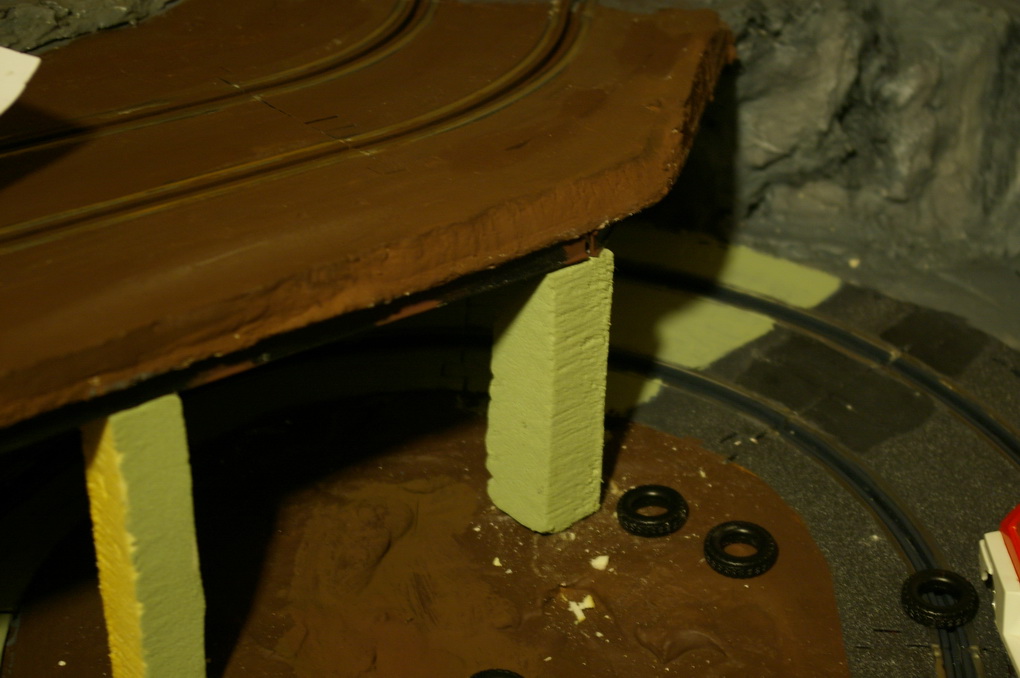
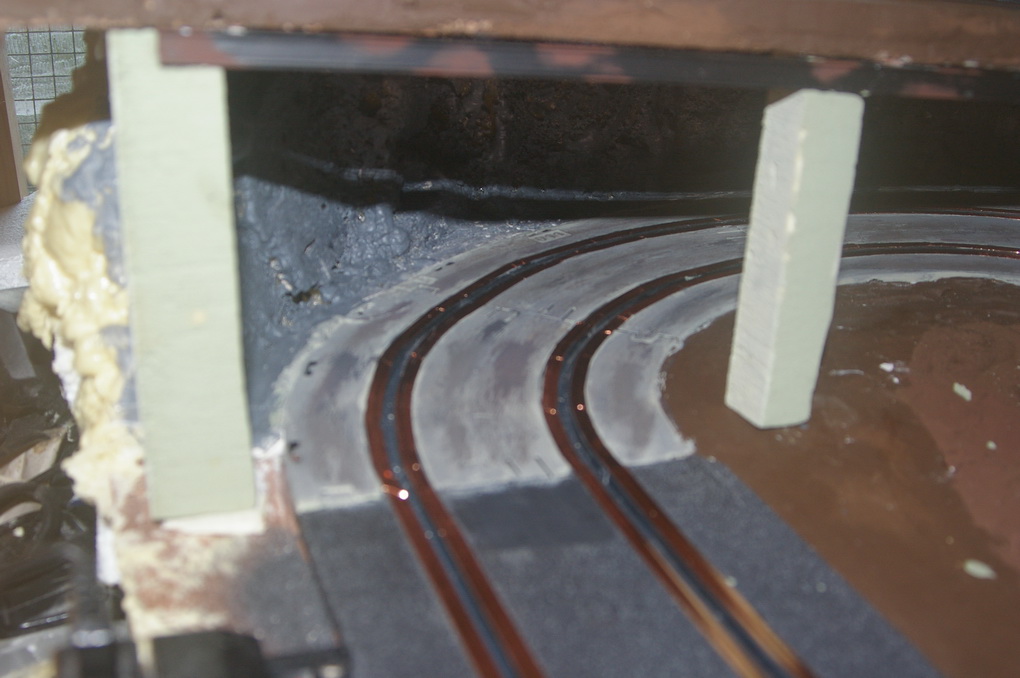
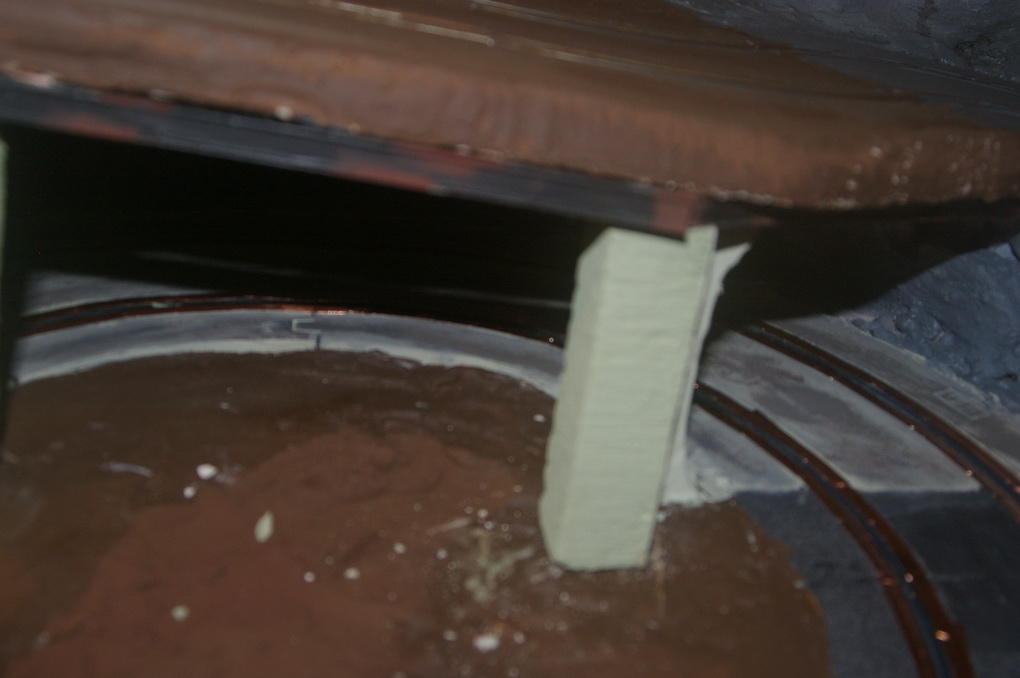
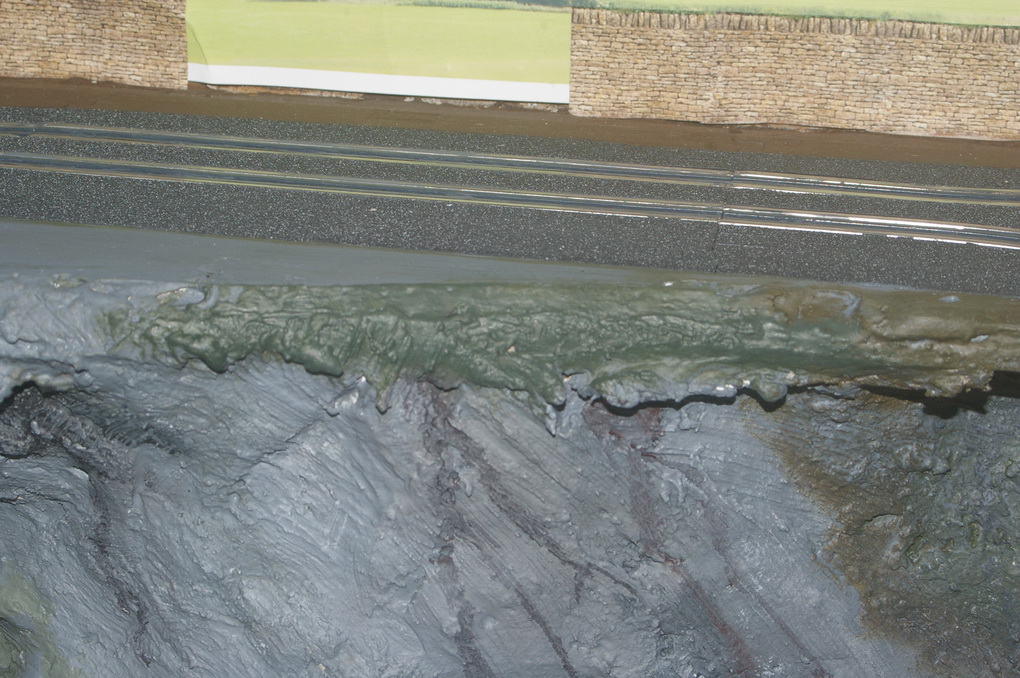
Also had the structural engineer on site and had to reinforce the underside of the overhang. Had to build a couple of concrete columns and install a couple of I beams. Got away with setting it in to the cliff face at one end (the rocks here are only foam so could just push the beam in to the foam). Now just need painting, looks like the rust will be coming out again.
rally in a shed 2 0527
rally in a shed 2 0528
rally in a shed 2 0529
rally in a shed 2 0530

rally in a shed 2 0531
rally in a shed 2 0532
rally in a shed 2 0533
rally in a shed 2 0534
rally in a shed 2 0535
rally in a shed 2 0536
rally in a shed 2 0537
rally in a shed 2 0528
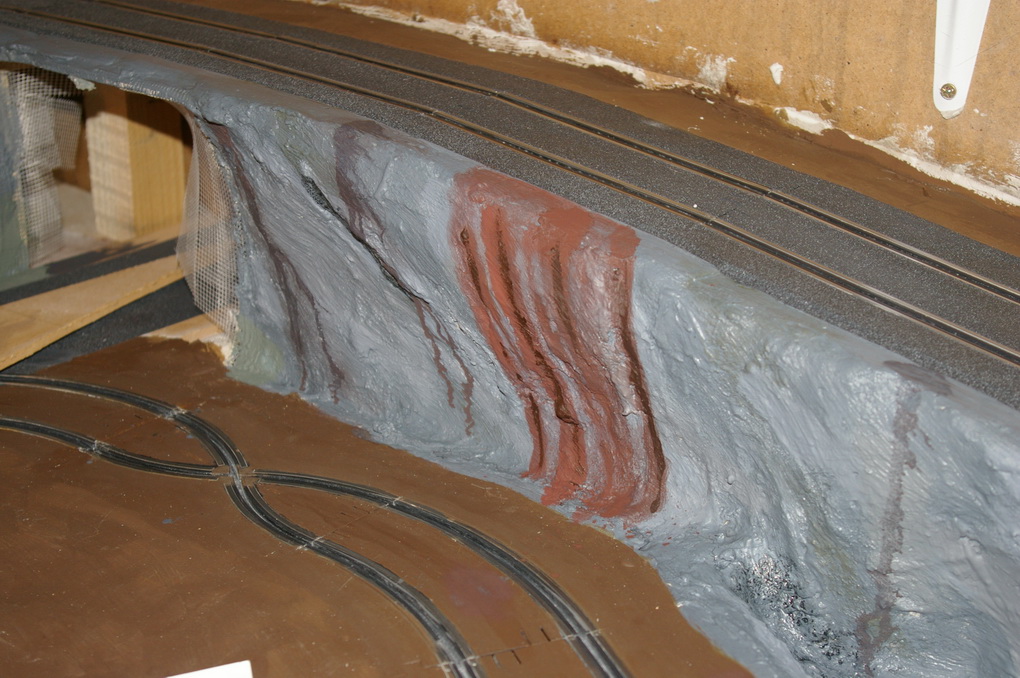
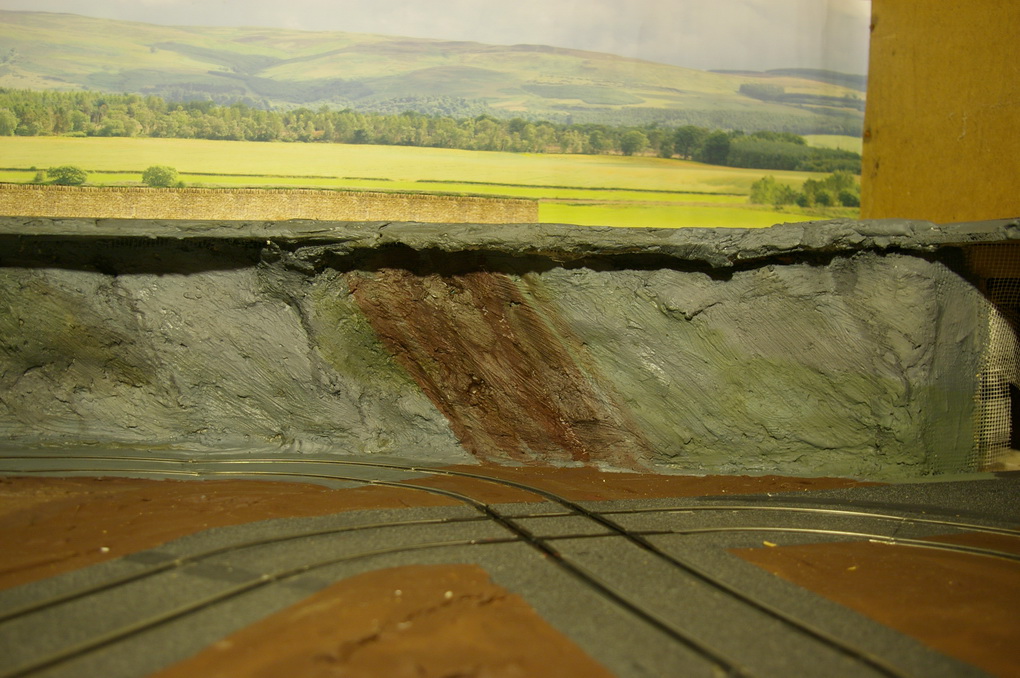
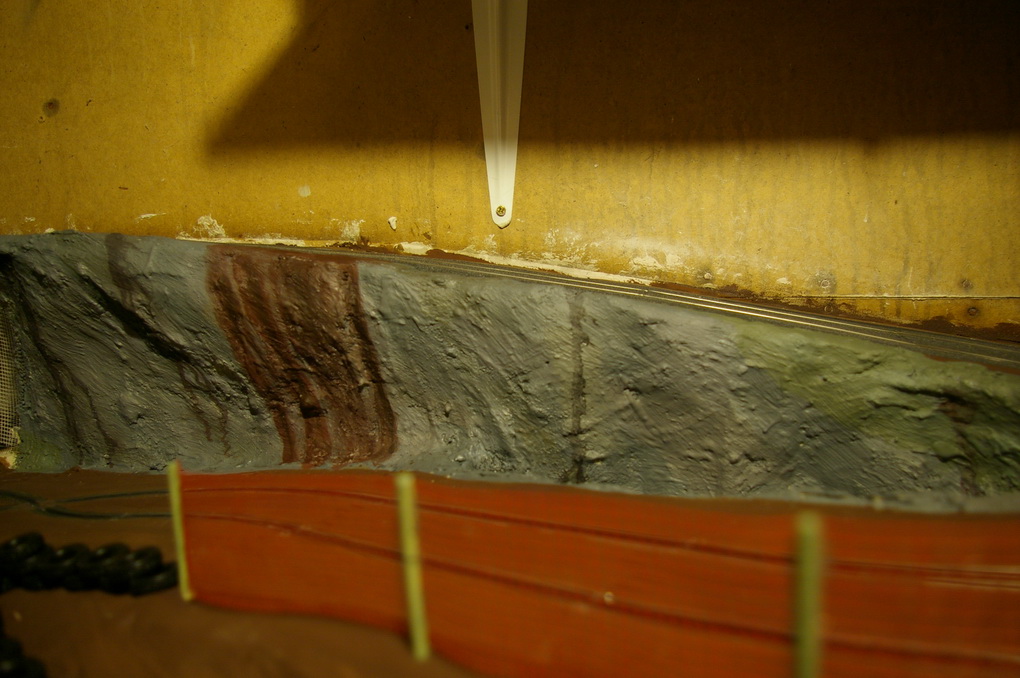
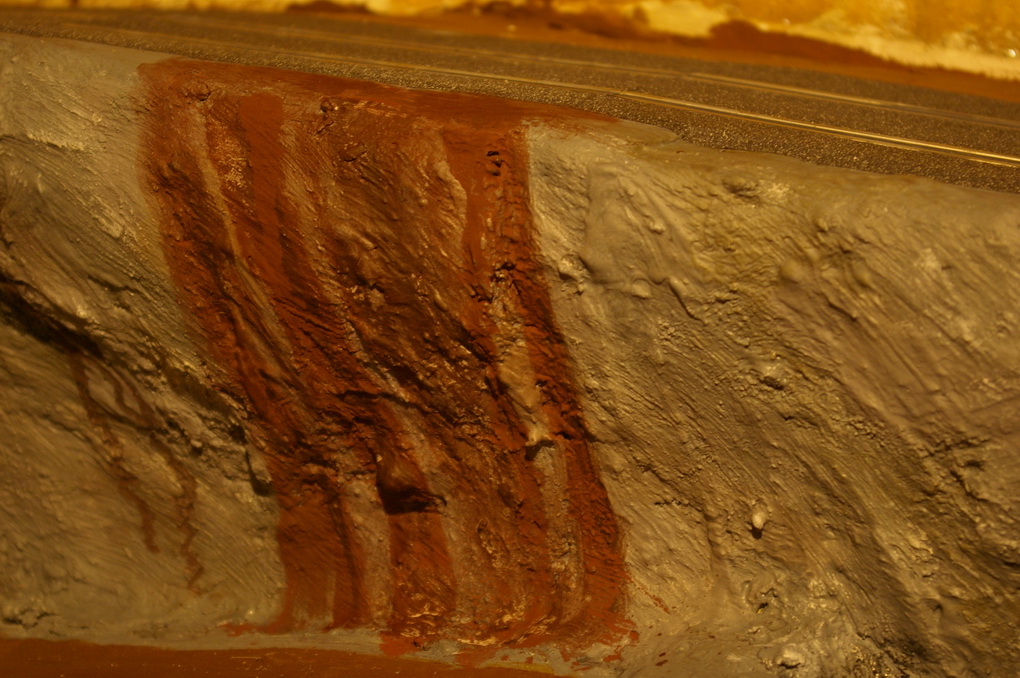
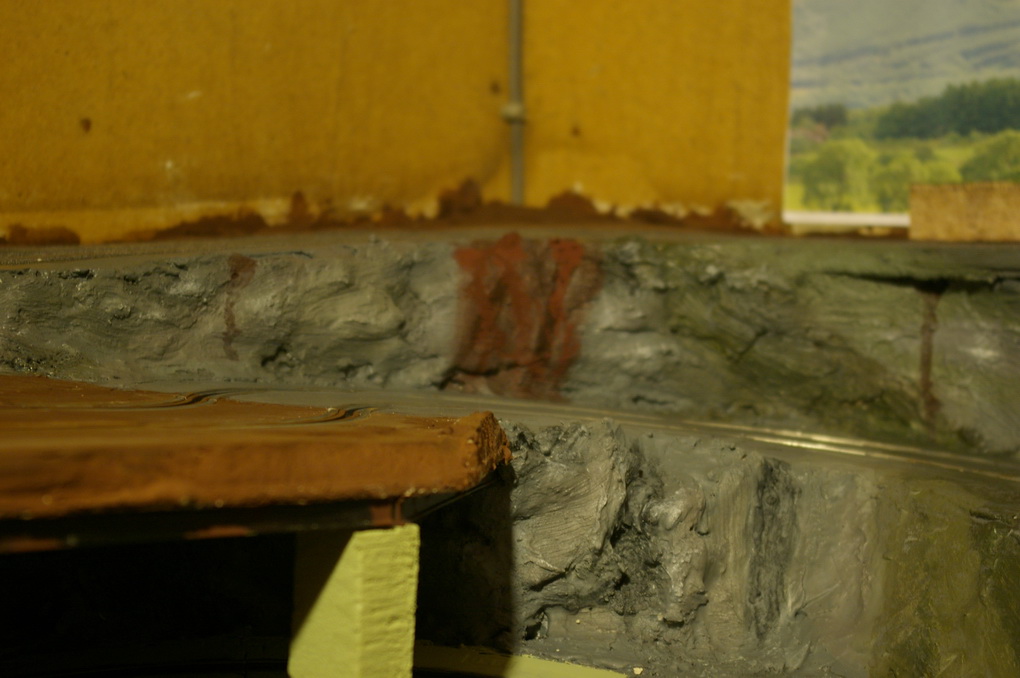
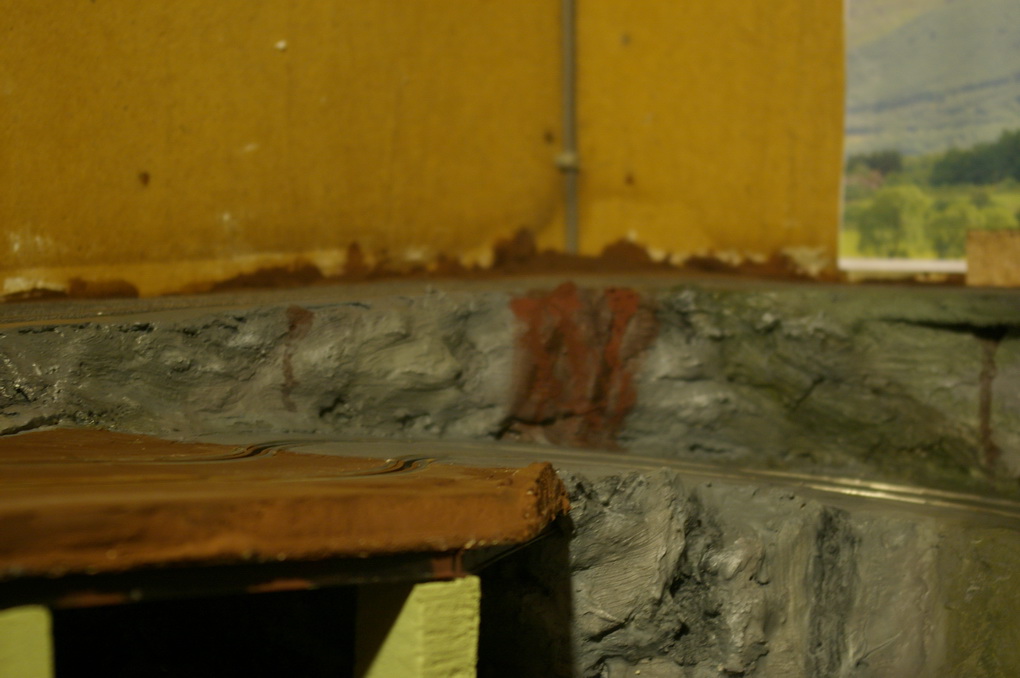
I've given the sandstone a matt coat, The only problem is that the matt coat as enhanced the colours which isn't to much of a problem except for the rust areas. As you can see the flat coat as darkend the rust colour to a brown so I may have to re do these areas. However the general effect is much better.
rally in a shed 2 0539
rally in a shed 2 0540
rally in a shed 2 0541
rally in a shed 2 0542
rally in a shed 2 0543
rally in a shed 2 0544
rally in a shed 2 0545
rally in a shed 2 0546

rally in a shed 2 0547
rally in a shed 2 0548
rally in a shed 2 0549

rally in a shed 2 0550
The Girders under the over hang have been painted, see above. Two thick uneven coats of black emulsion to represent years of bitumen paint beung apply and still the rust comes through. Just need to find a good 'concrete' colour for the support columes and also for the road under the overhang.
I tried a little bit of white highlighting but probably did it a little bit to lightly. Also I've added to the rust, this was done with lots of thinners and a little of the rust weathering powder and was just alowed to run down the rock face.
rally in a shed 2 0551
rally in a shed 2 0552
rally in a shed 2 0553
rally in a shed 2 0554
rally in a shed 2 0555
rally in a shed 2 0556
rally in a shed 2 0557
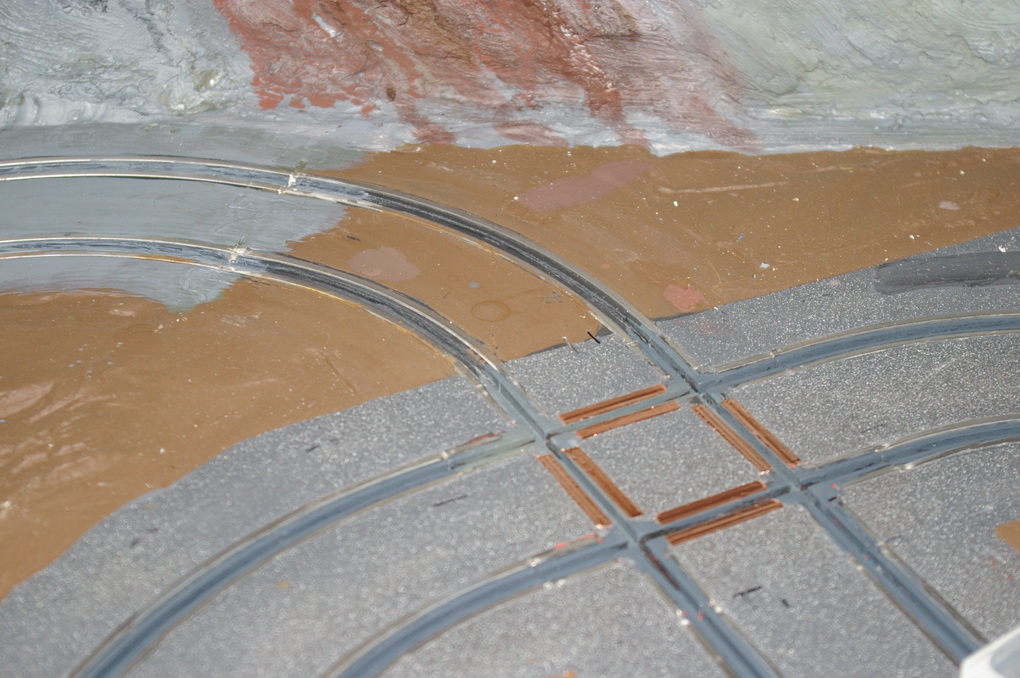
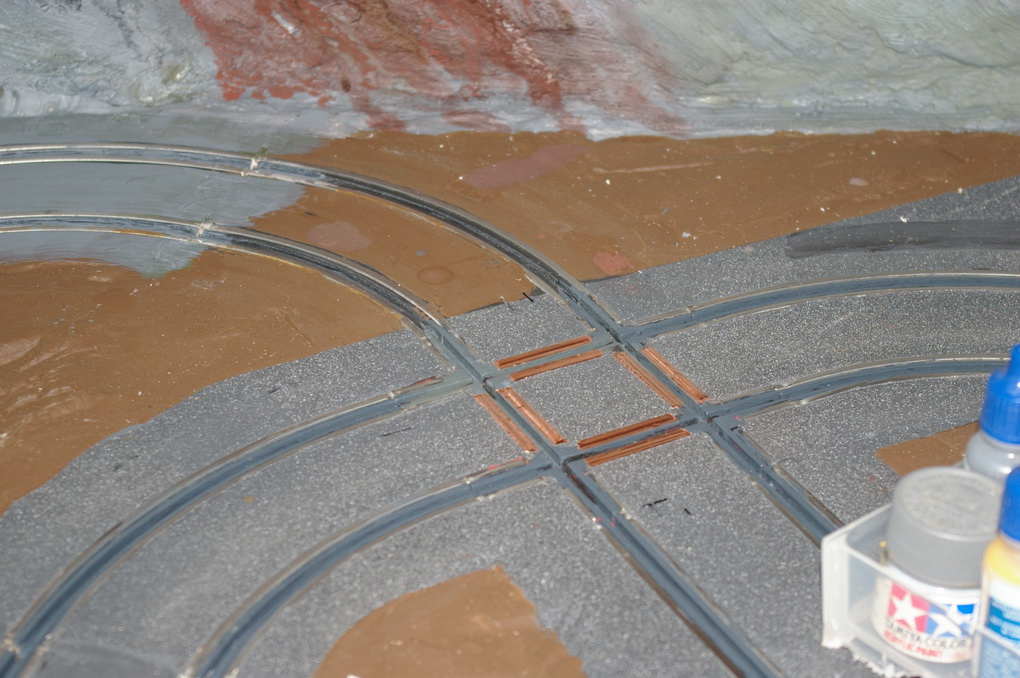
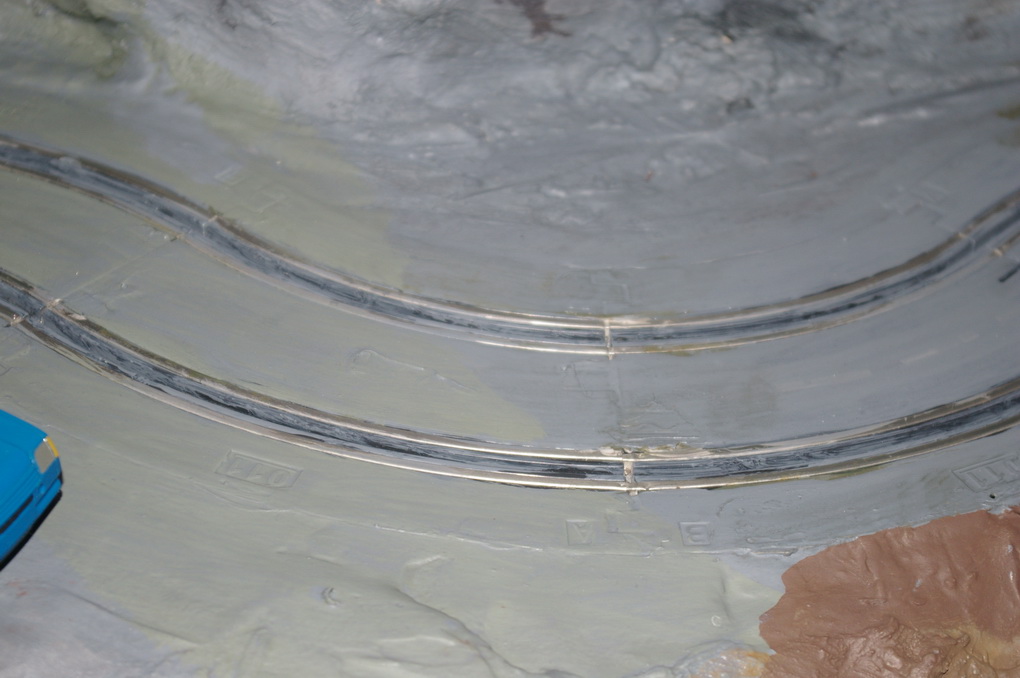
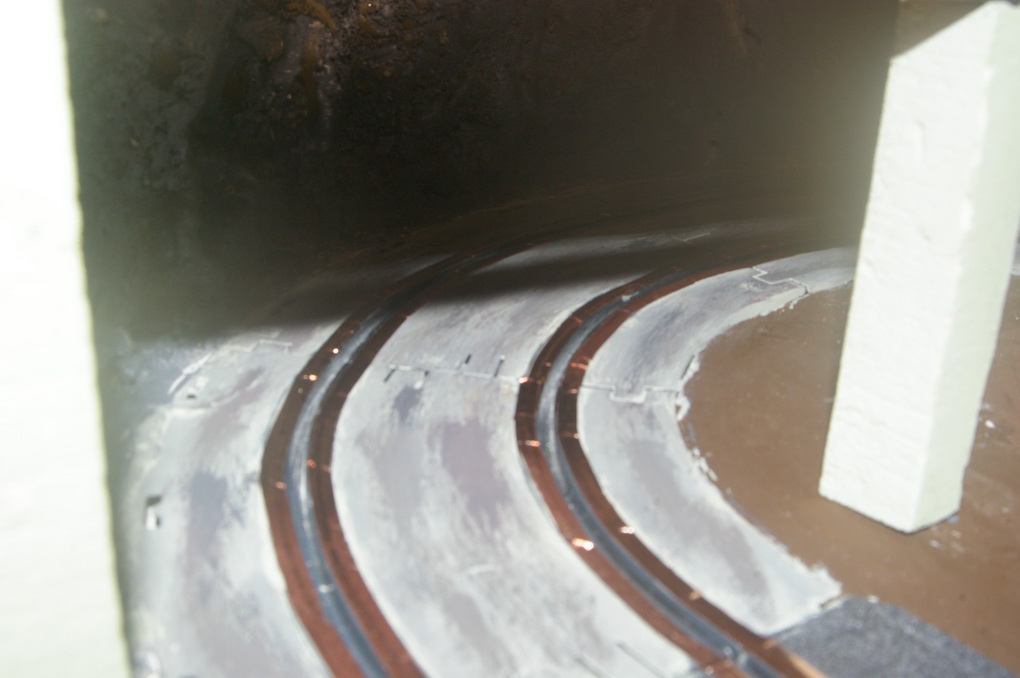
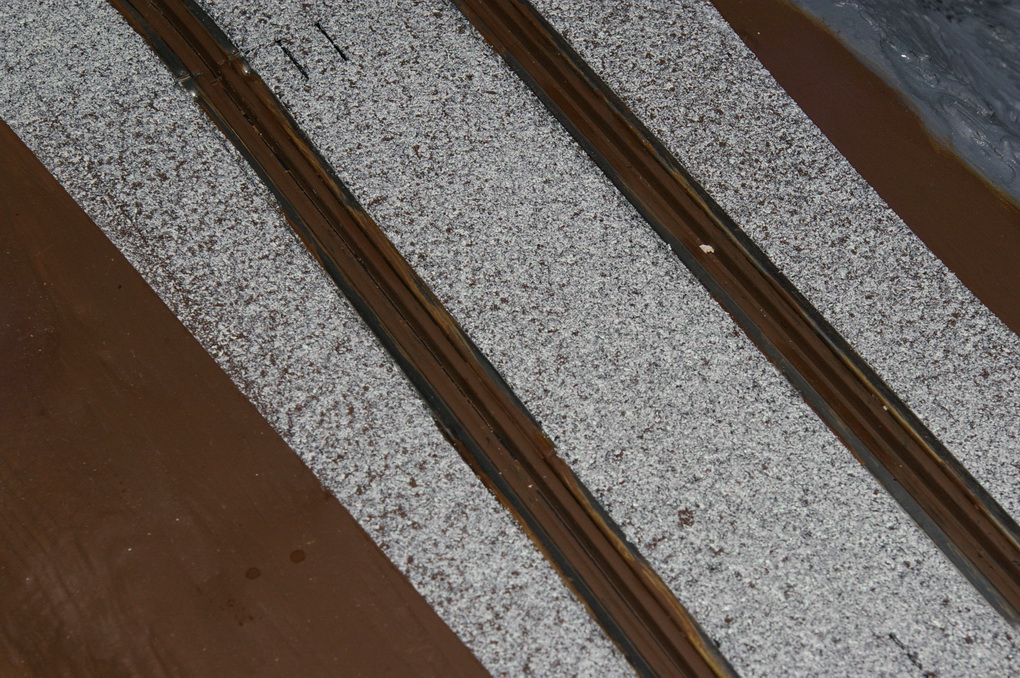
I've also painted the slot to match more or less the the track colour and as you can see I'm also doing a test with the copper tape. The tape width is just about right as it covers the rail and goes to the edge of the slot. I tried this light grey for the concrete road but it doesn't look right.
rally in a shed 2 0558
rally in a shed 2 0559
rally in a shed 2 0560
rally in a shed 2 0561
rally in a shed 2 0562
rally in a shed 2 0563
rally in a shed 2 0564
rally in a shed 2 0565
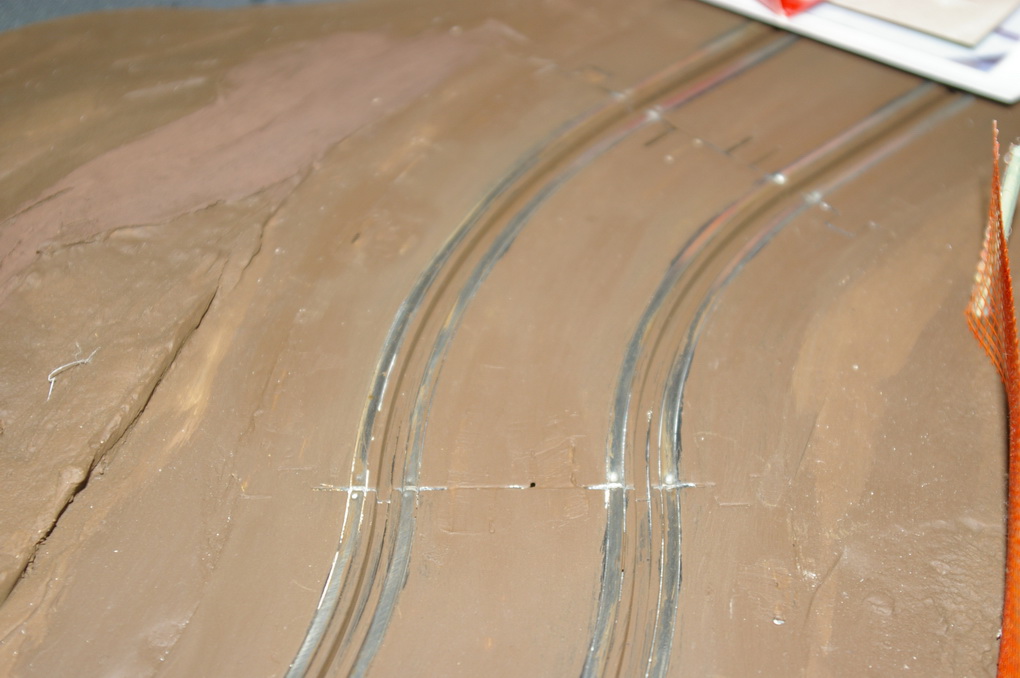
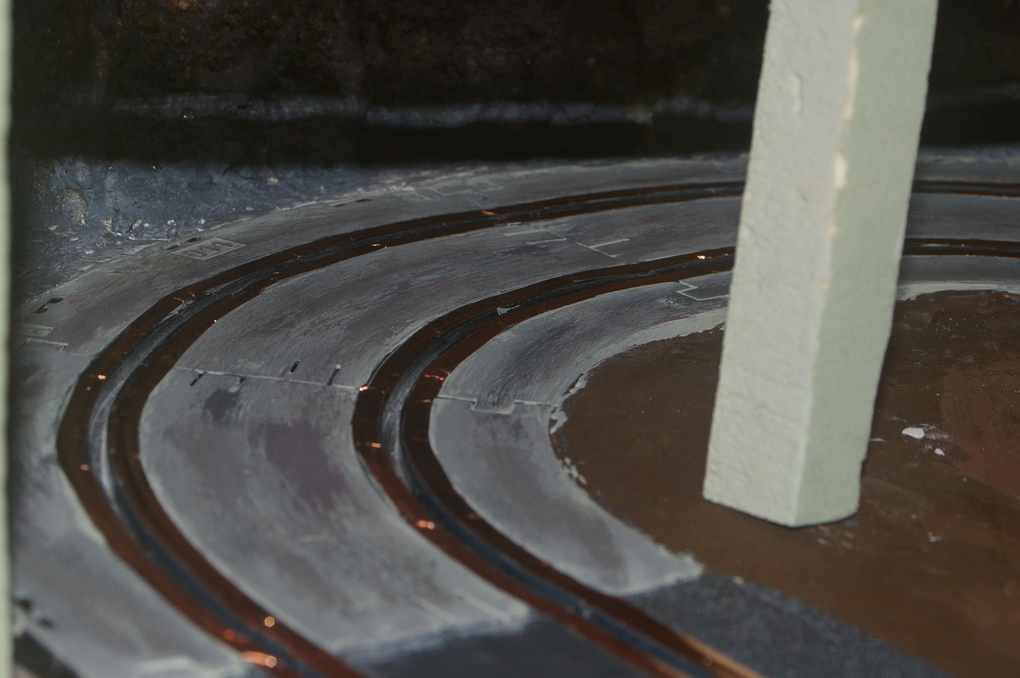
Started with another go at the concrete road suface under the overhang. I like the final result. It's been done the wrong way to normal, a alight grey and the darker grays dry brushed on top. Also a mixture of weathering powders mixed into the original light grey base colour. I Used both the light and dark rust, earth and soot.
Also put the copper tape on the front loop of the track. What a pain that was the tape kept breaking, one run under the overhang has about six joins in it. The difference it makes to the performance of the cars is massive.
rally in a shed 2 0566
rally in a shed 2 0567
rally in a shed 2 0568
rally in a shed 2 0569
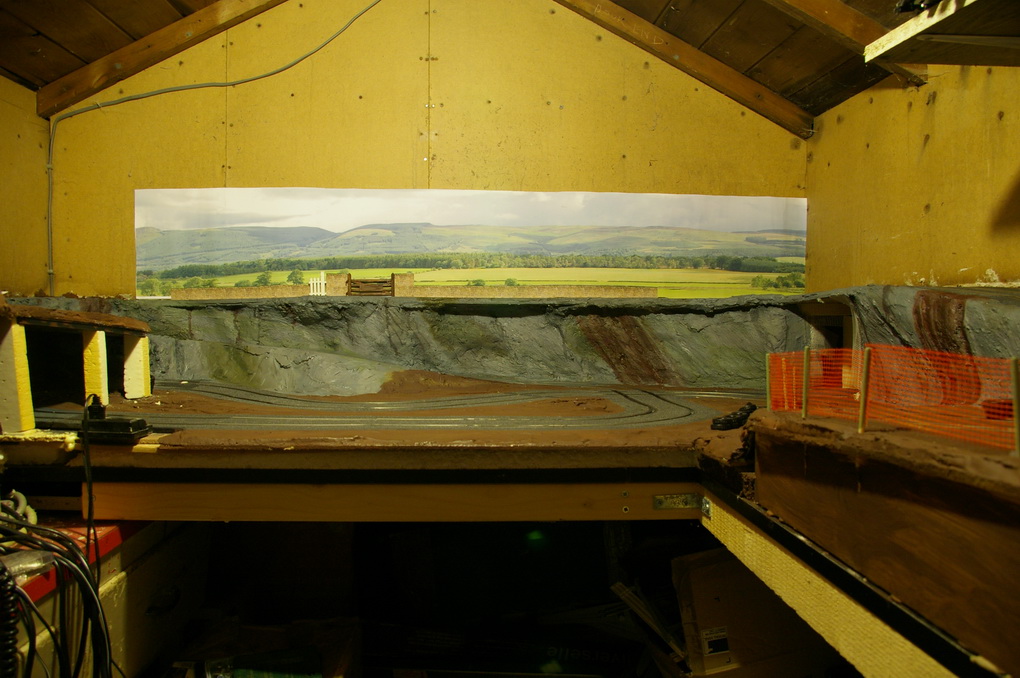
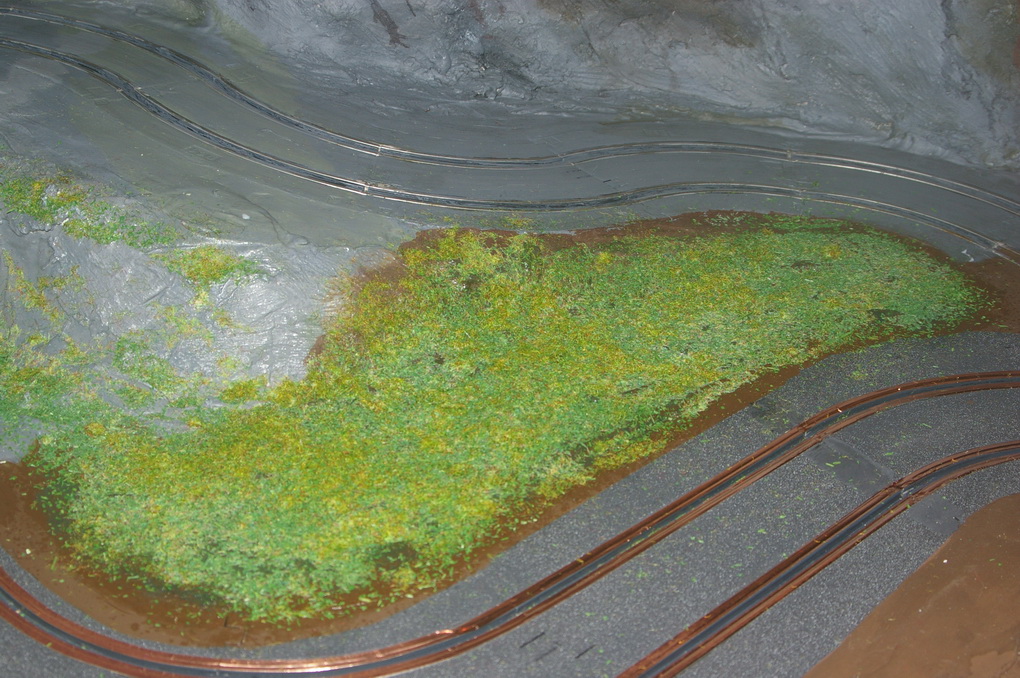
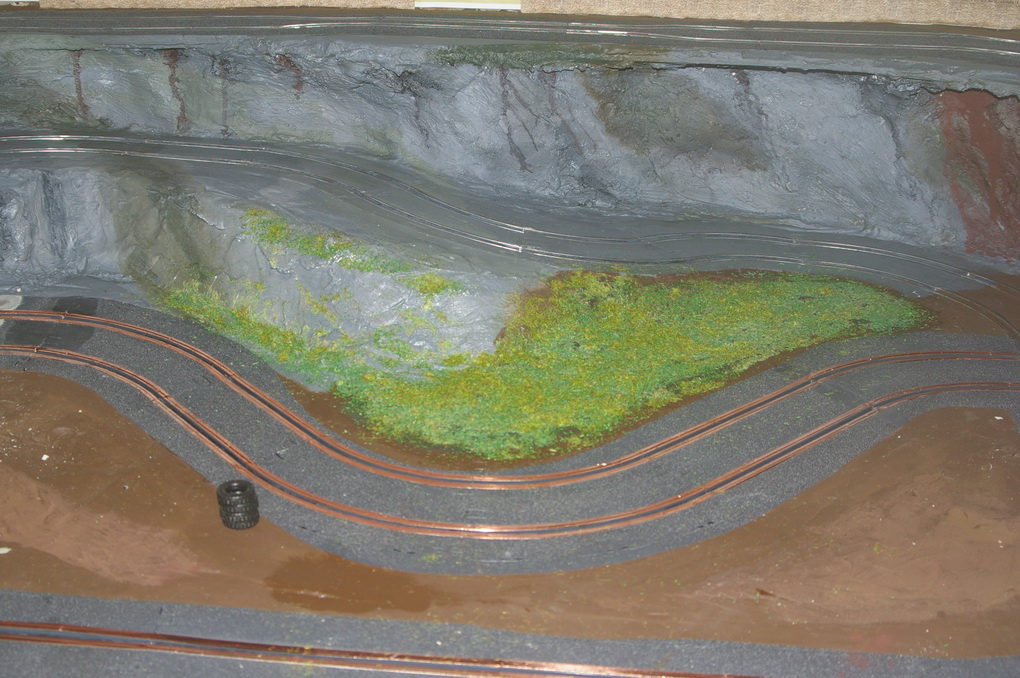
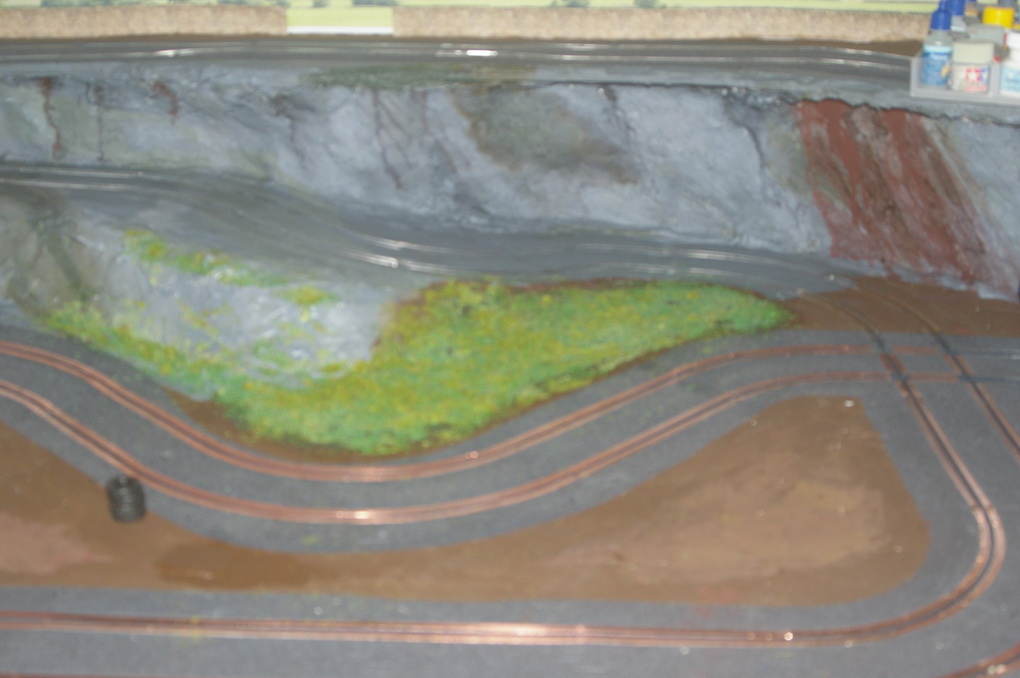
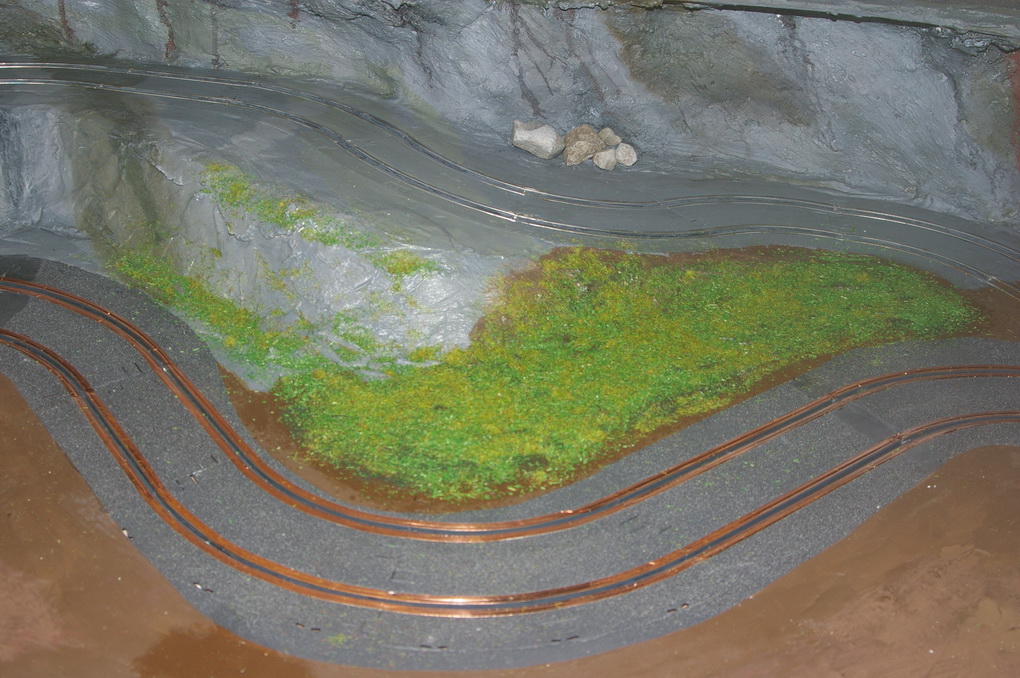
Next was some more painting, lots of different shades of green where the flock is going and on the top edge of the cliffs. Don't know if I will leave this as painted or add flock.
rally in a shed 2 0570
rally in a shed 2 0571

rally in a shed 2 0572
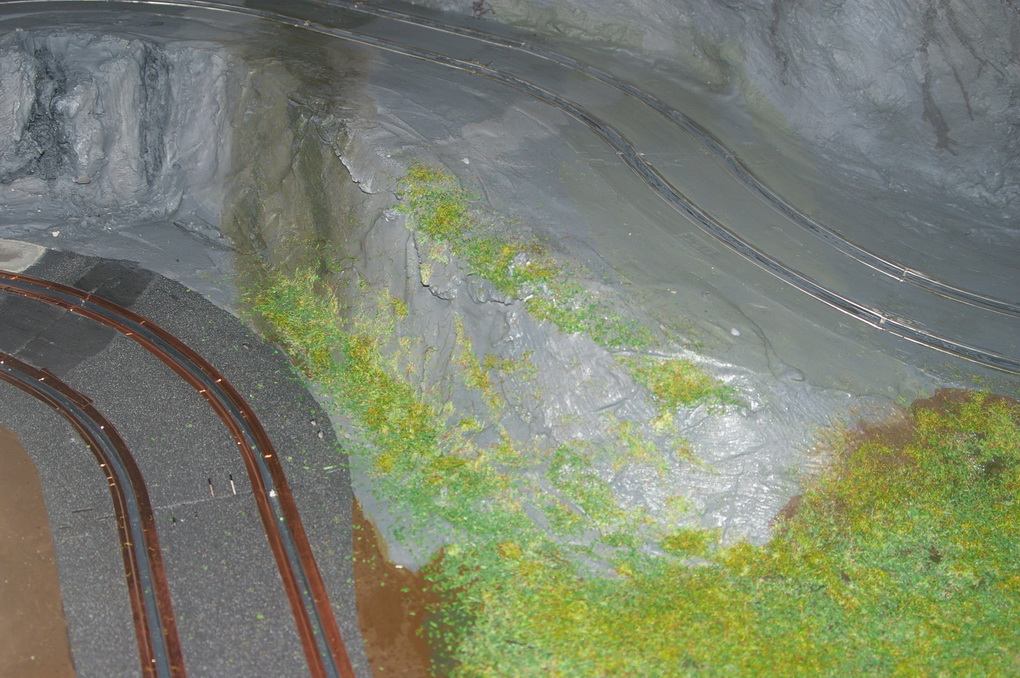
And talking of flock put some green ground cover down and flock over the top. My first attempt and this so will have to see what it's like when the top coat of PVA is dry. Next will be some bushes, hopefully, and some plants. Then it will be time to try to make some trees, But need to get the gravel part of the track painted before the trees get planted.
rally in a shed 2 0573
rally in a shed 2 0574
rally in a shed 2 0575

rally in a shed 2 0576
The PVA holding the grass has now dried and to my great suprise its all fixed down and no loose bits.
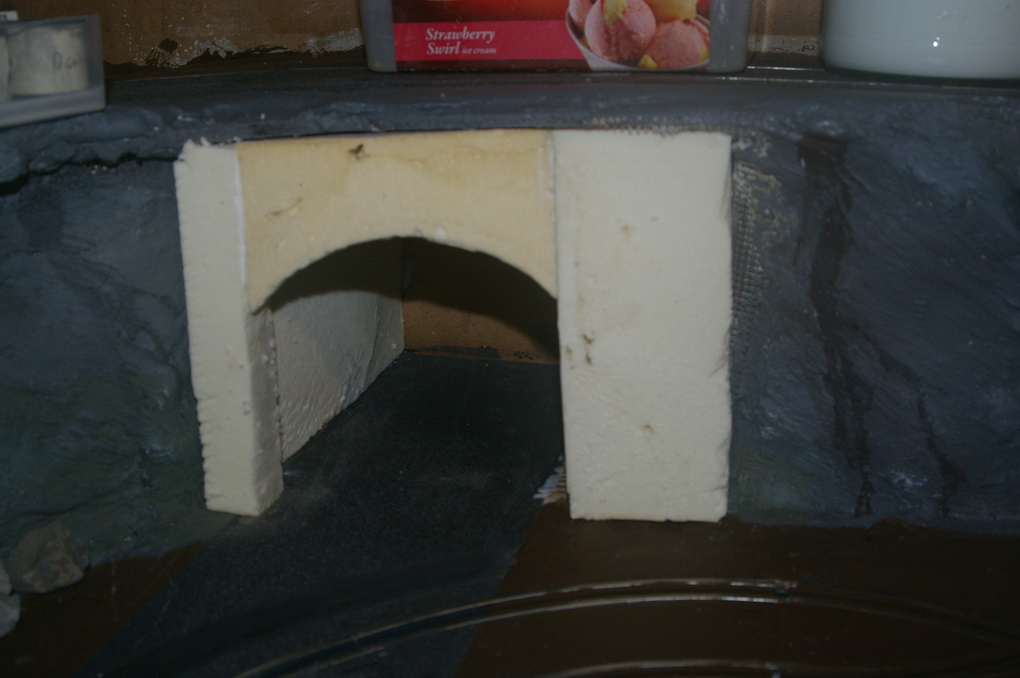
So onward and I've made a start on the tunnel at last.
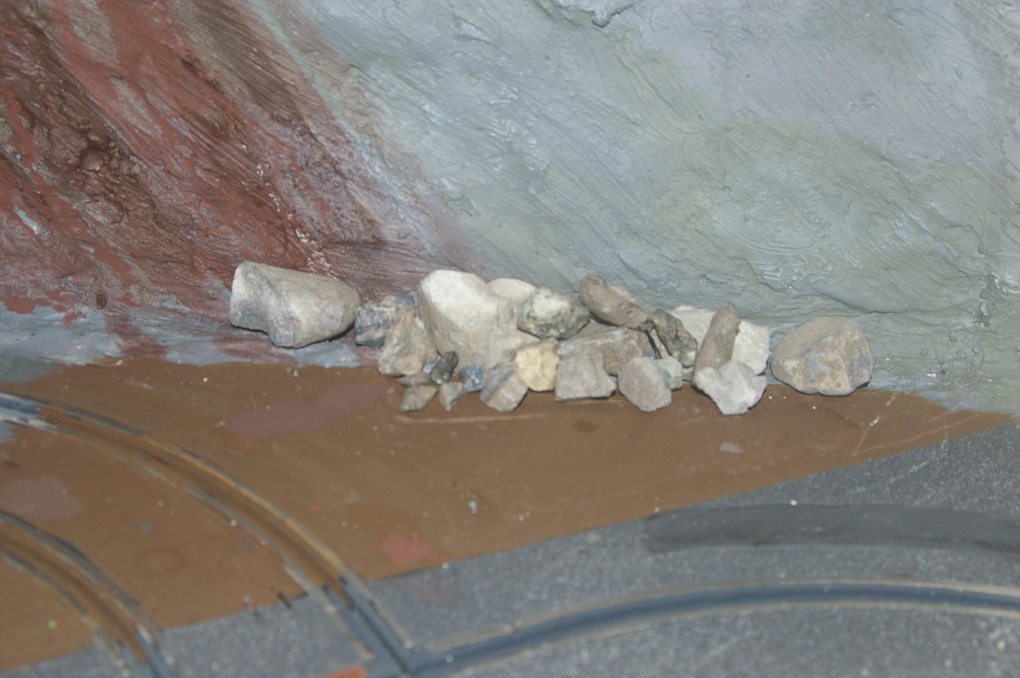
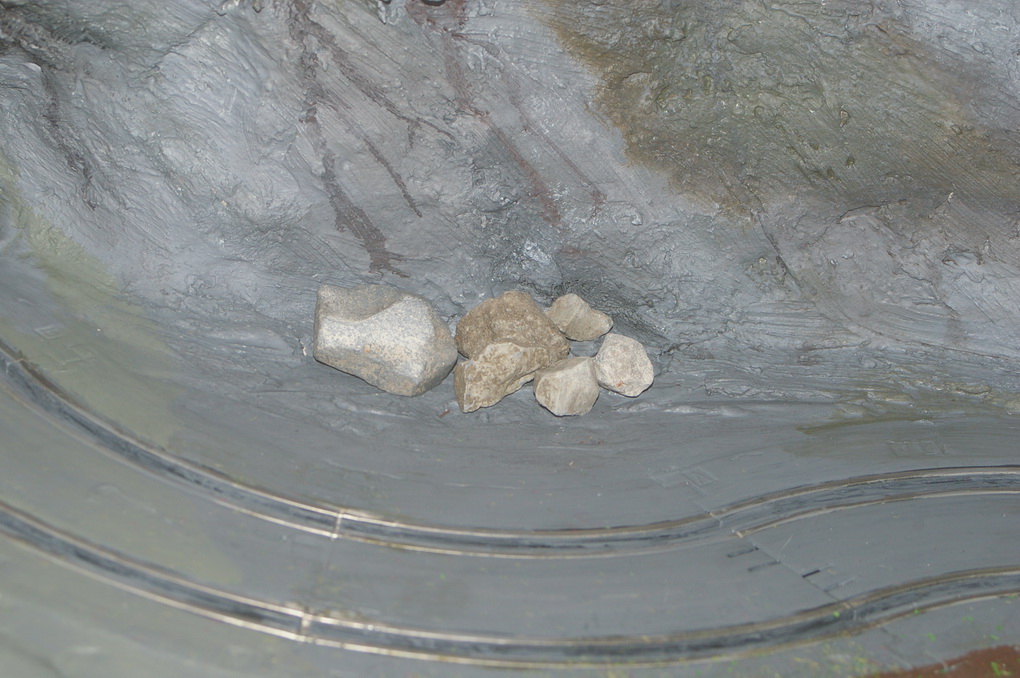
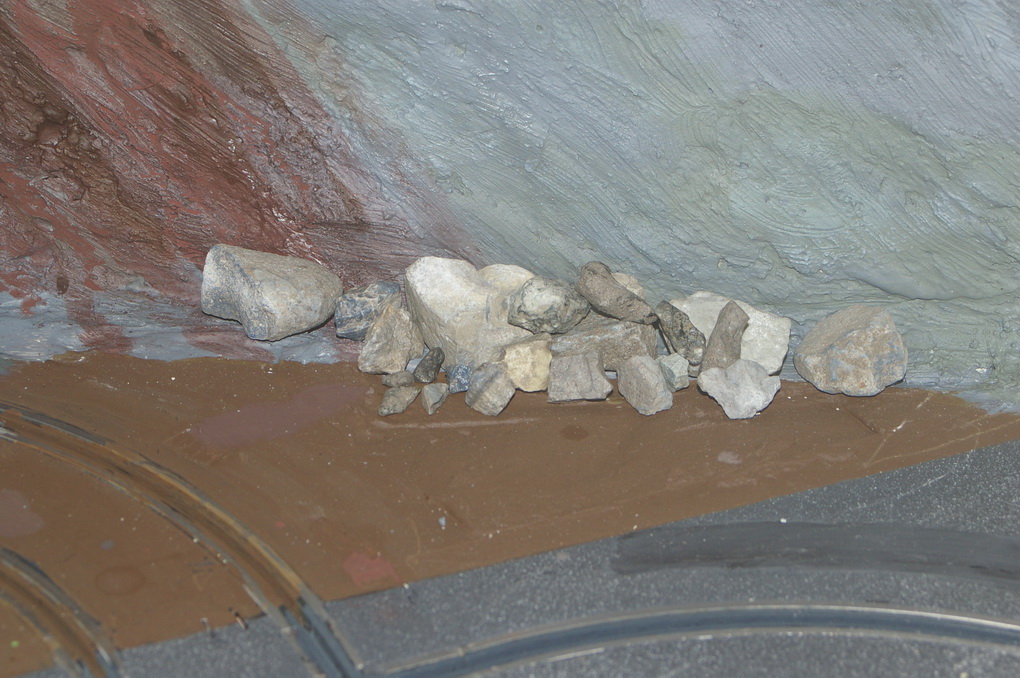
Tried a few more bits of scenery, just tempory locations at the moment. may have to get a few more of the smaller rocks but nothings set in stone yet (Pun intened) and they don't need painting.
rally in a shed 2 0573
rally in a shed 2 0580
rally in a shed 2 0585
rally in a shed 2 0581
rally in a shed 2 0582
rally in a shed 2 0583
rally in a shed 2 0584
Tunnel entrance is on hold again as my first idea has failed.
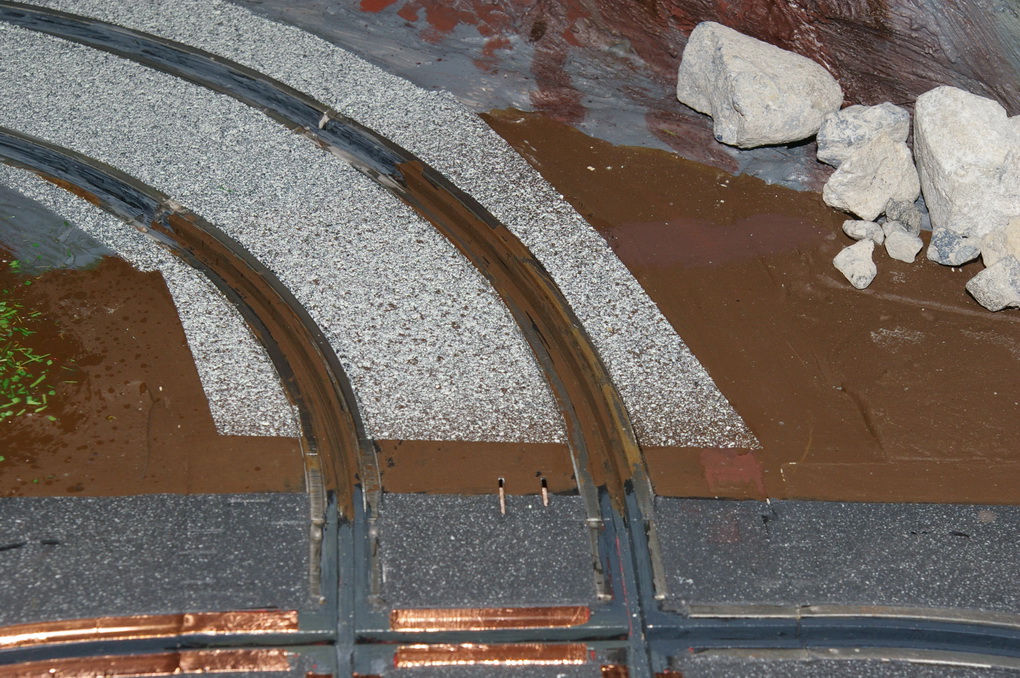
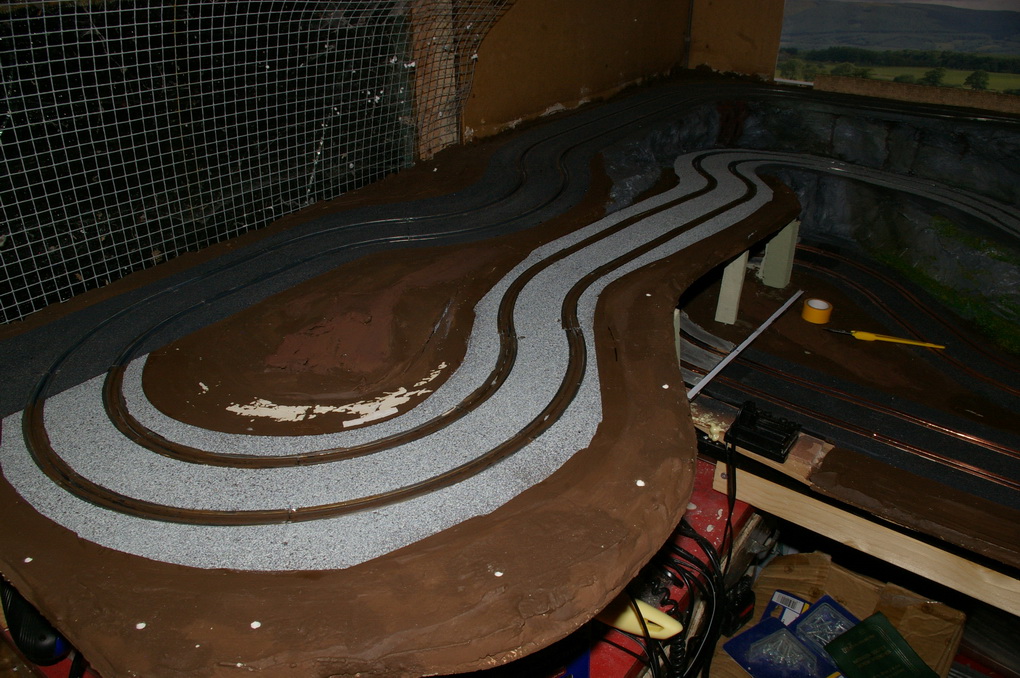
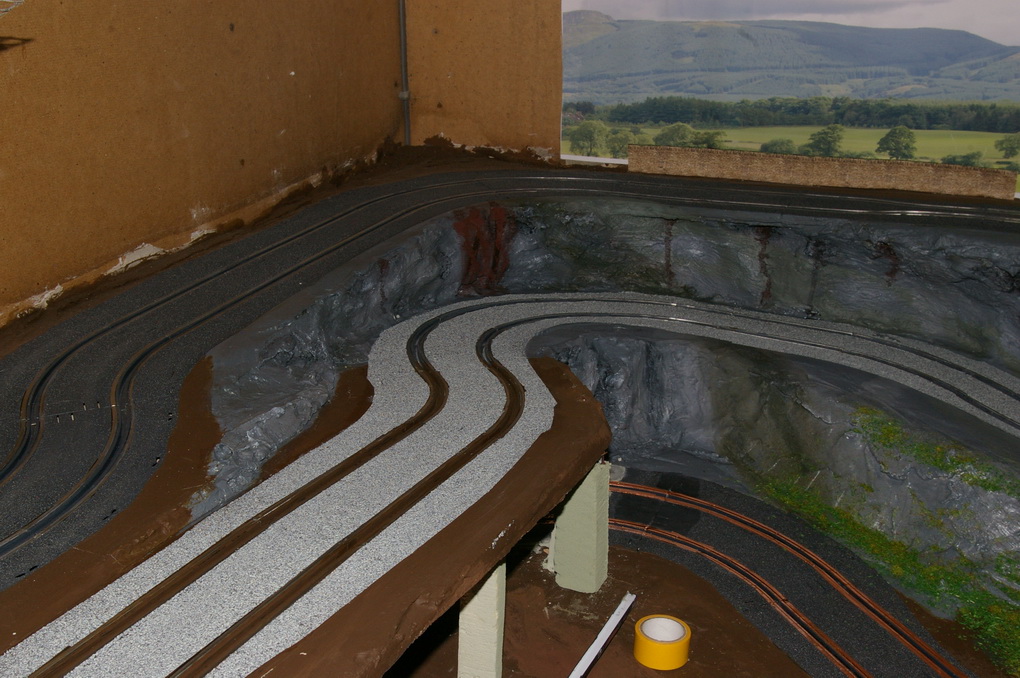
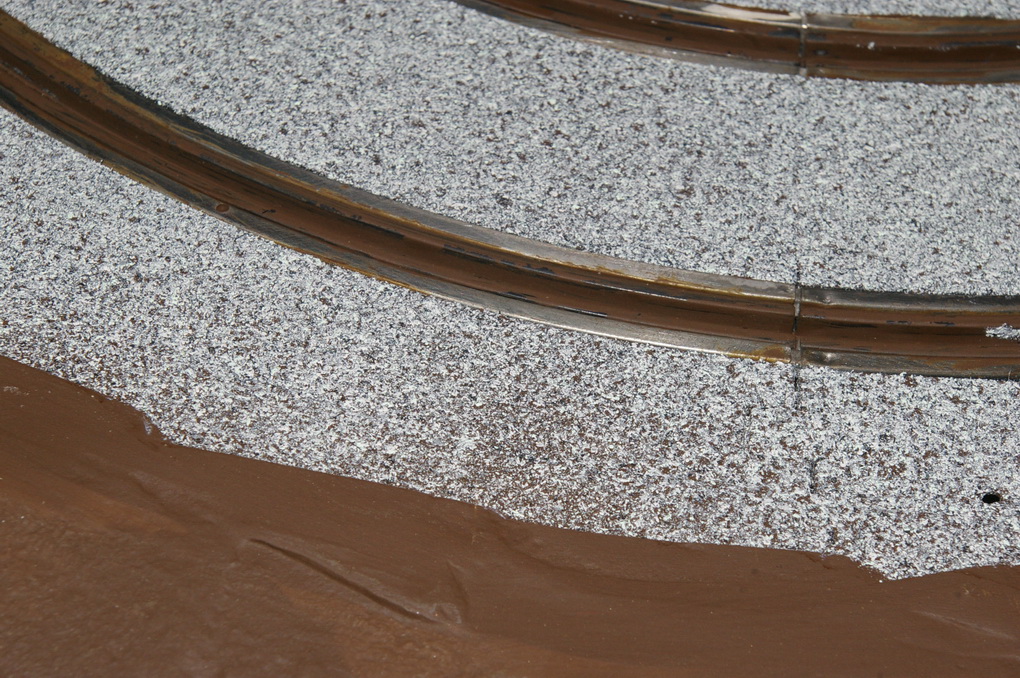
I've final finished or so I thought the painting of the track. I got some Gotham Grey Plastikot and have now sprayed the gravel areas of the track.Used the Taymia masking tape again to mask the railsbut as I only had 18mm wide I found that if I masked the outer rail on the curves and then cut the tape against the inner edge of the grove I could mask the inner rail with the trimmed tape and still cover the grove. The paint used for the tarmac was a textured spray paint but this is a stone paint and it appears to come out as small flakes. The one advantage of this is that the base layer colour shows throught very nicely. The edges of the 'gravel' aren't important as I will be drybrushing mud over the gravel in a lot of areas. The only problem so far is that the paint should be touch dry in 2 hours and some 4 hours later it is not touch dry. Where it does appear to be touch dry is still feels and seems very soft. I was already intending to paint the gravel areas with varnish to reduce the effect of the textured surface on the grip of the tyres. This is loose gravel and so should have low grip. It's now looking like the varnish will be need to protect the paint surface yet alone reduce grip.

rally in a shed 2 0586
rally in a shed 2 0587
rally in a shed 2 0588
rally in a shed 2 0589
rally in a shed 2 0590
rally in a shed 2 0591
rally in a shed 2 0592

rally in a shed 2 0593
rally in a shed 2 0594
rally in a shed 2 0595
Ok, 24 hours later and the stone paint is dry but it still seems very soft. If you rub on pne of the bare patches you get little flakes coming away. The thickness of the paint doen't seem to matter. So it will be on with a matt clear coat as I don't think the stone paint will take being driven on as is. I don't know if it's just not bonding well with the emulsion paint already been used on the track.As to tracking down klear I had been search for it under the Pledge brand with out a lot of luck but I should have been using it full new name Pleade multi surface wax. It looks like the only supermarket chain stocking it in the UK is Sainsbury's. reading the modeling site it would seem that the new version still works fine as a gloss coat and can still be mixed with acrylic paint and clearcote. The only difference appears to be that you can't use it for fixing decals. I might try coating the stone paint with matt clearcote and then try a mix of matt clearcote and Klear not so much for the sheen but to reduce the grip abit.
rally in a shed 2 0586
Just a small update on the plastikote.On the can it said touch dry in 2 houers fully dry in 4 to 6 hours. Well what a load of rubbish. After 2 hours most of the coating was still wet, 24 hous later and it was still soft and could be rubed off. After 48 hours it was hard but I could still rub bits of it away. 72 nhours gone by and it finally seems to be ok having said that I would not try driving on the bare surface.
It's all now been given a first coat of clearcote. Will get a idea how it will look with different finishes as I had to use what clearcoat I had. On the left hand track the front section of the track has flat coat, the middle section is in semi gloss and the rear section if full gloss. On the right hand track it's semi, semi and full gloss. I'd used up most of my flat coat on the rock faces and the local model shop, mainly radio control, doesn't stock any acrylic clear coat only clear gloss enamel.
Still need to get the Pledge Klear, which I will use to fill the surface of the stone paint to give a smooth surface before a final matt coat. This will not only be cheaper than using clearcote but will have the advantage that any bits I miss with the flat coat will look like wet areas I hope biggrin.gif . Depending on what the sufaces look like I may go for a semi matt finish by mixing the klear and matt coat.Need to get this done as then I can get the rest of the copper tape down and start doing some driving.

 View on its own (if entry or VIDEO doesn't show)