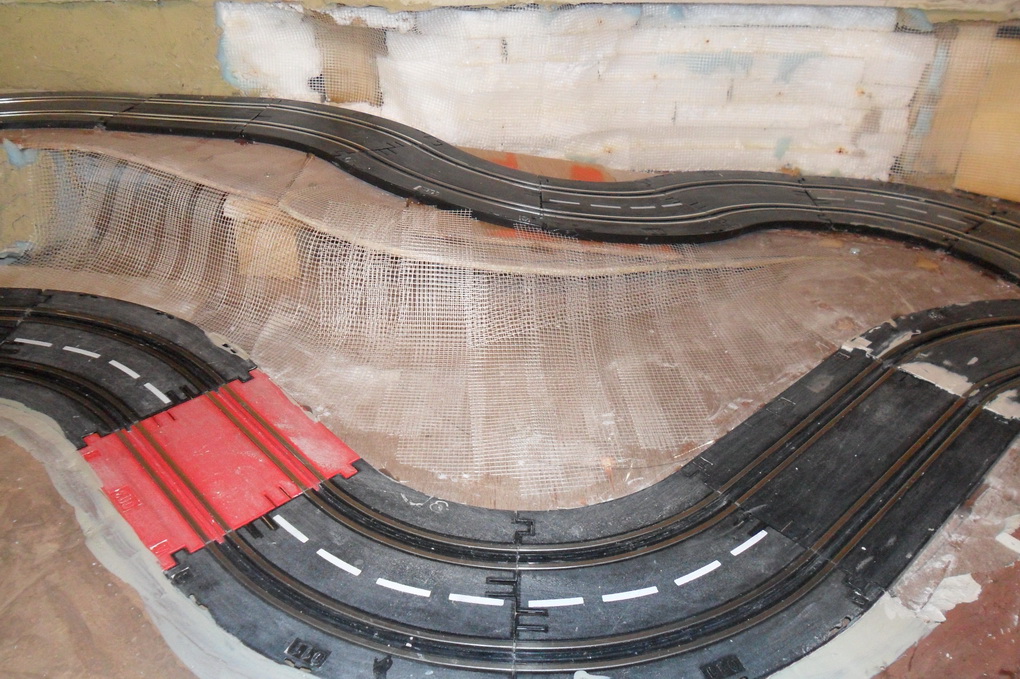
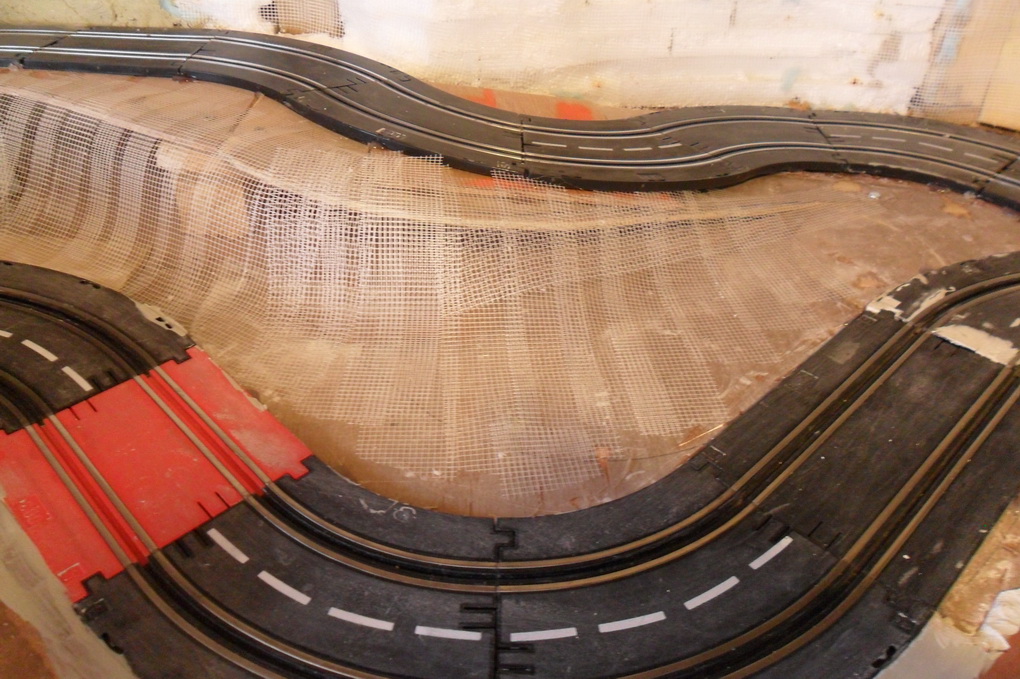
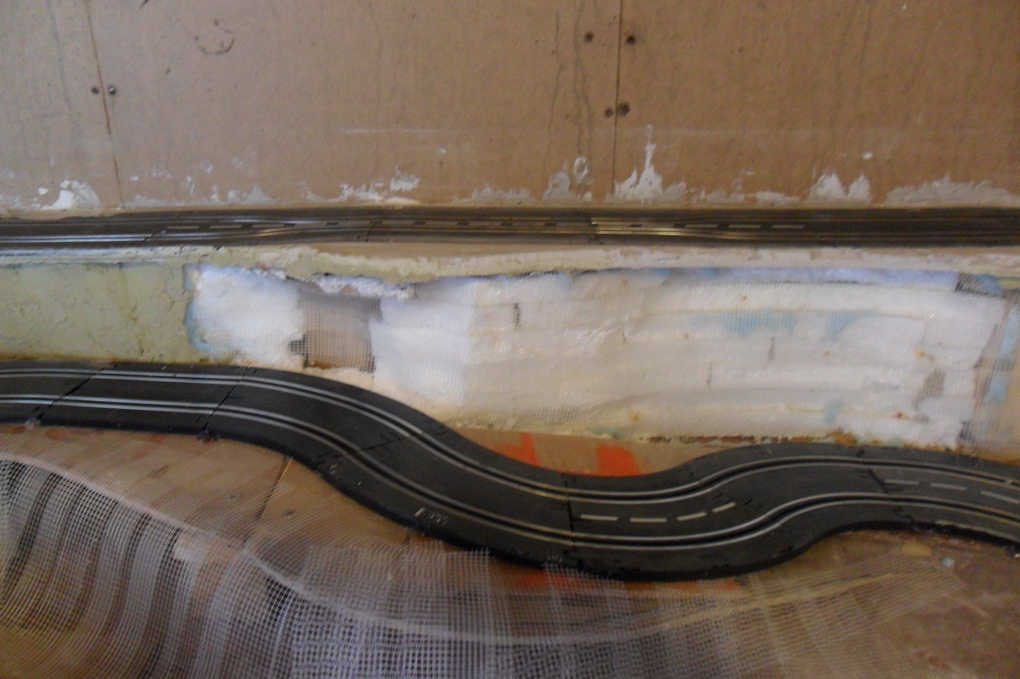
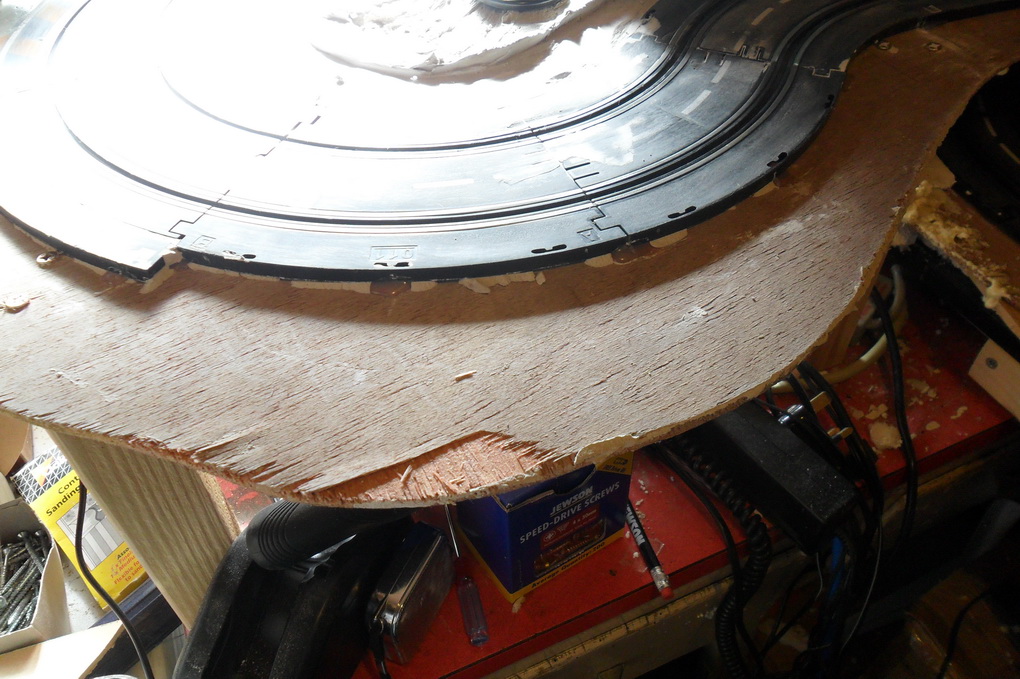
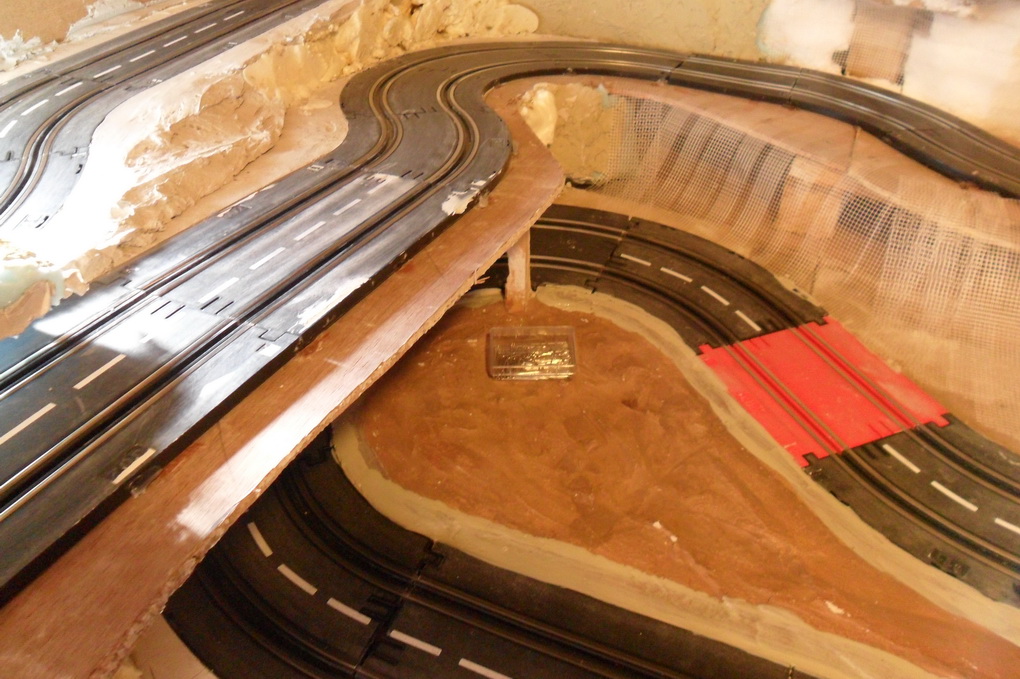
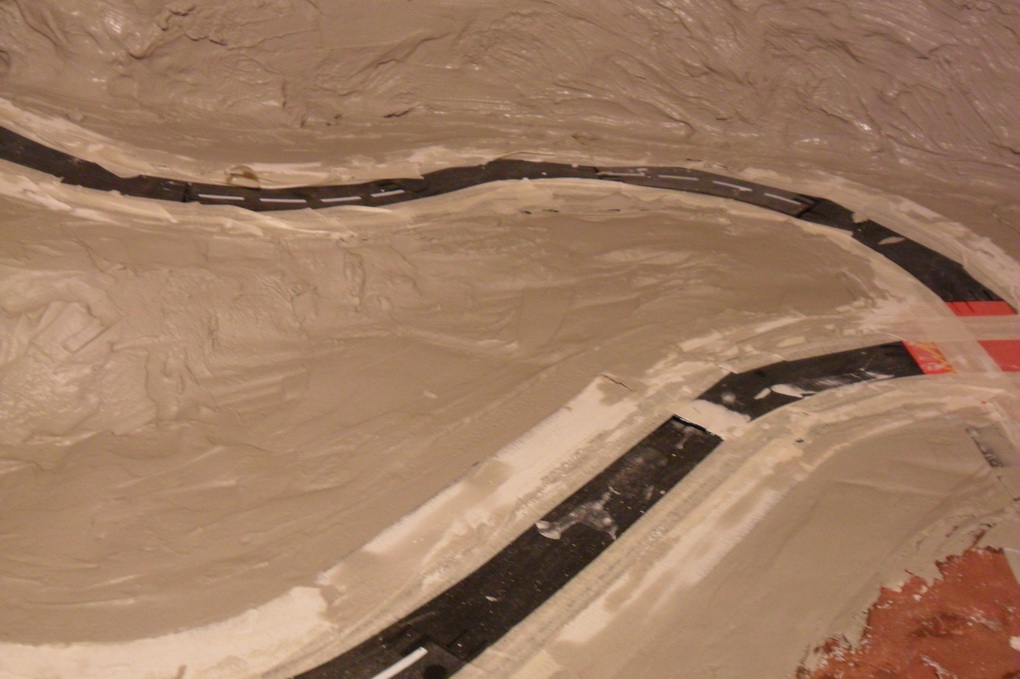
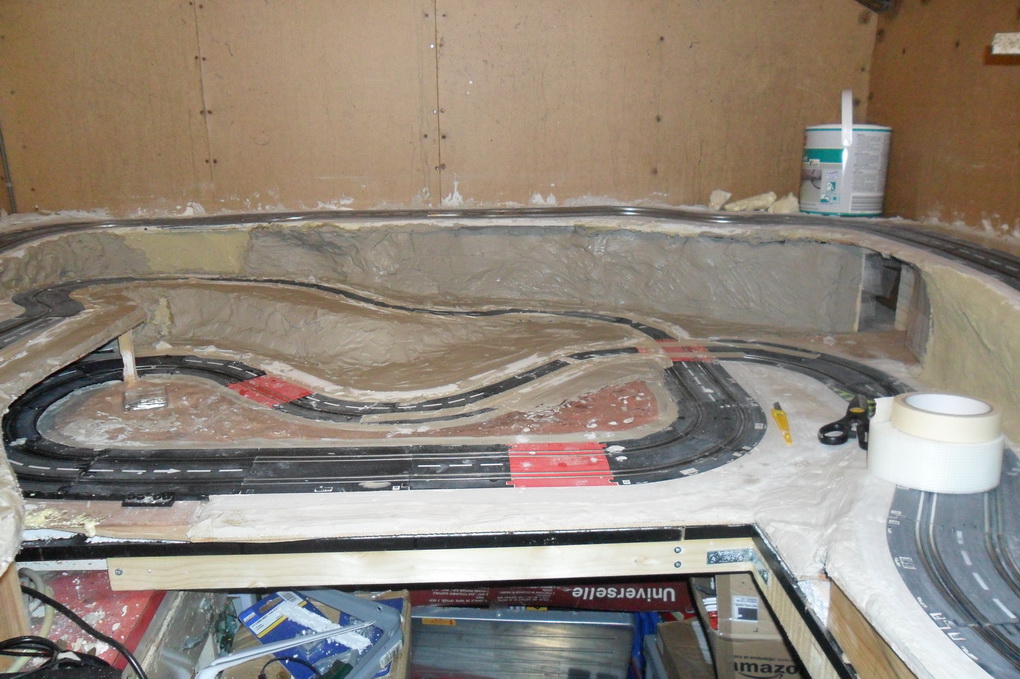
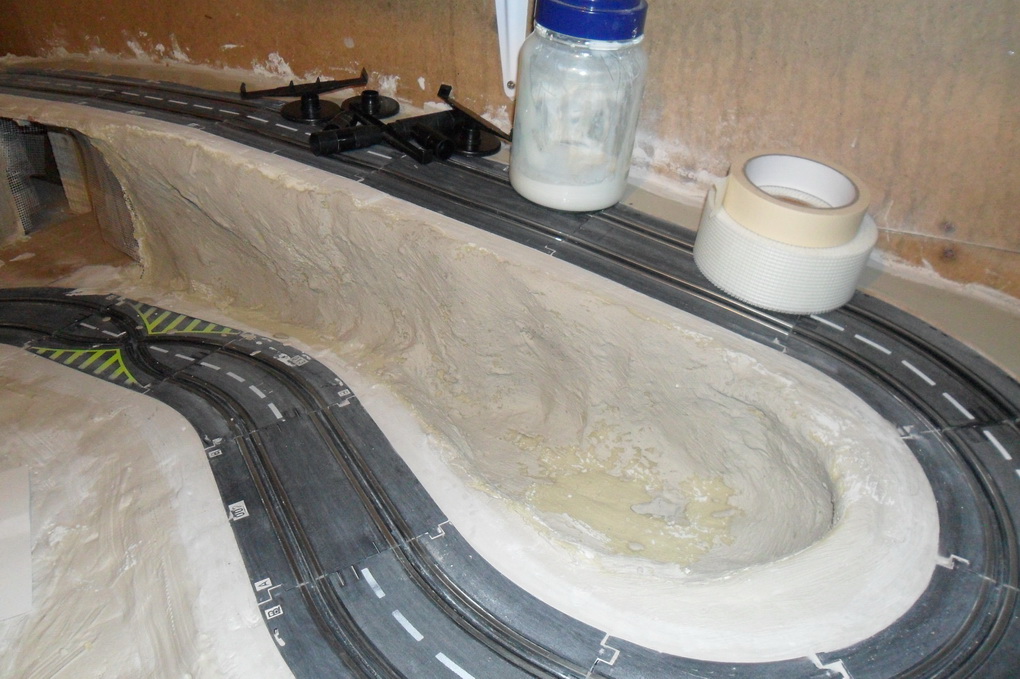
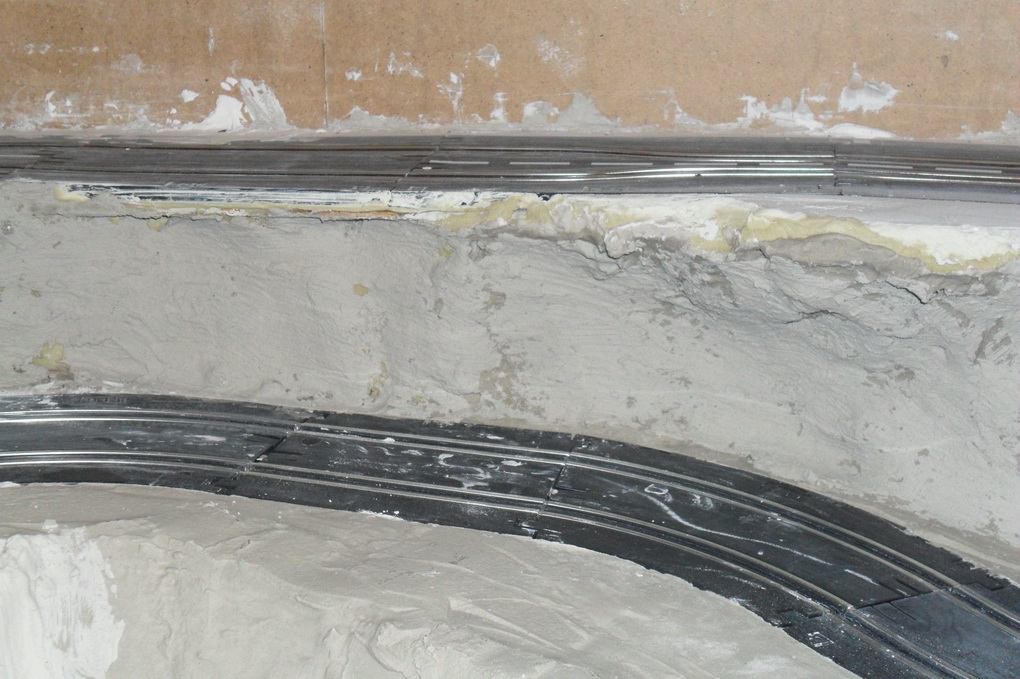
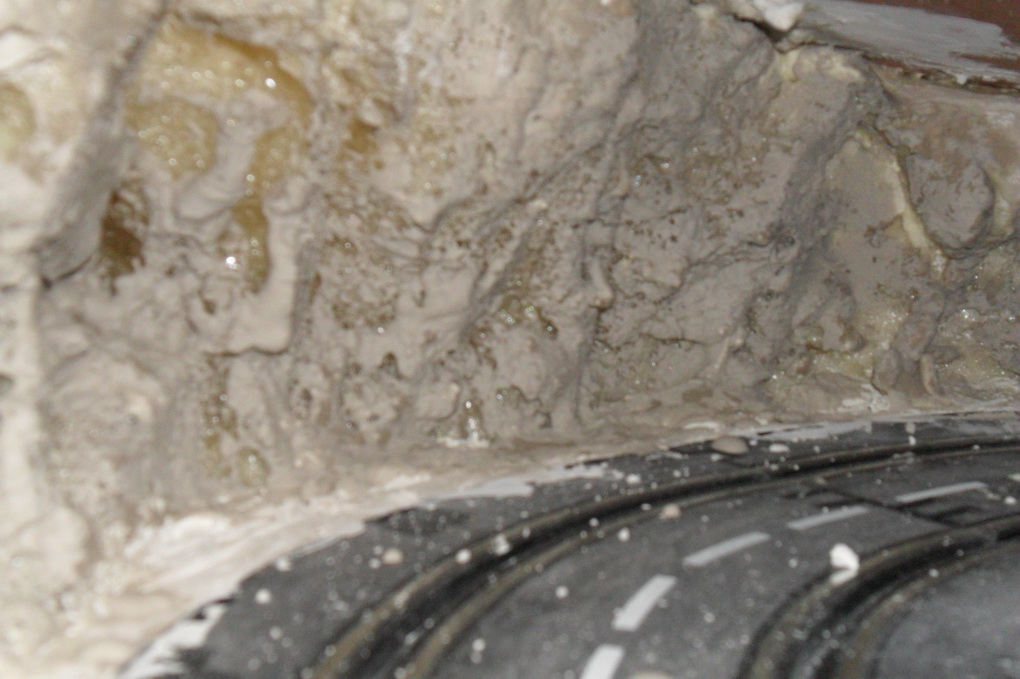
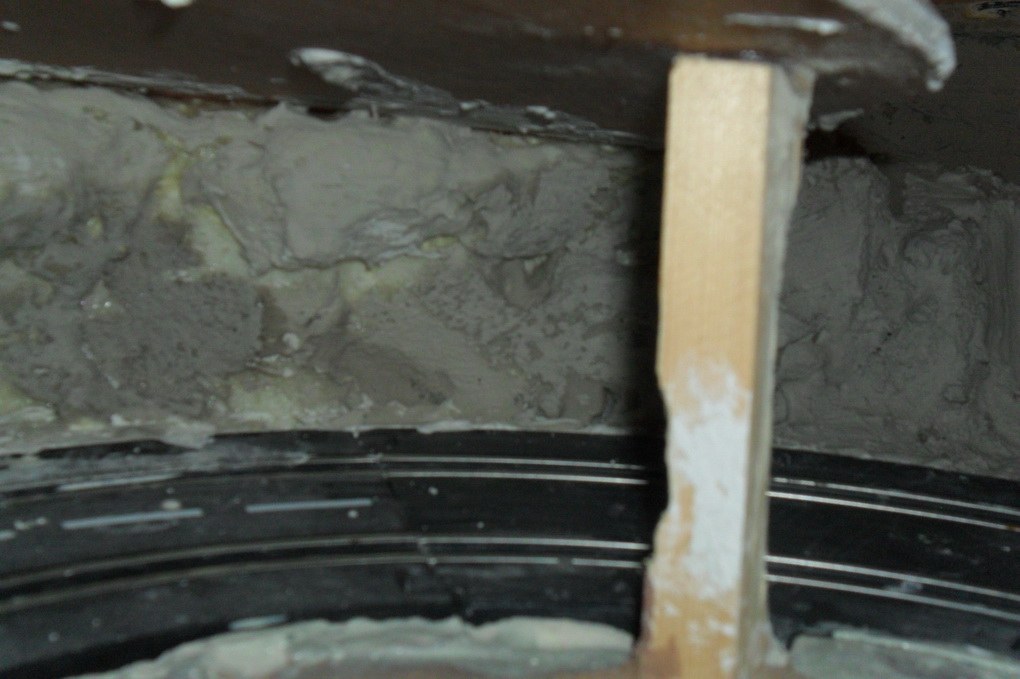
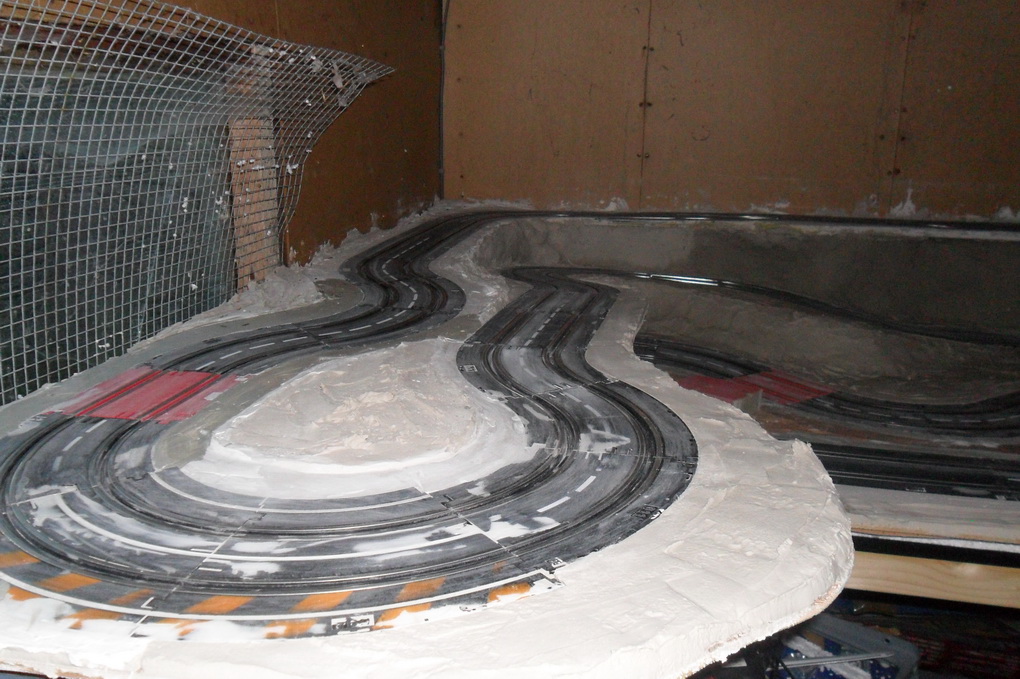
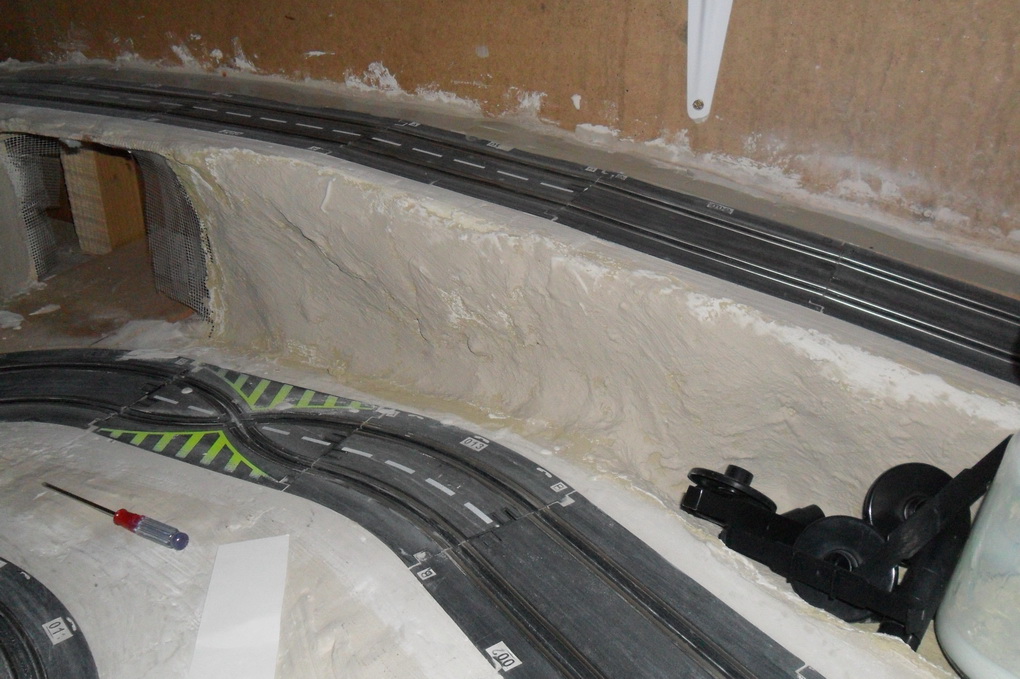
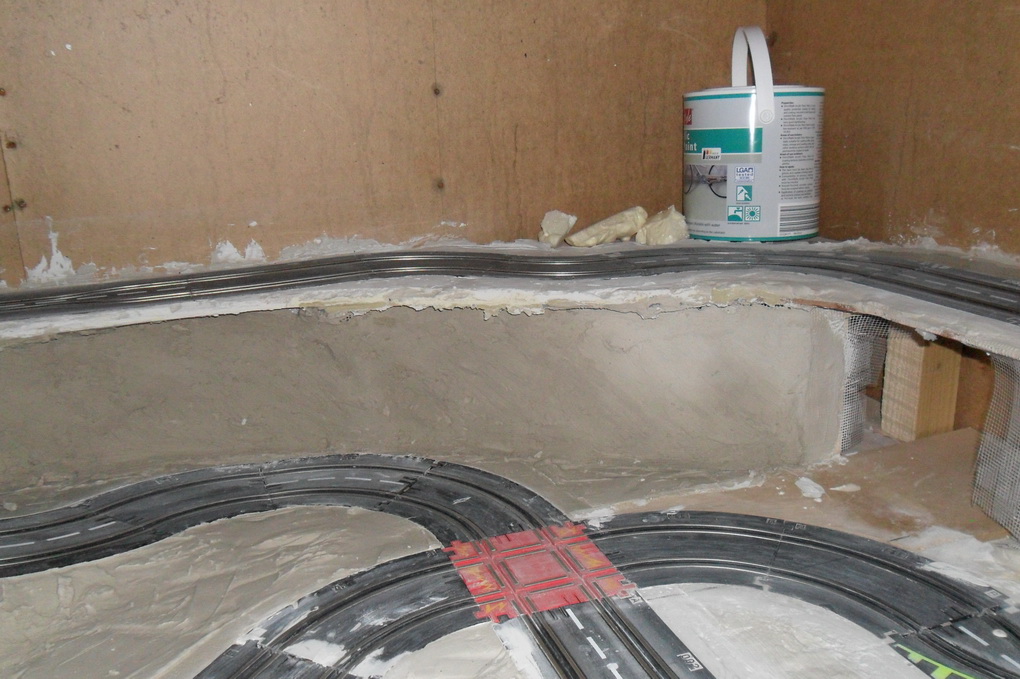
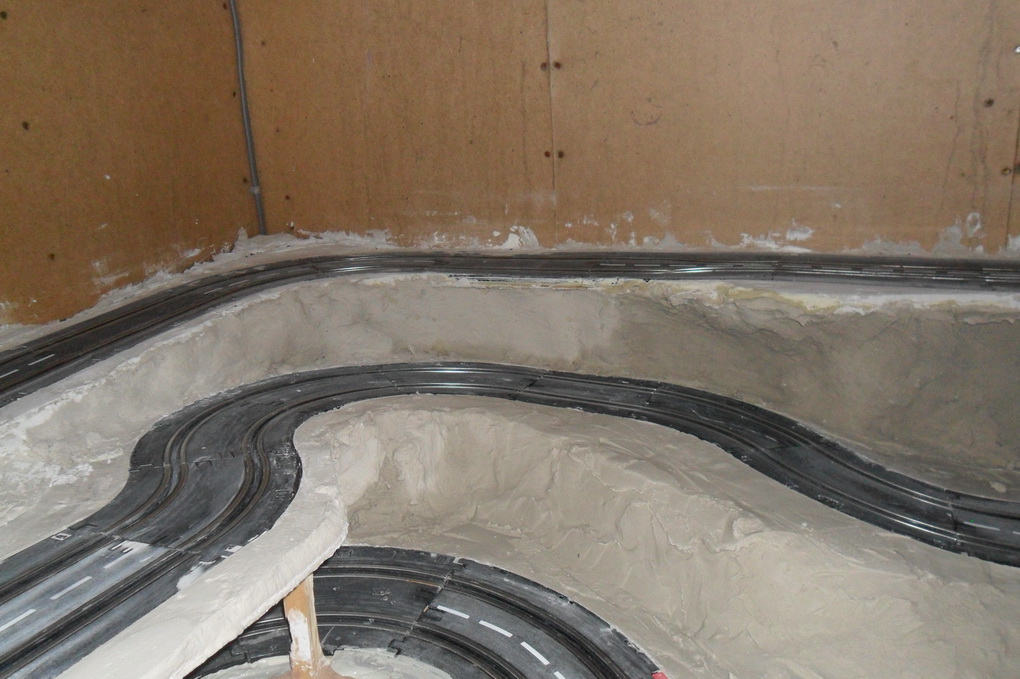
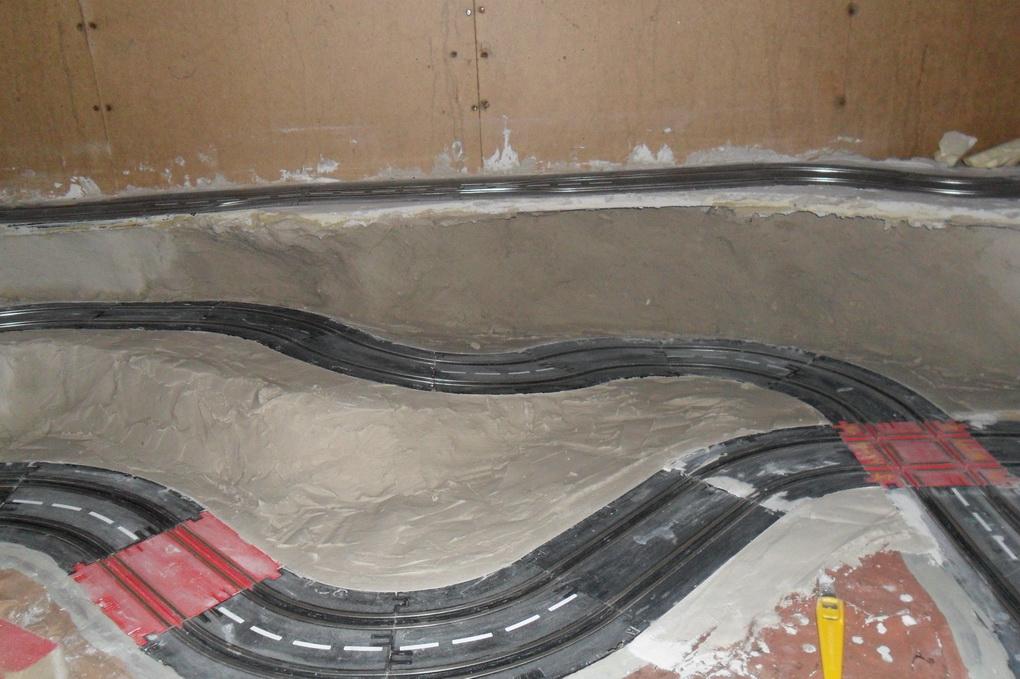
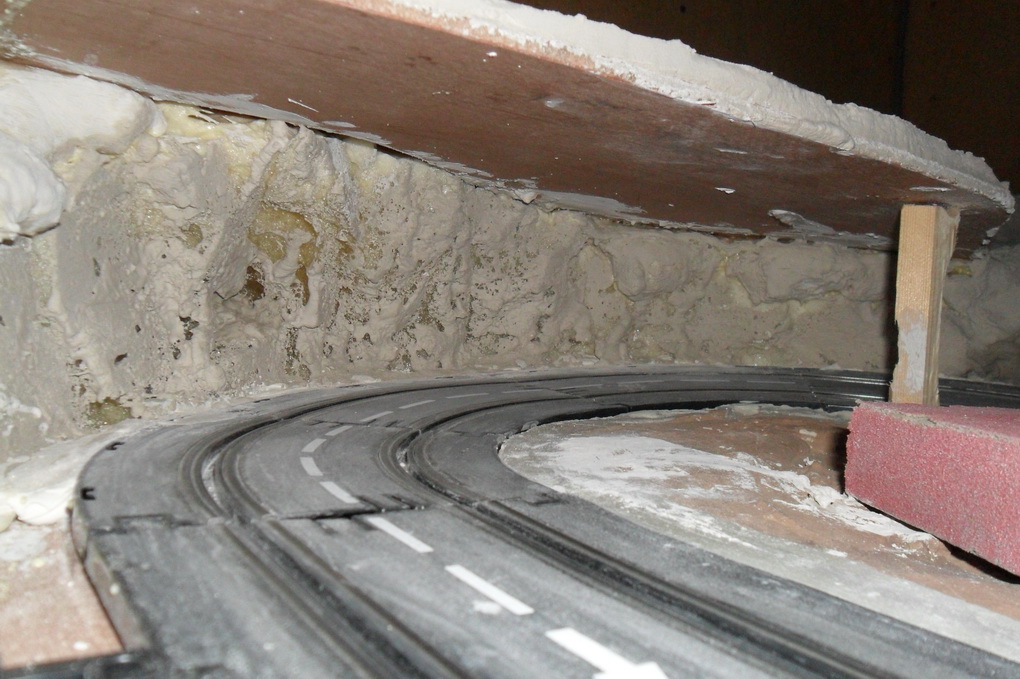
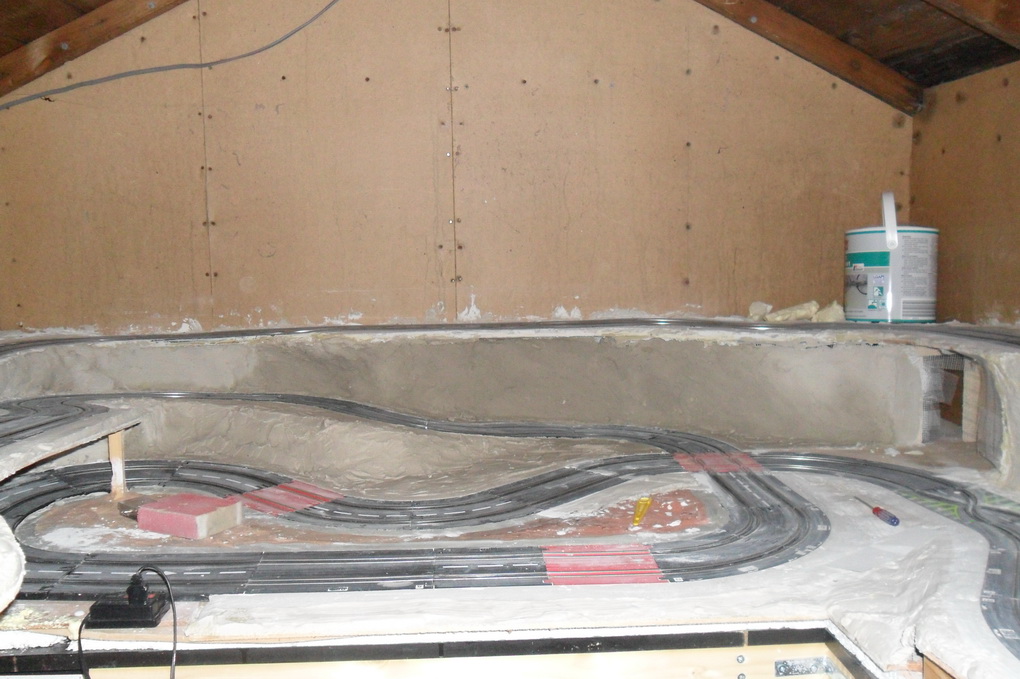
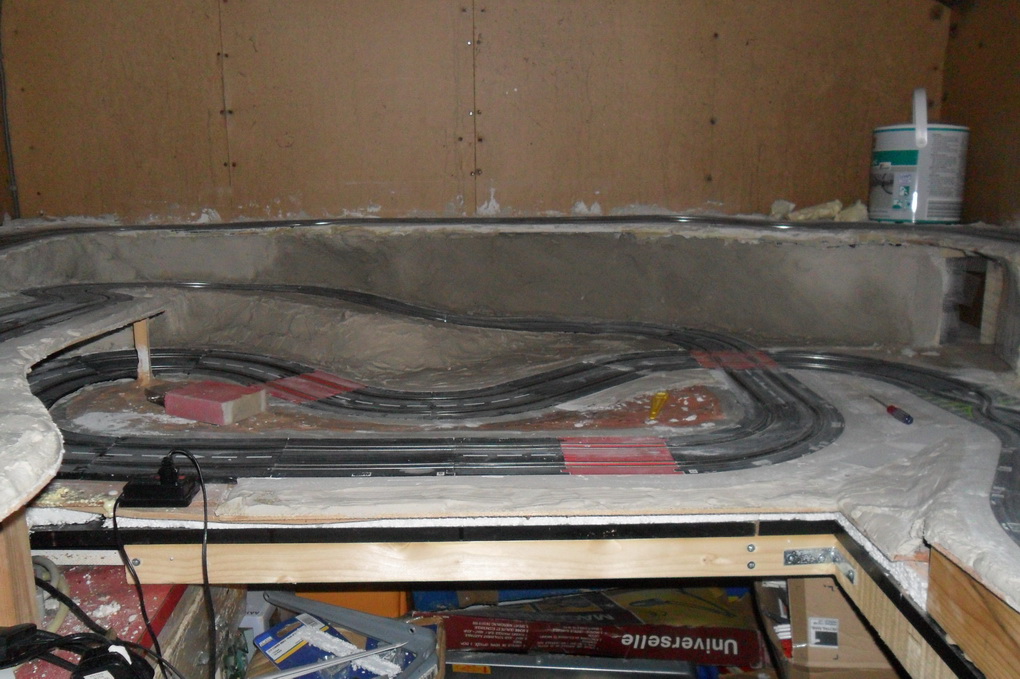
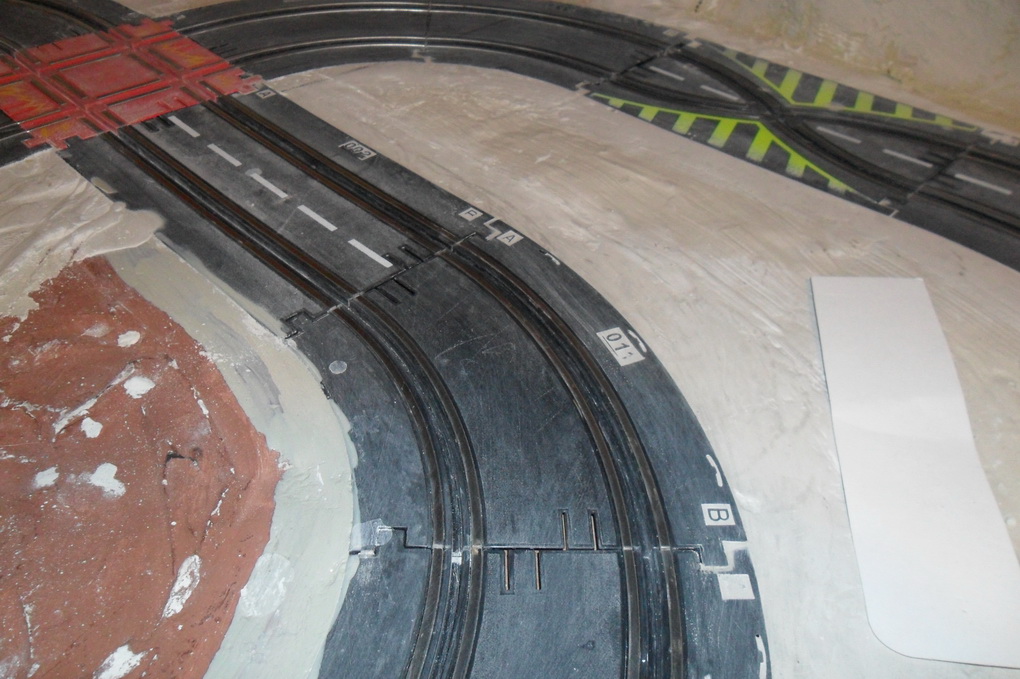
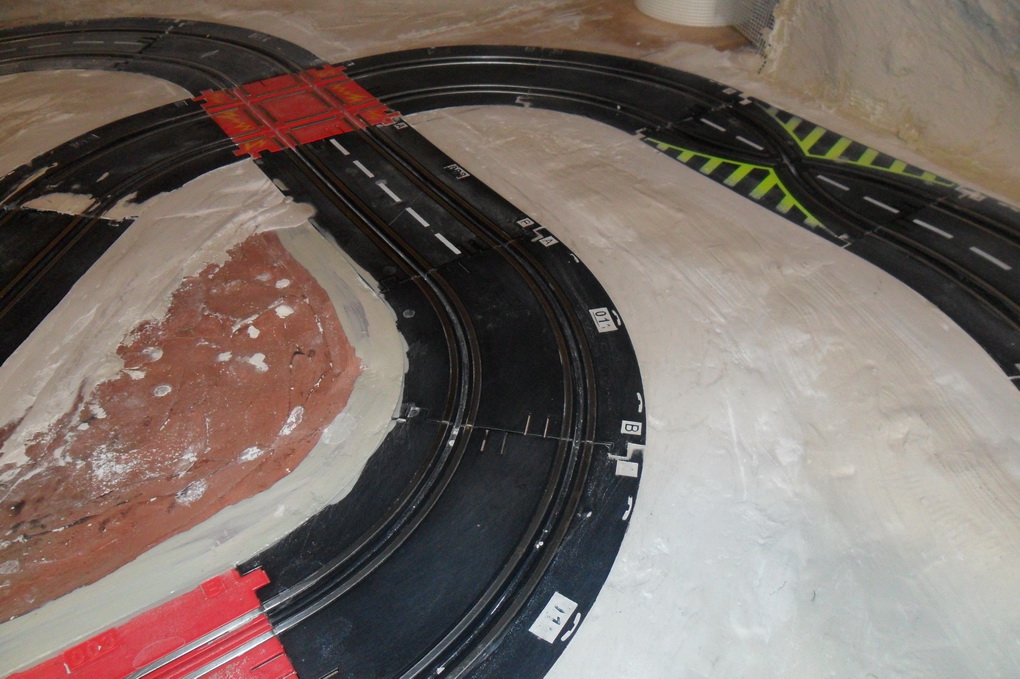
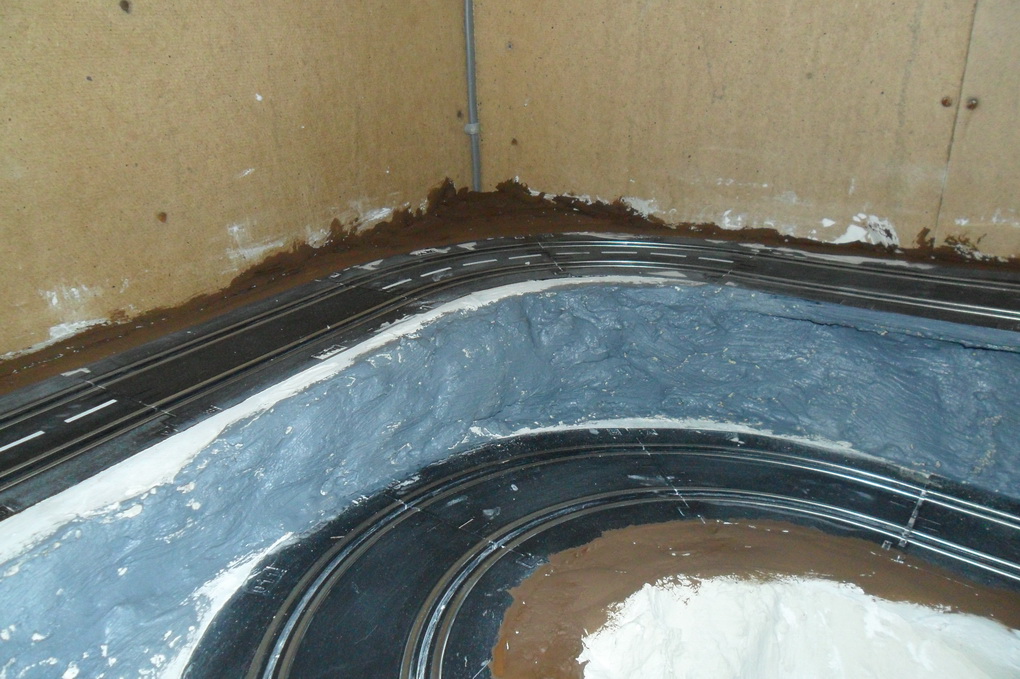
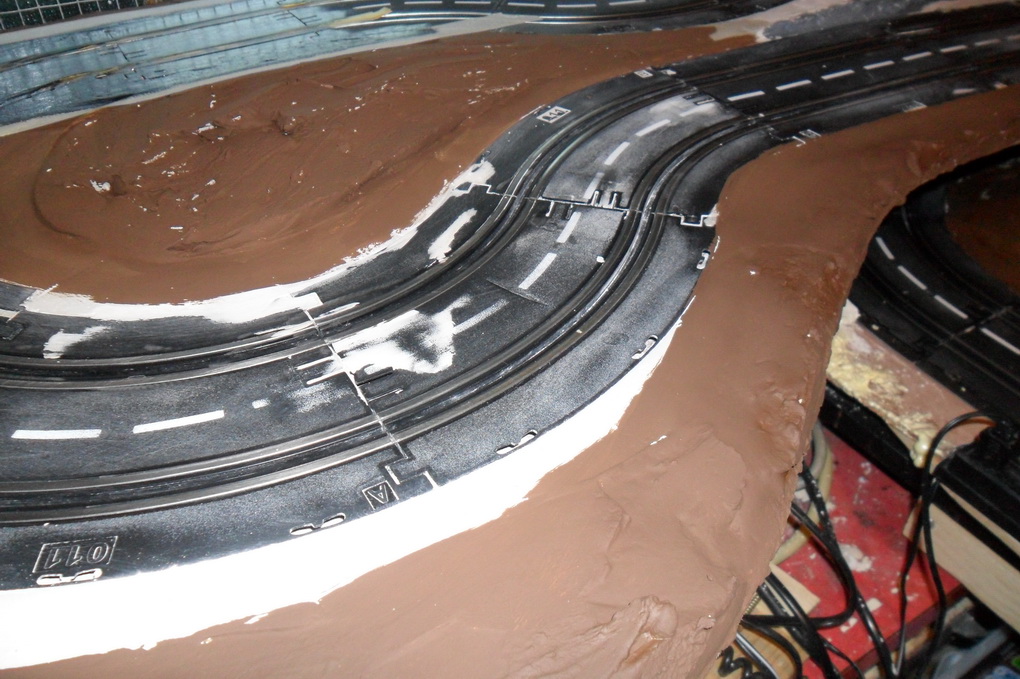
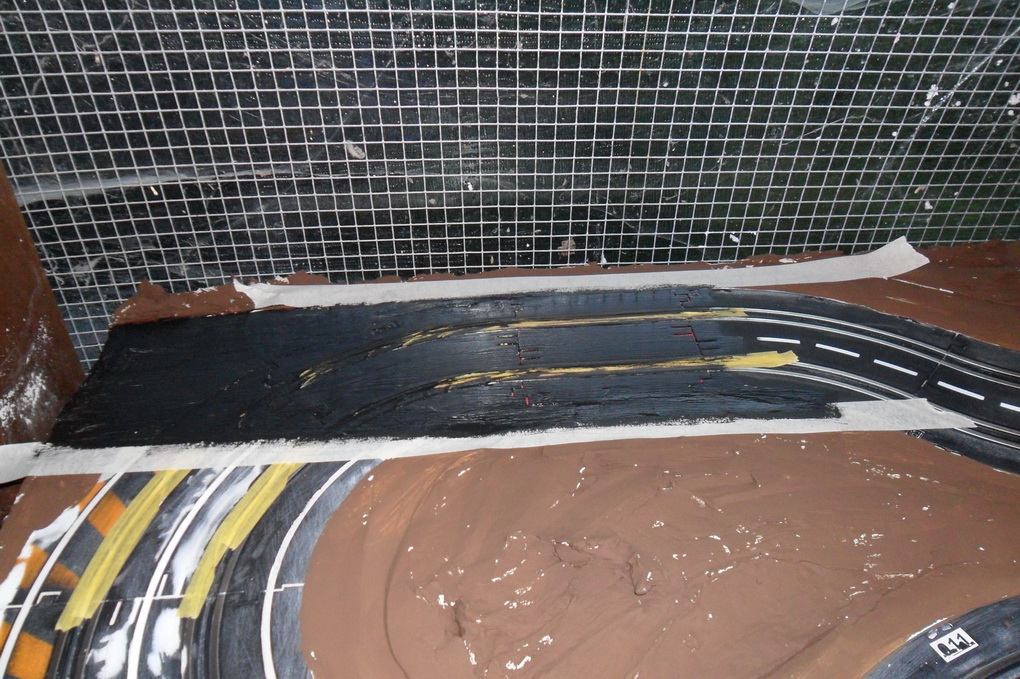
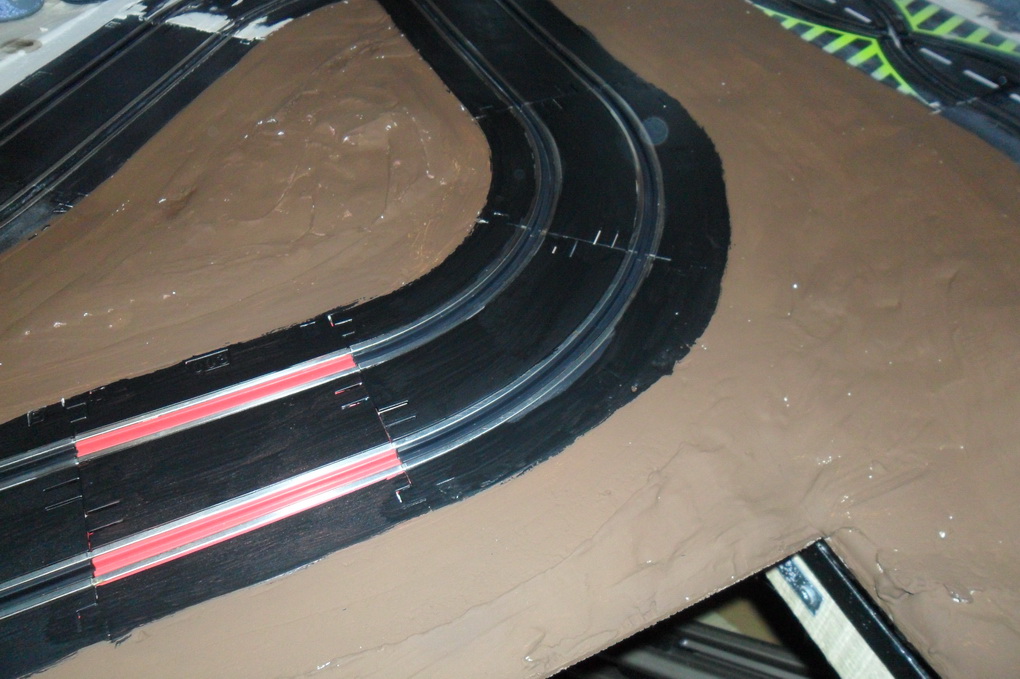
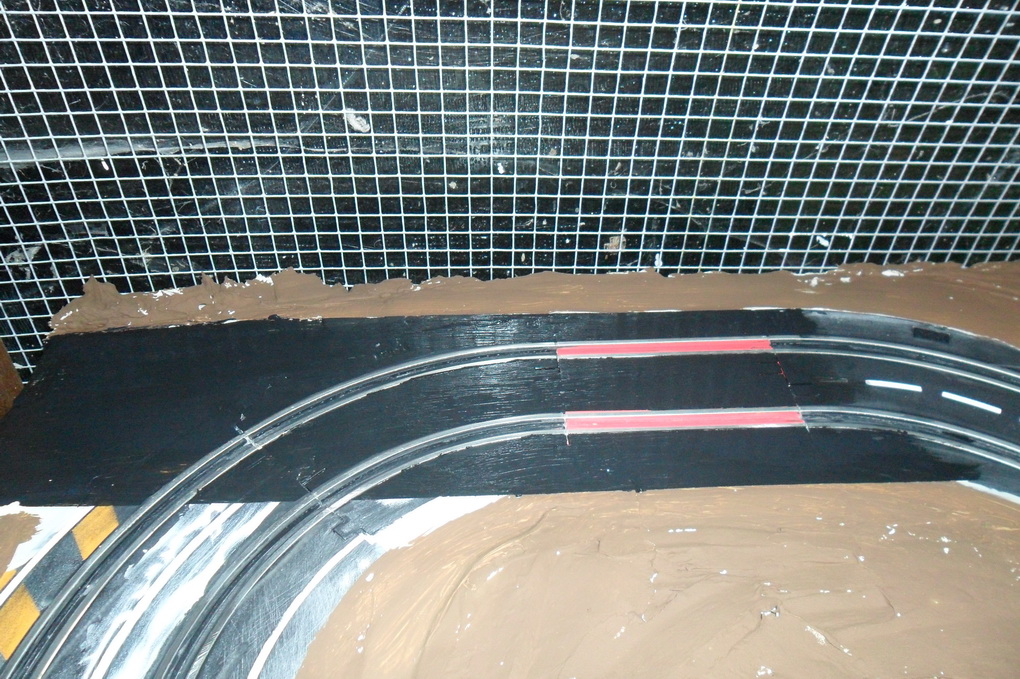
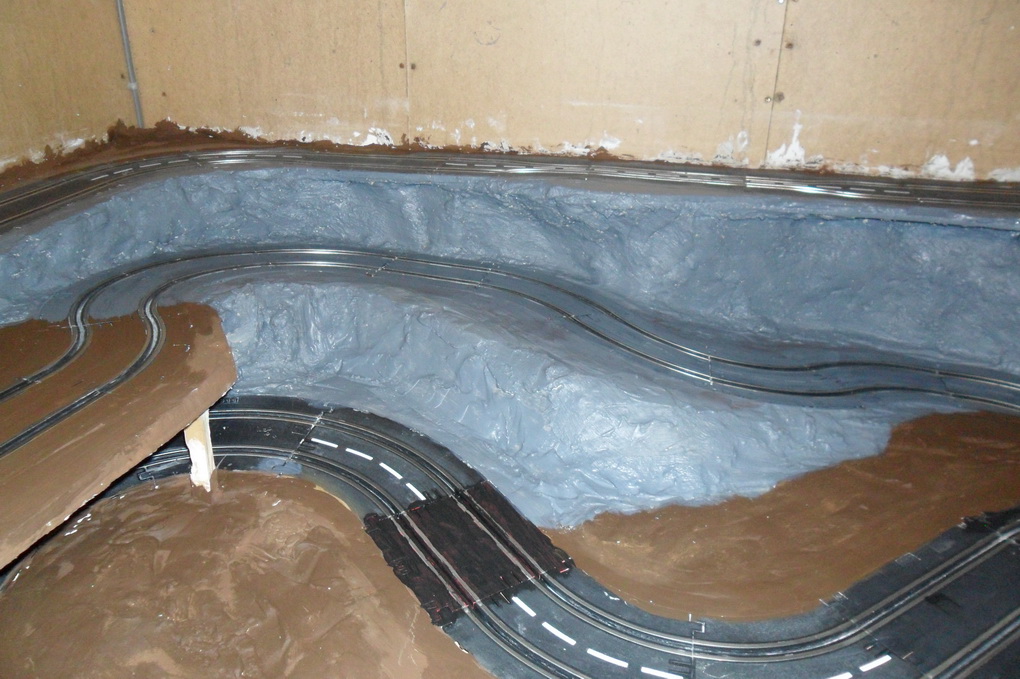
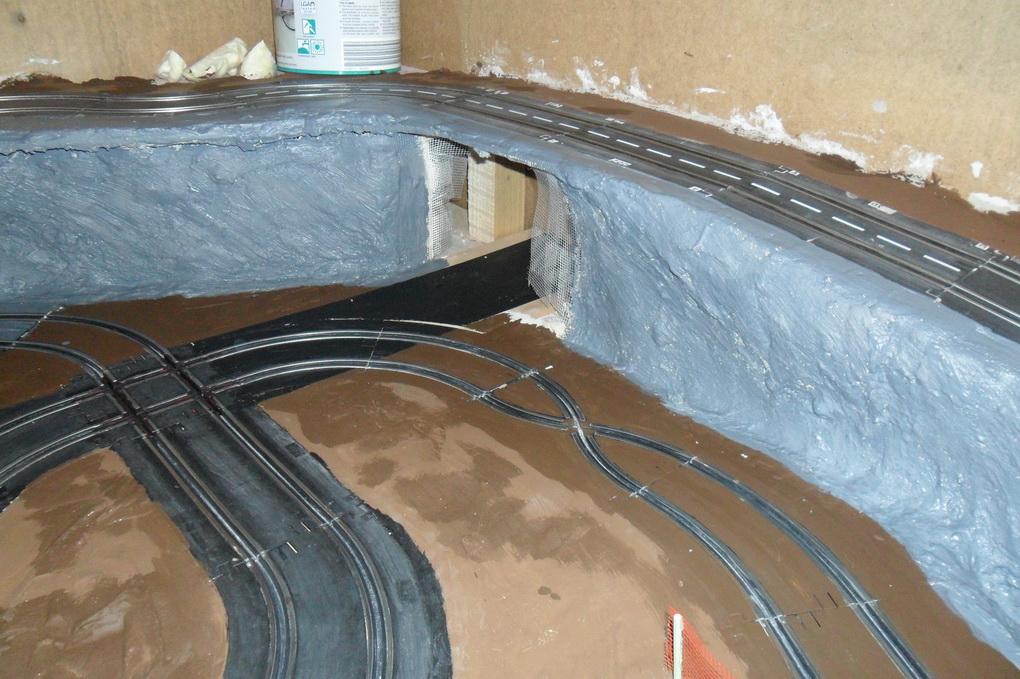
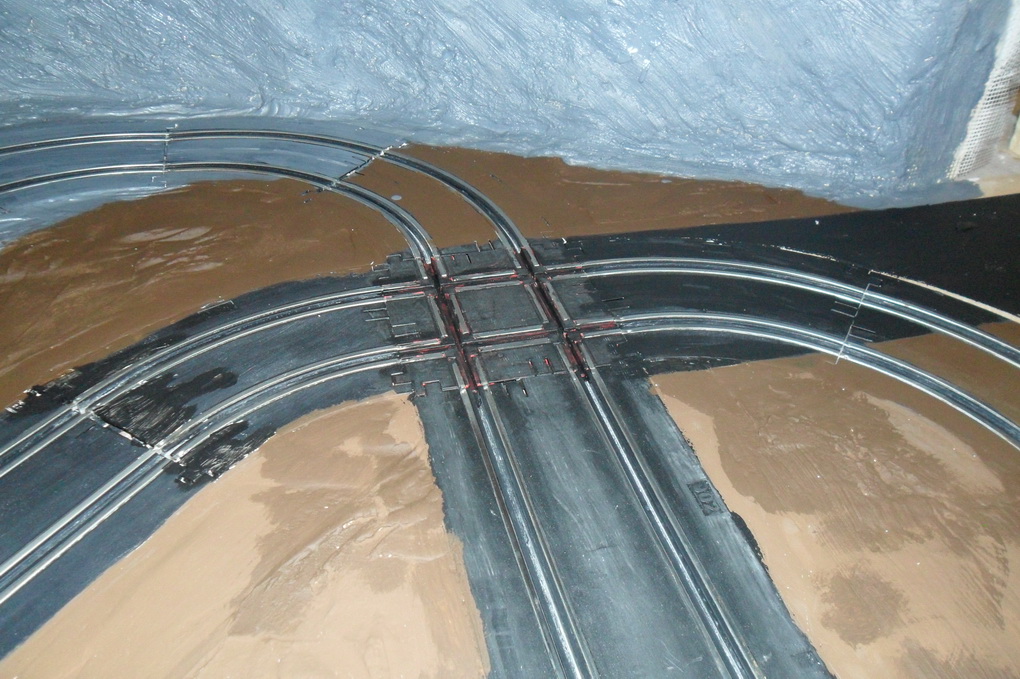
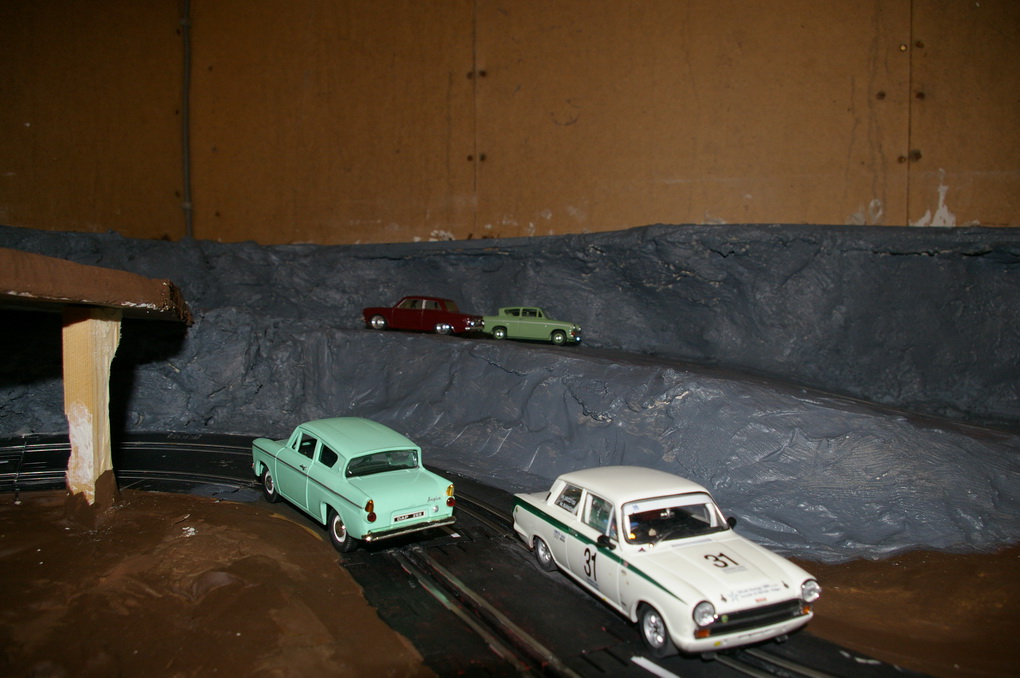
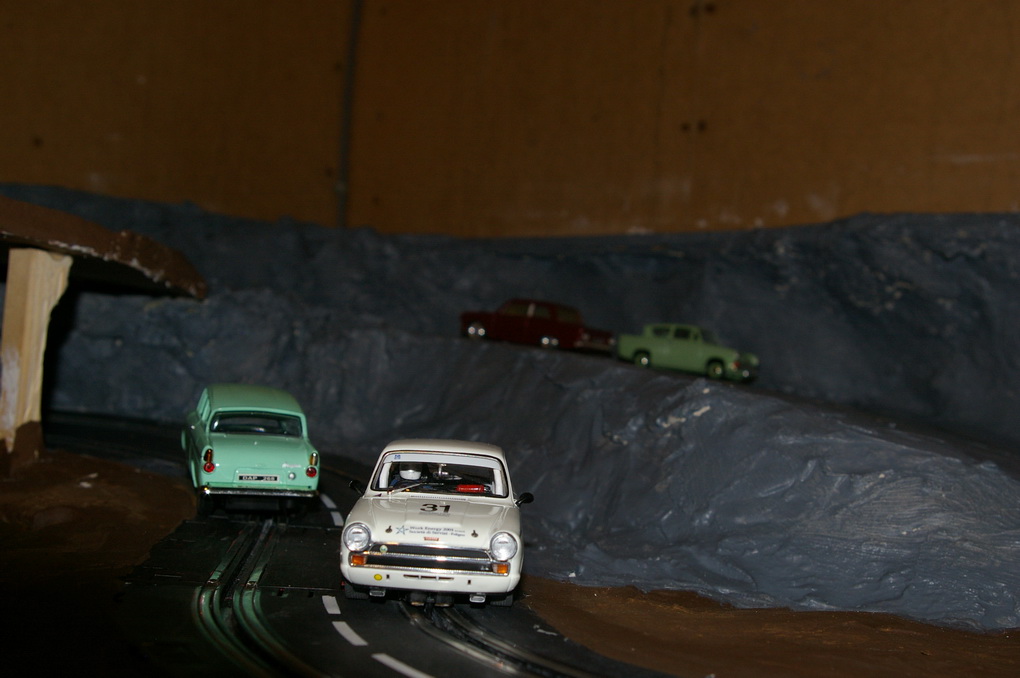
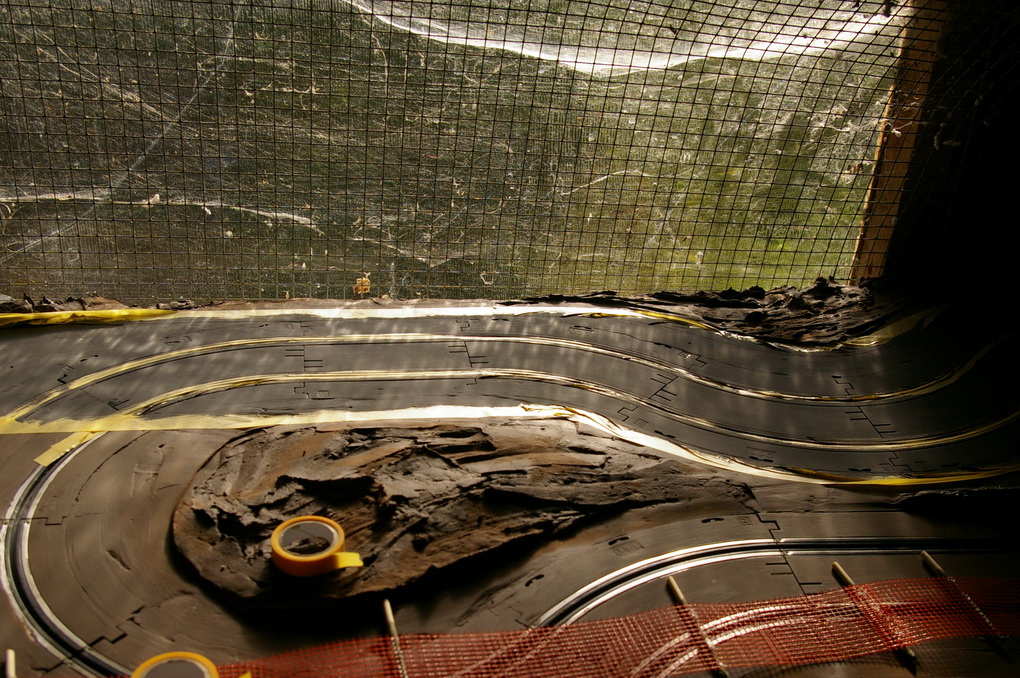
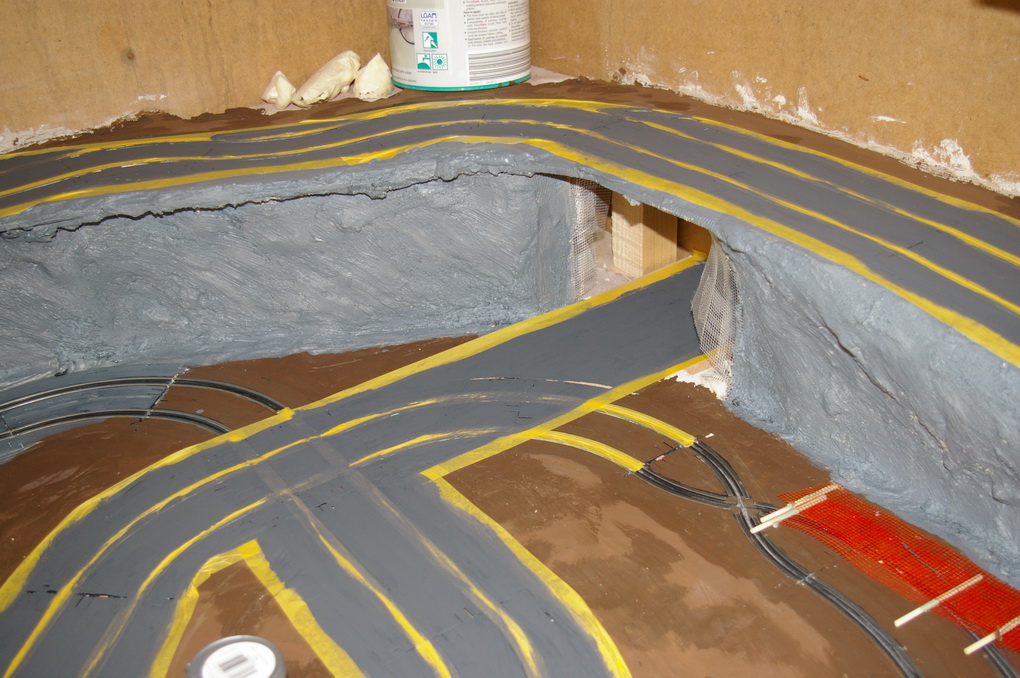
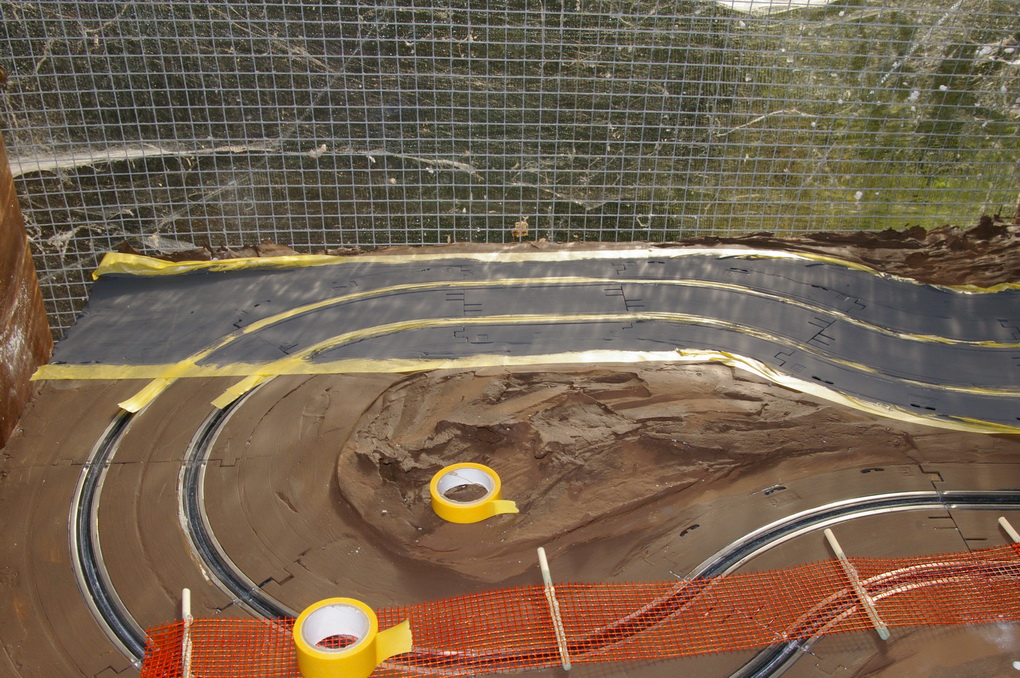
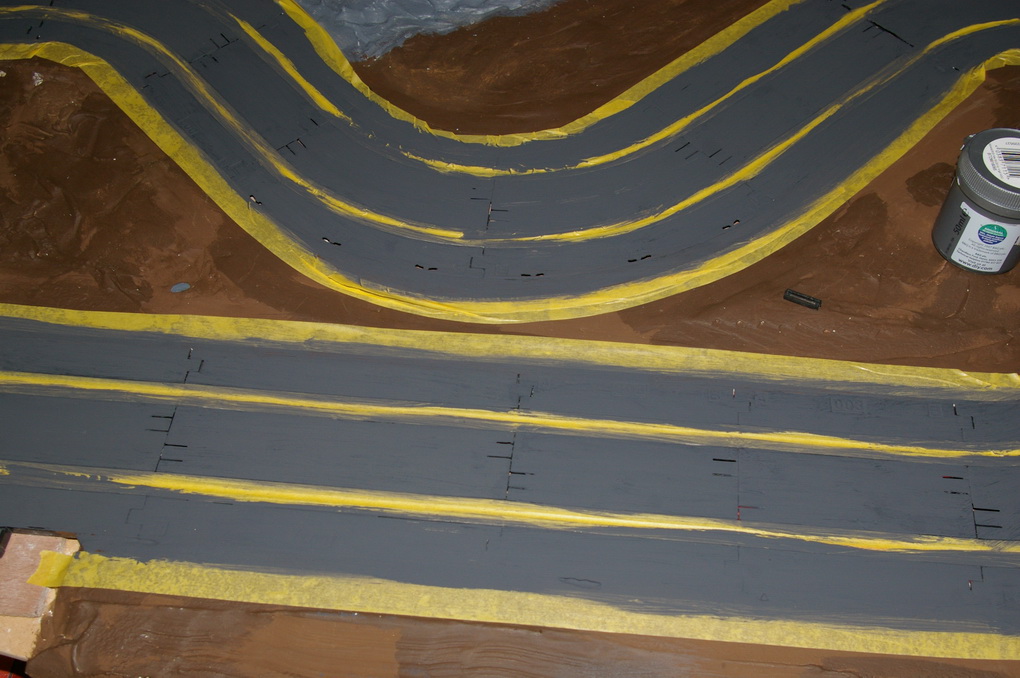
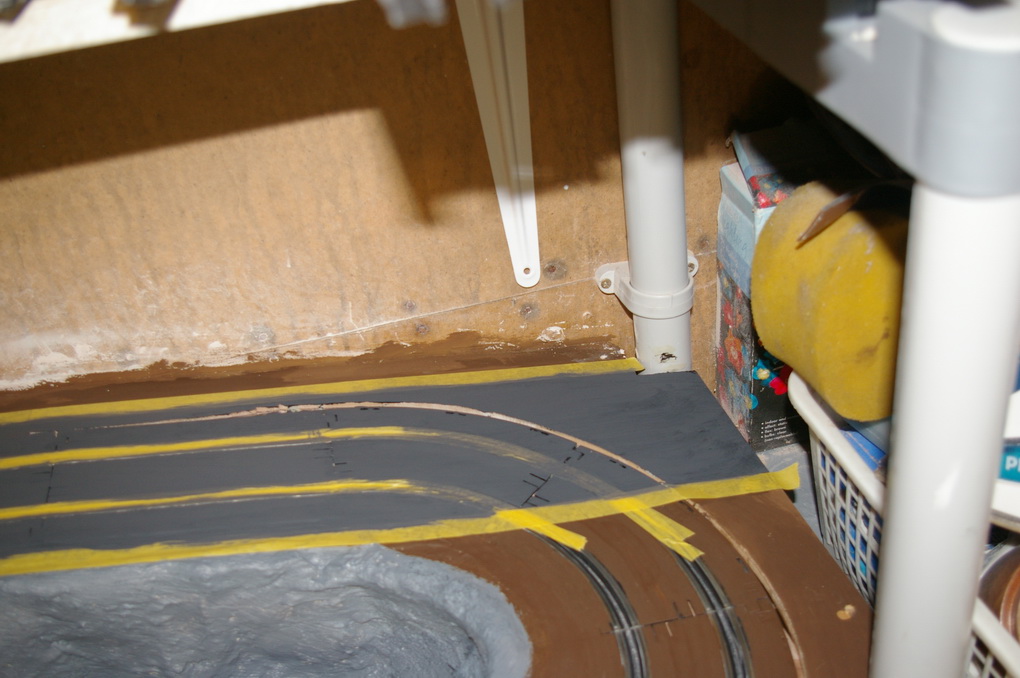
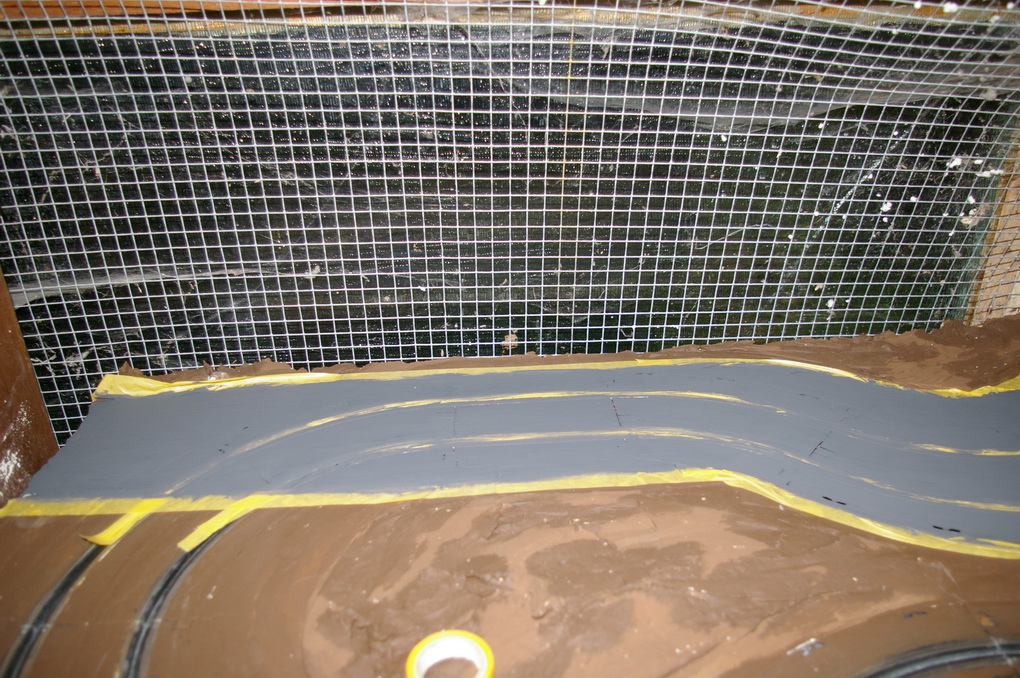
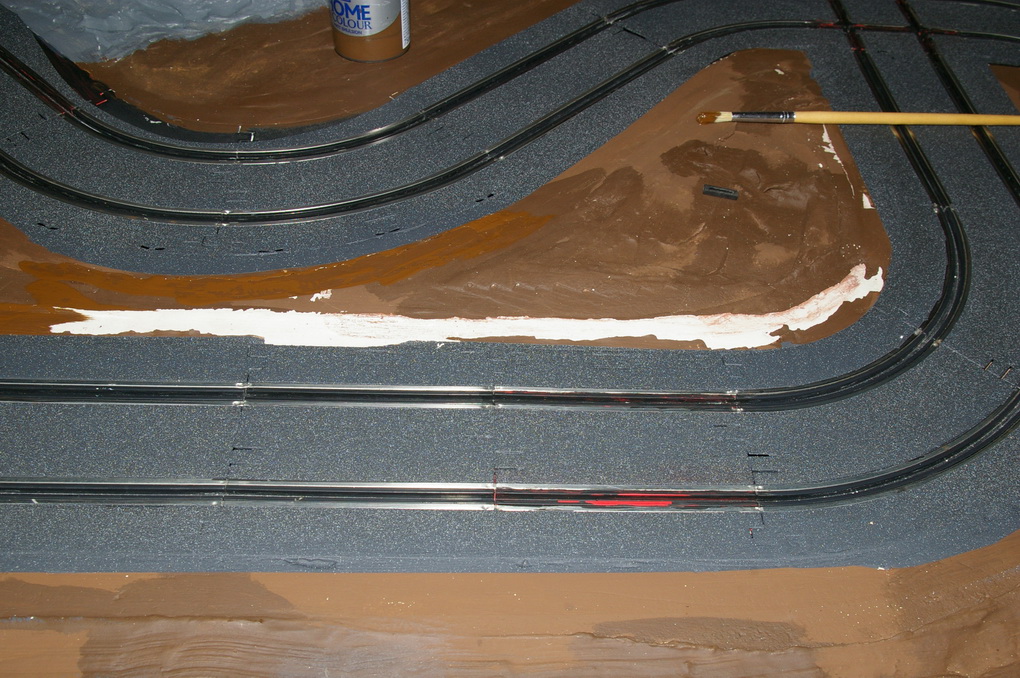
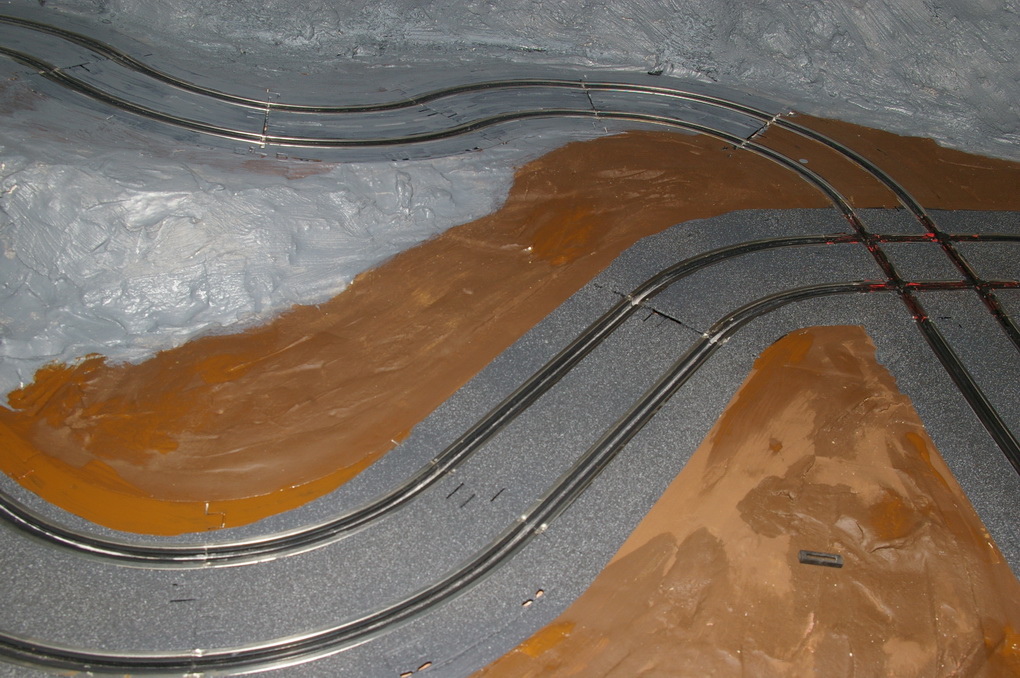
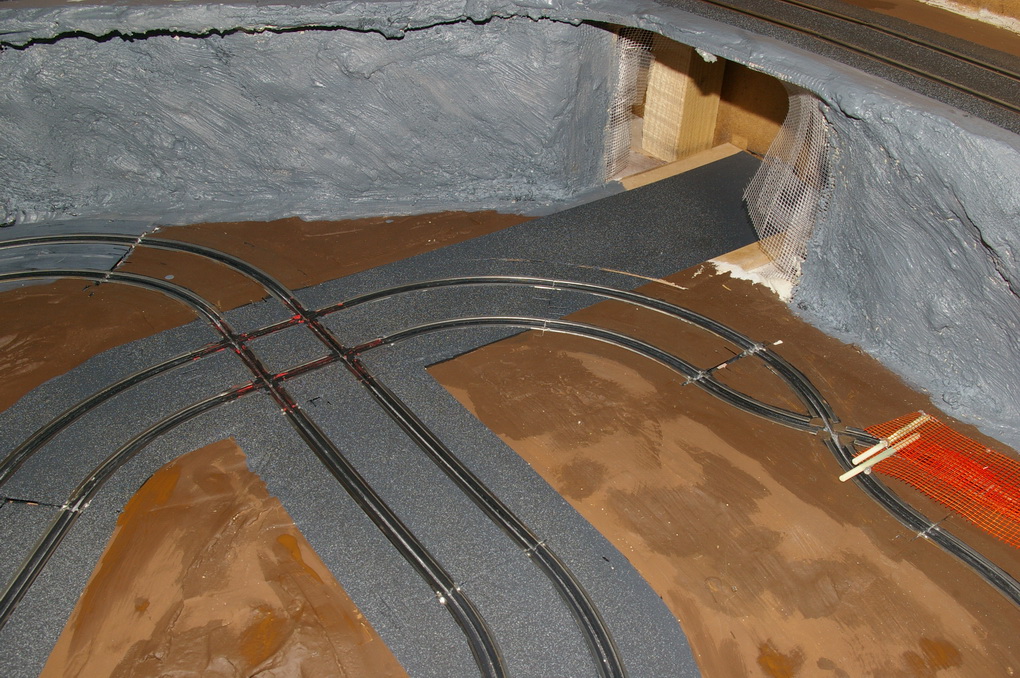
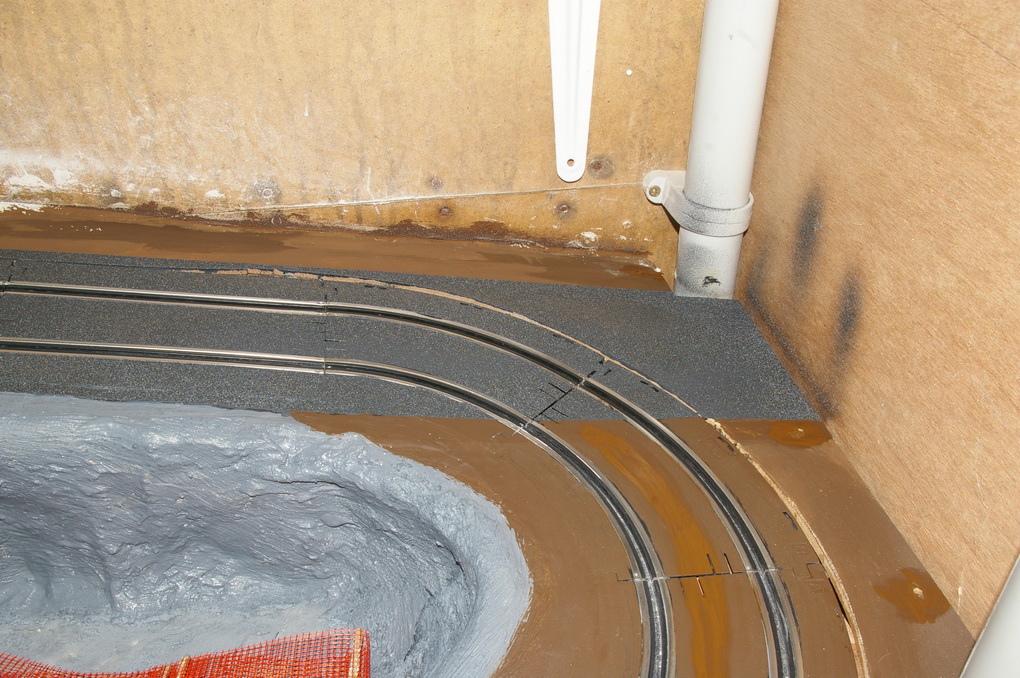
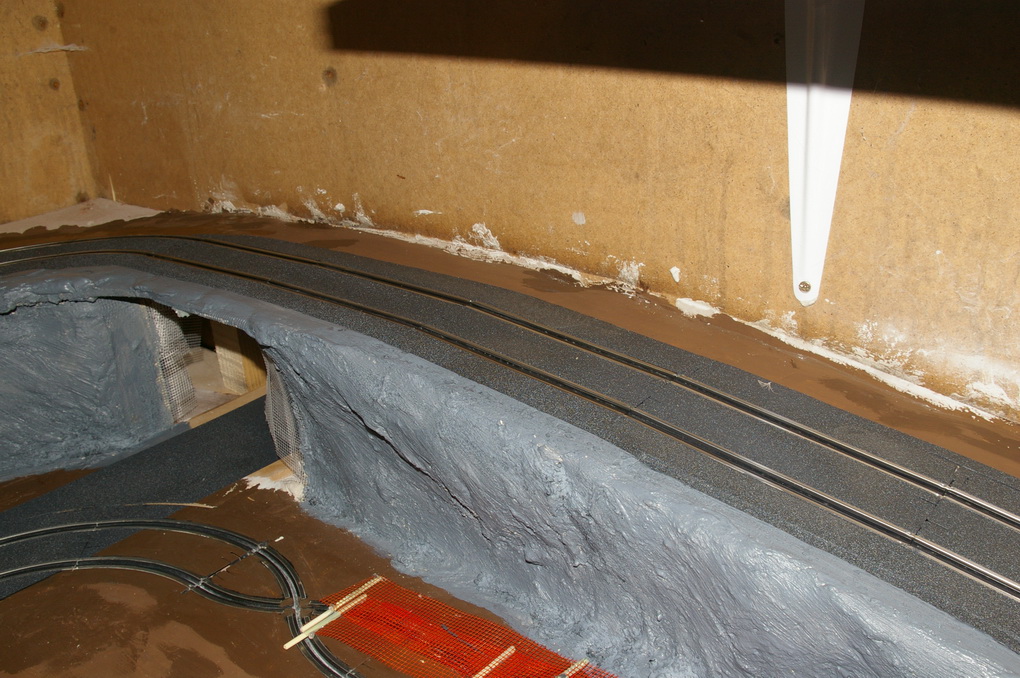
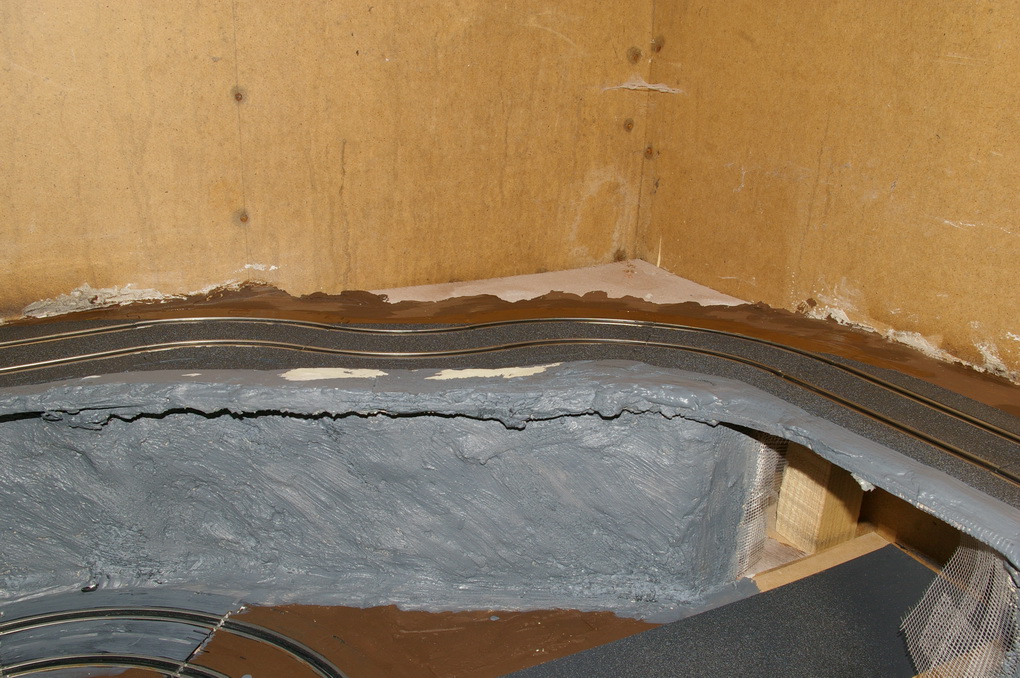
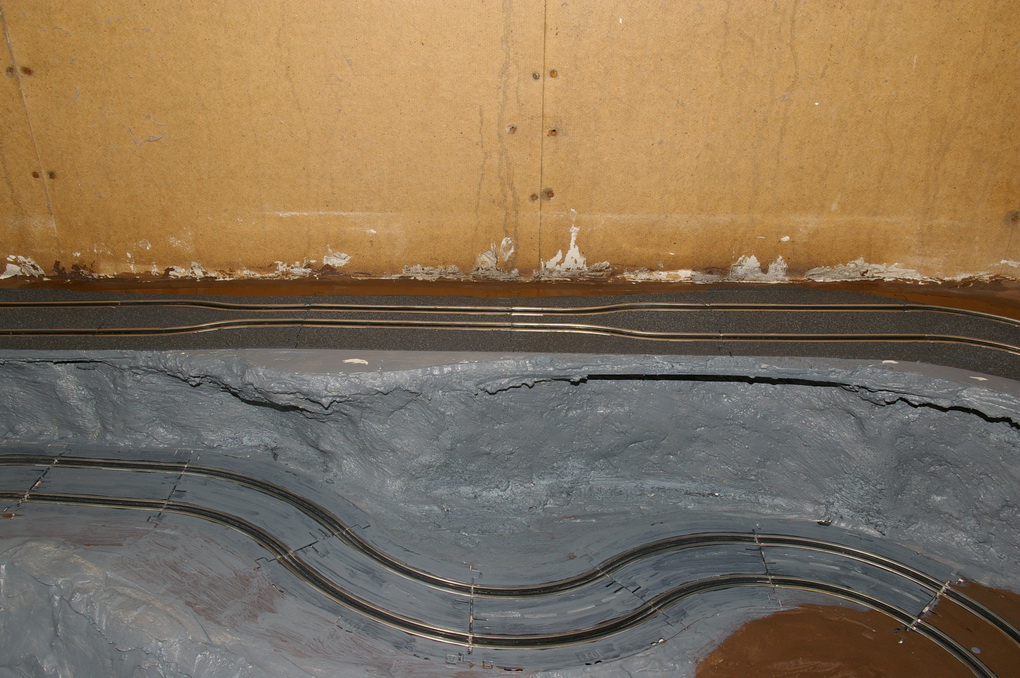
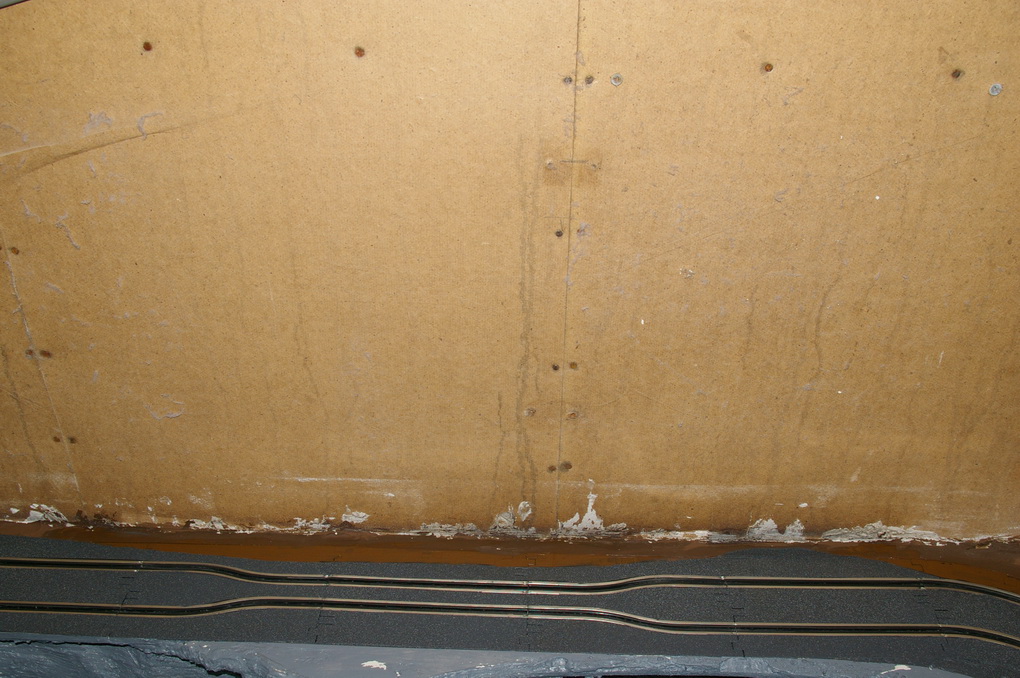
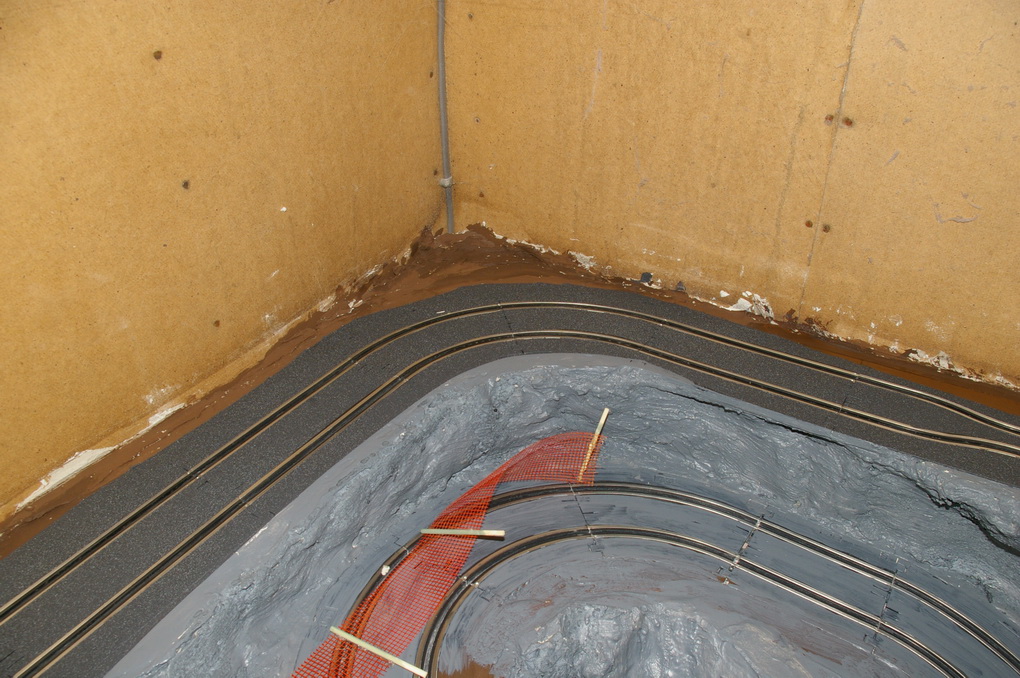
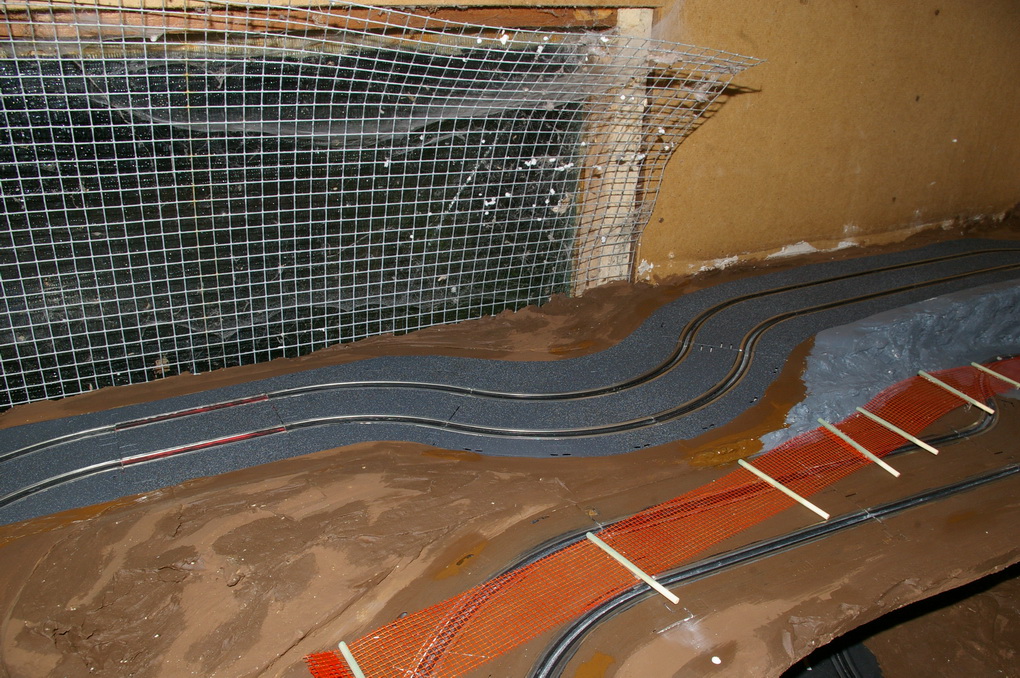
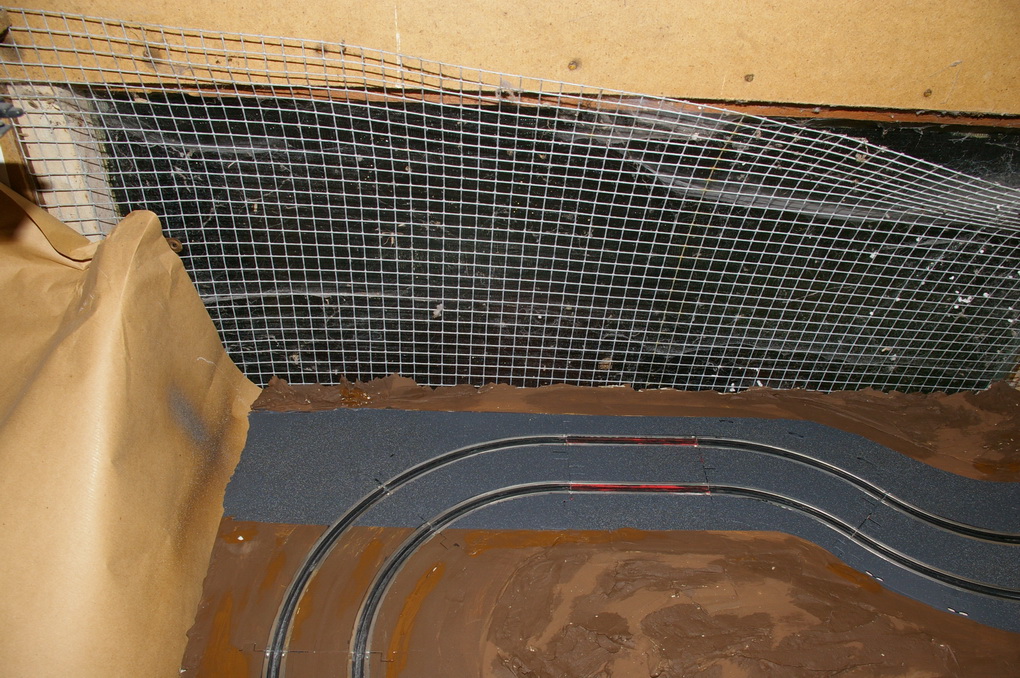
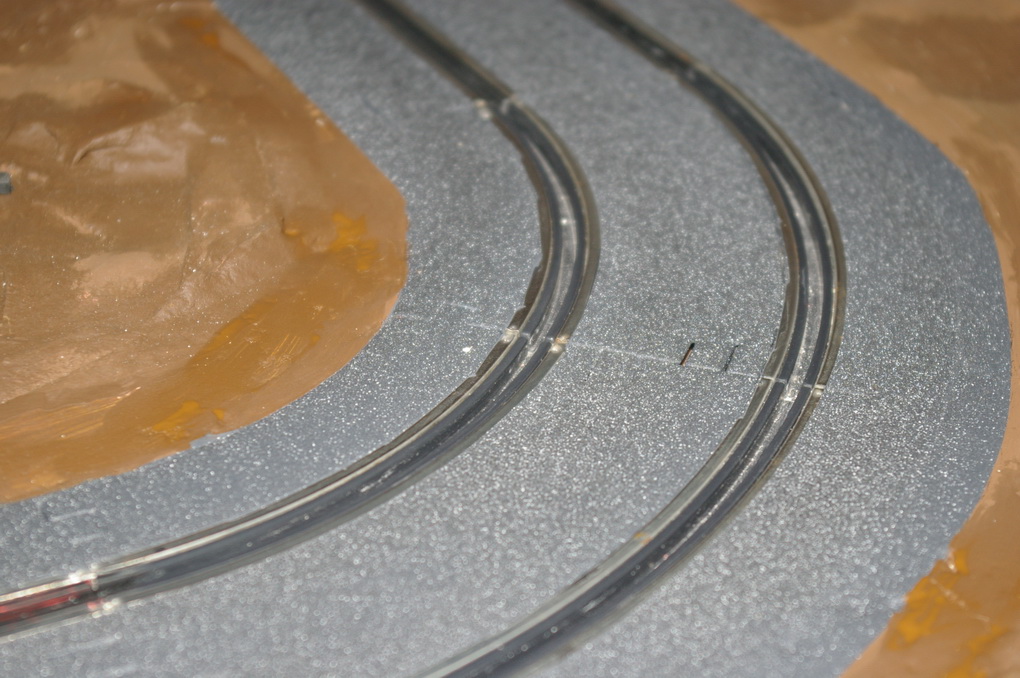
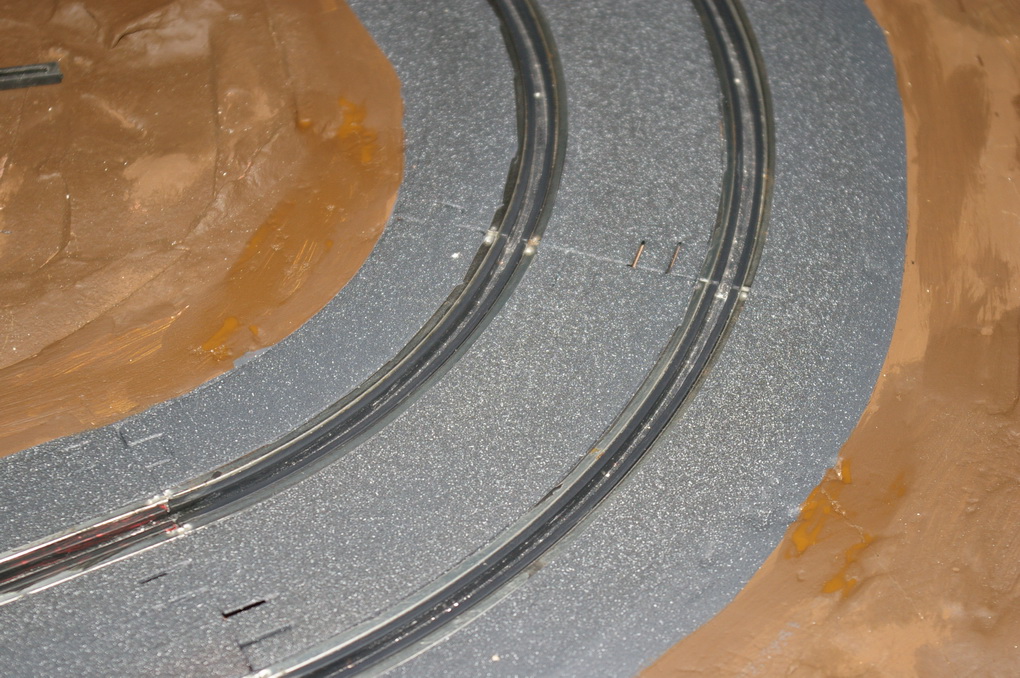
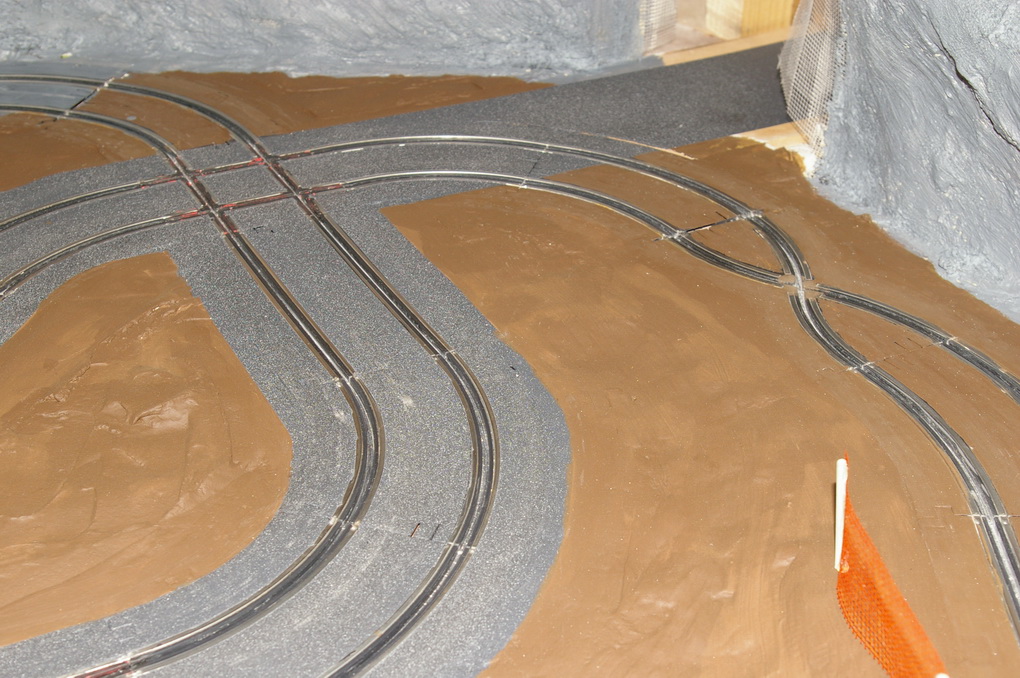
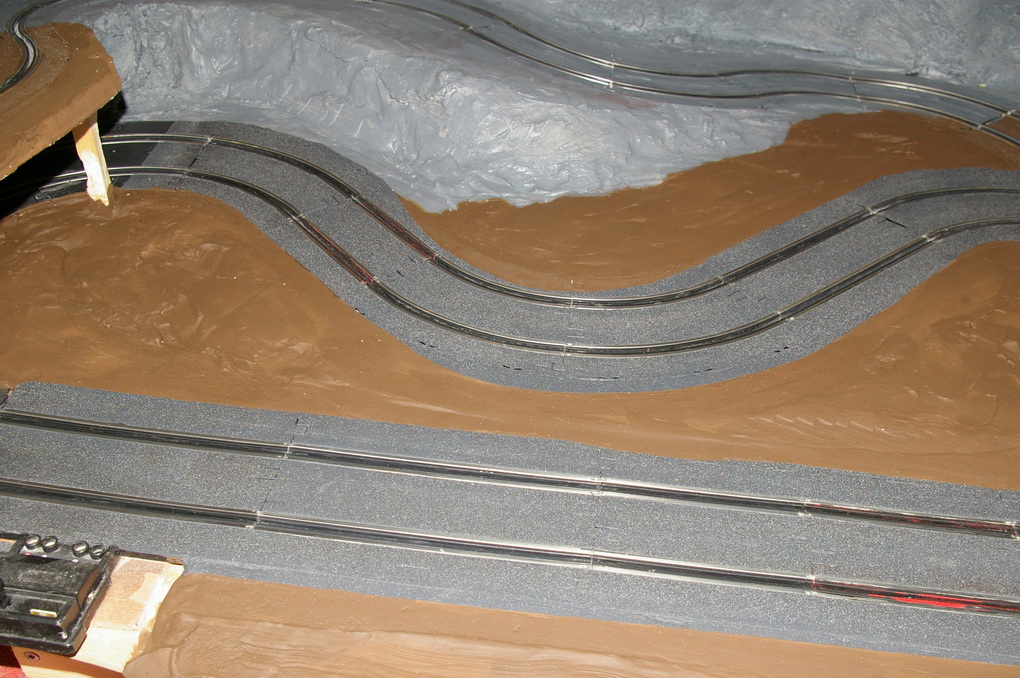
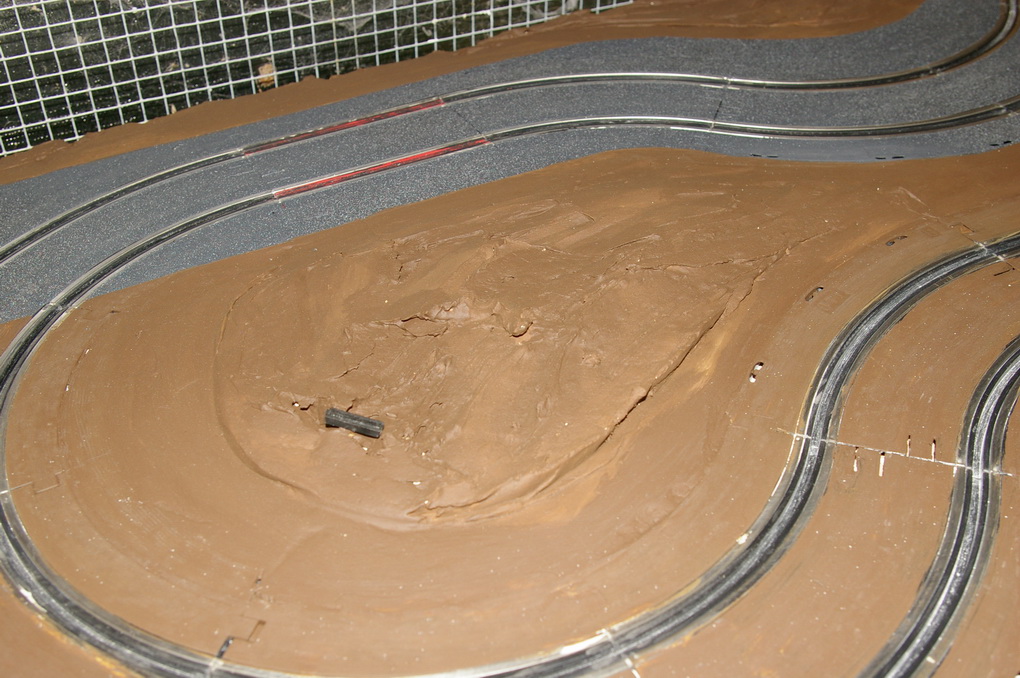
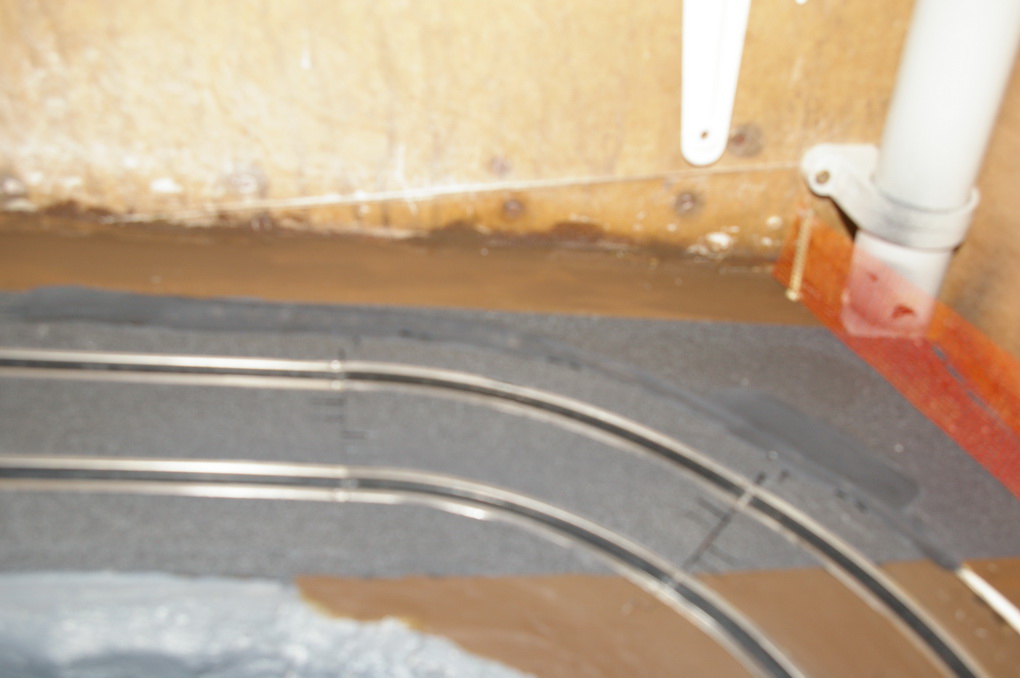
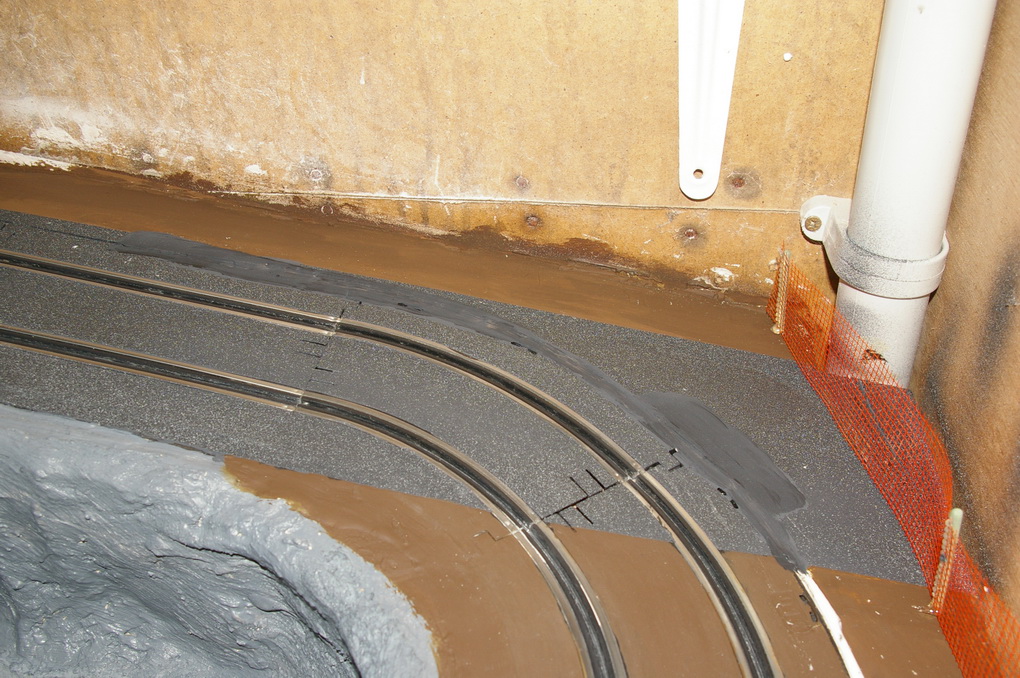
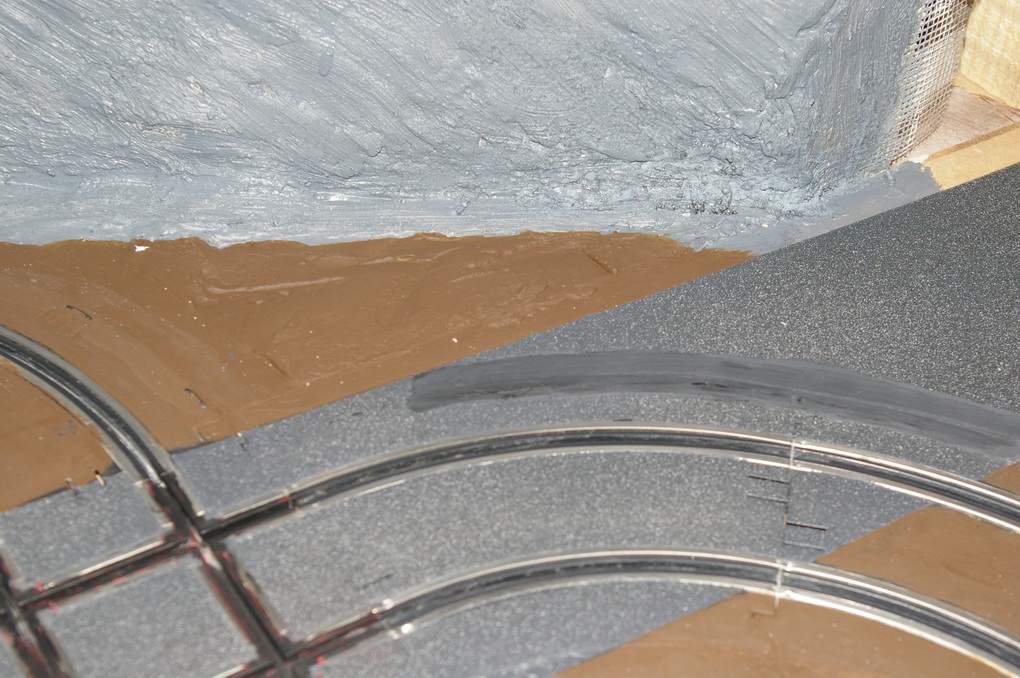
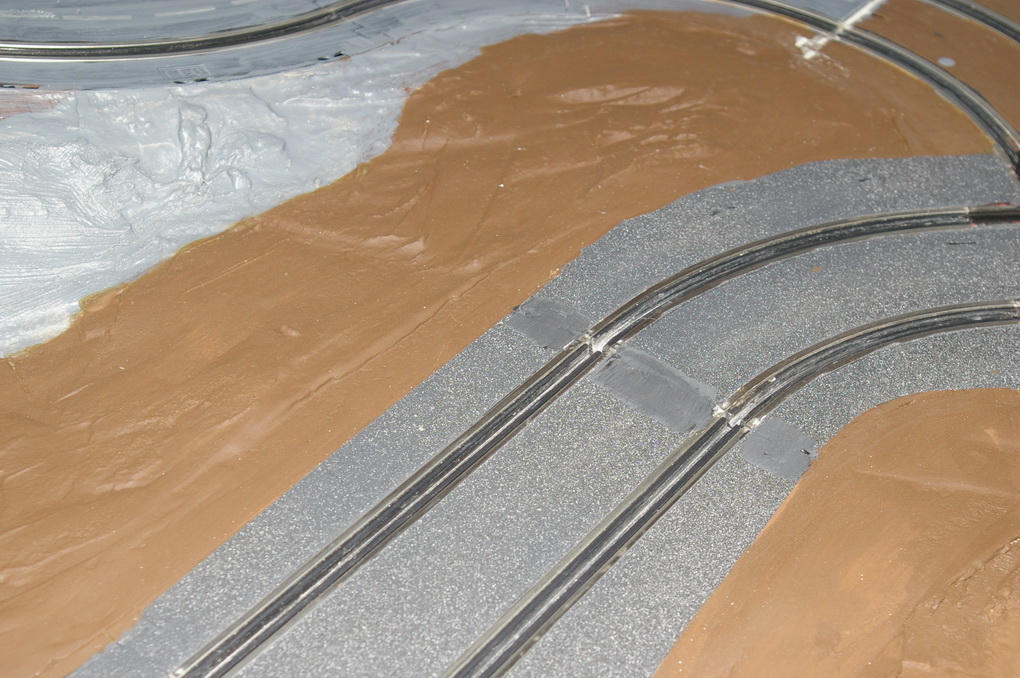
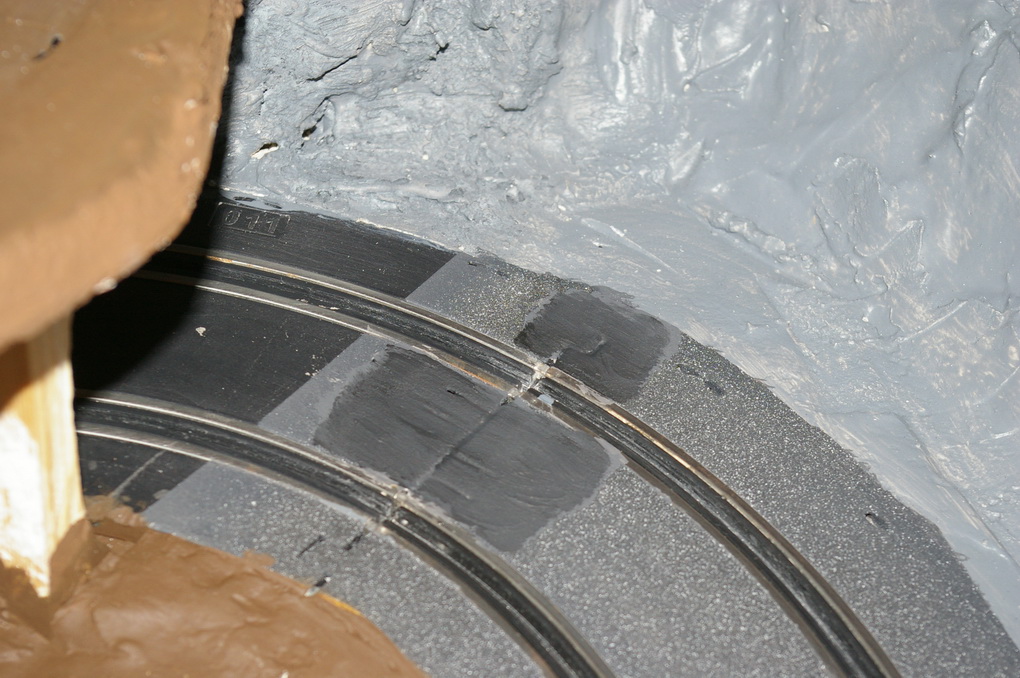
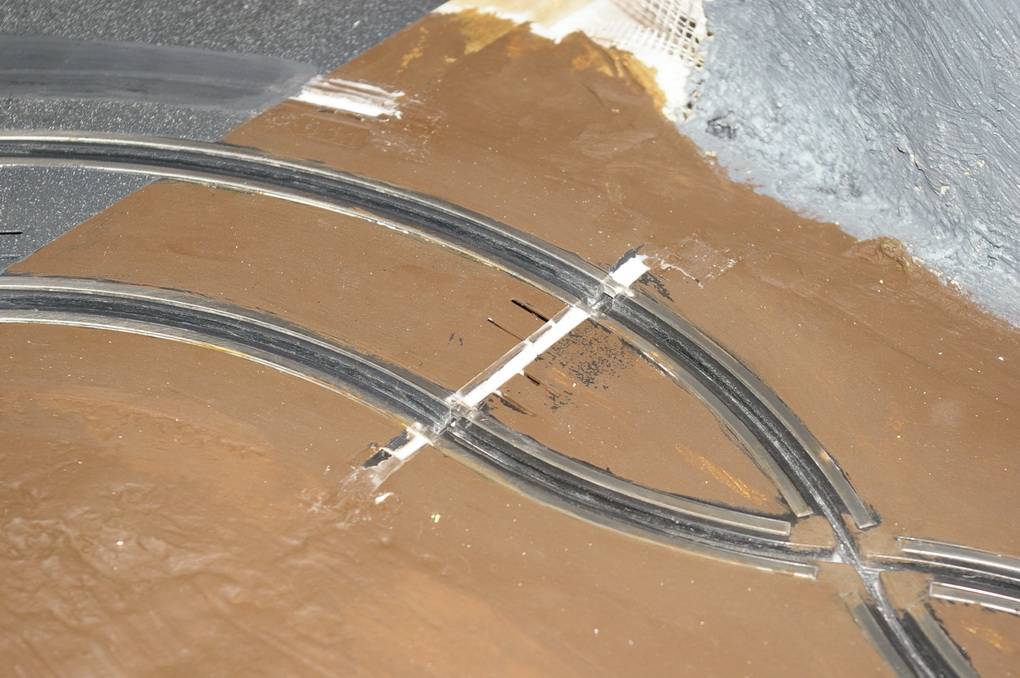
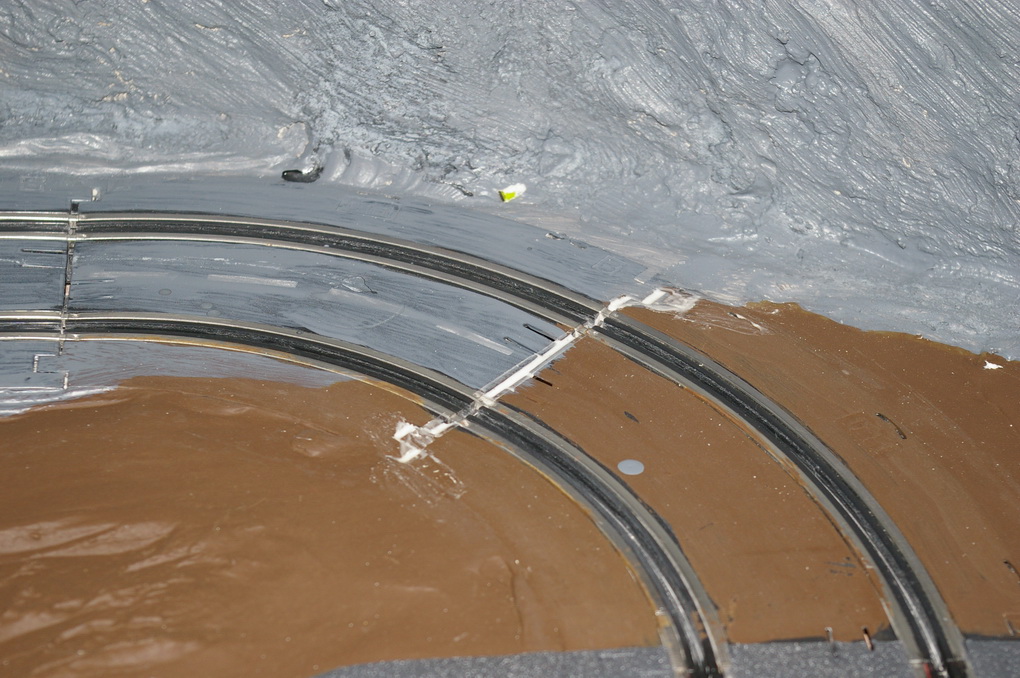
Time for repair work on the track and this is the end result, can anyone see the join between the old (Frock) and new (plaster on tape)? I decided that I needed a bit more room between the track and rockface so I decided to remove a lot of the remaining FRock and plaster on to tape as I had on the righthand side of the track. As you can see lots of tape and not a lot of foam anymore. So with tape in place plaster was mixed, the first batch was a bit to wet and didn't do a very good job of covering the tape. The next batch was a lot better and covered the tape quite well. The plaster was being textured as I was applying it as I was using a cheap nylon paint brush to apply and give the diagonal grain effect. I repaired the lefthand loop and then the sloped area in front of the central climb was replastered and all the existing rockface (Frock and foam) was blended into the new plaster.
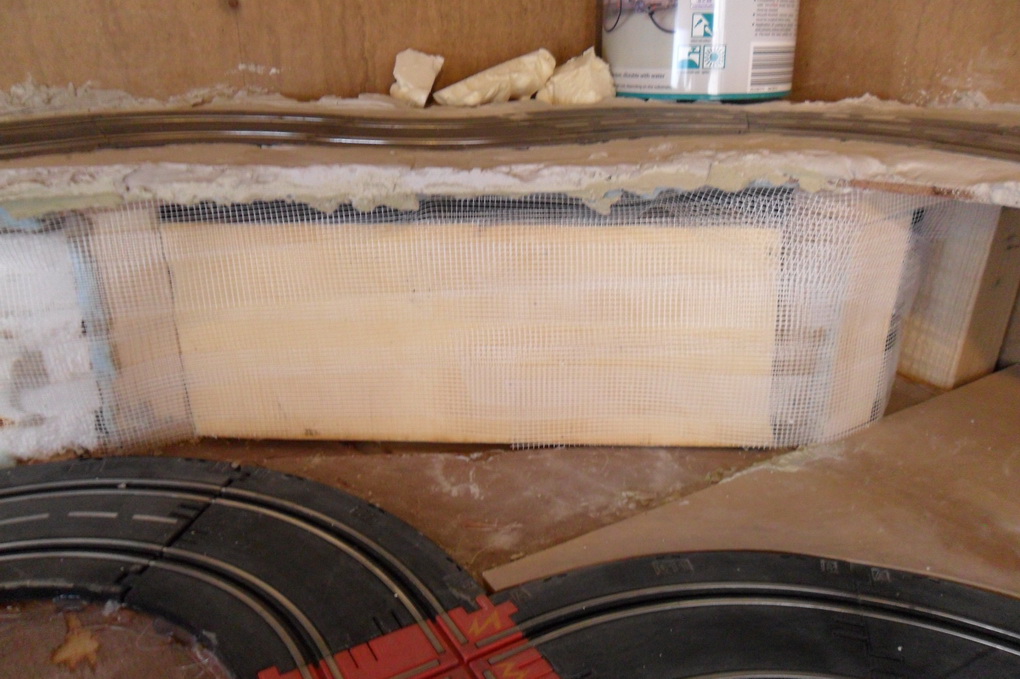
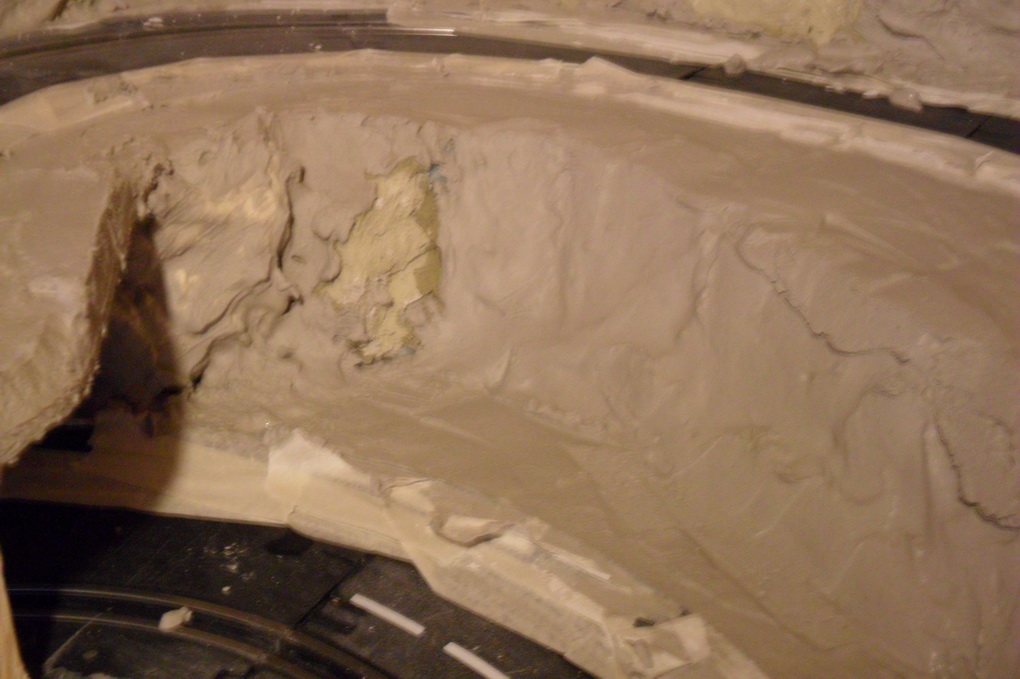
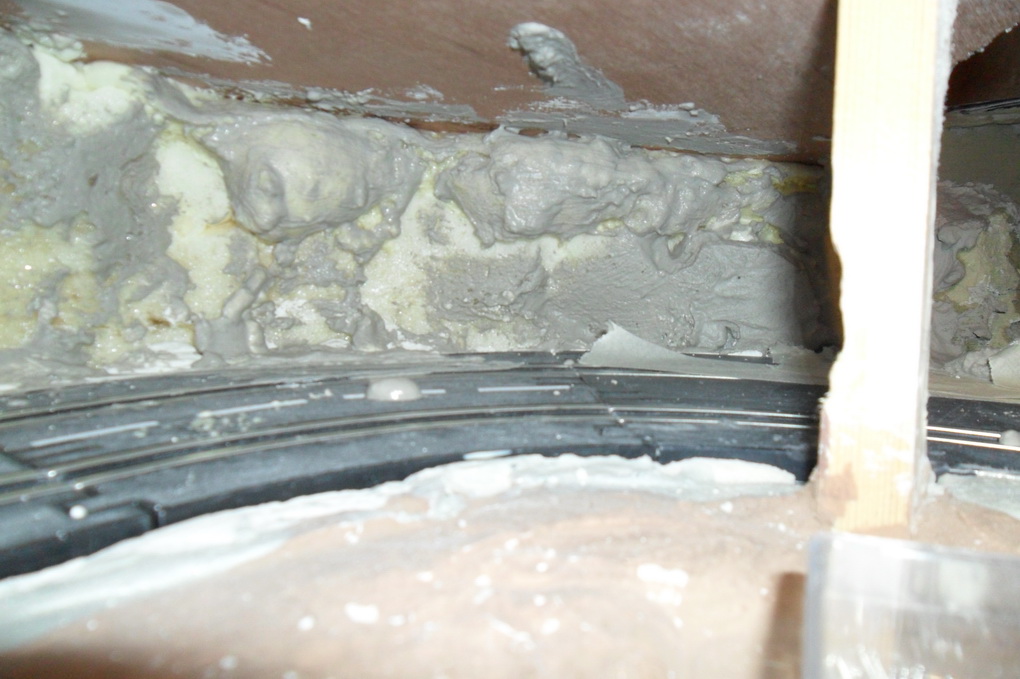
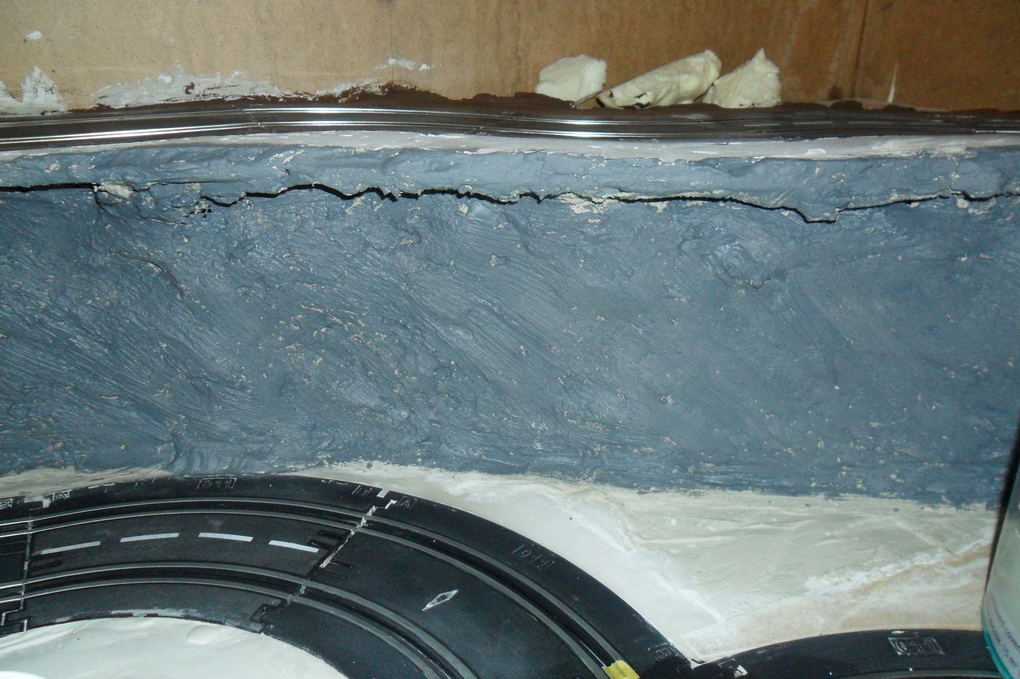
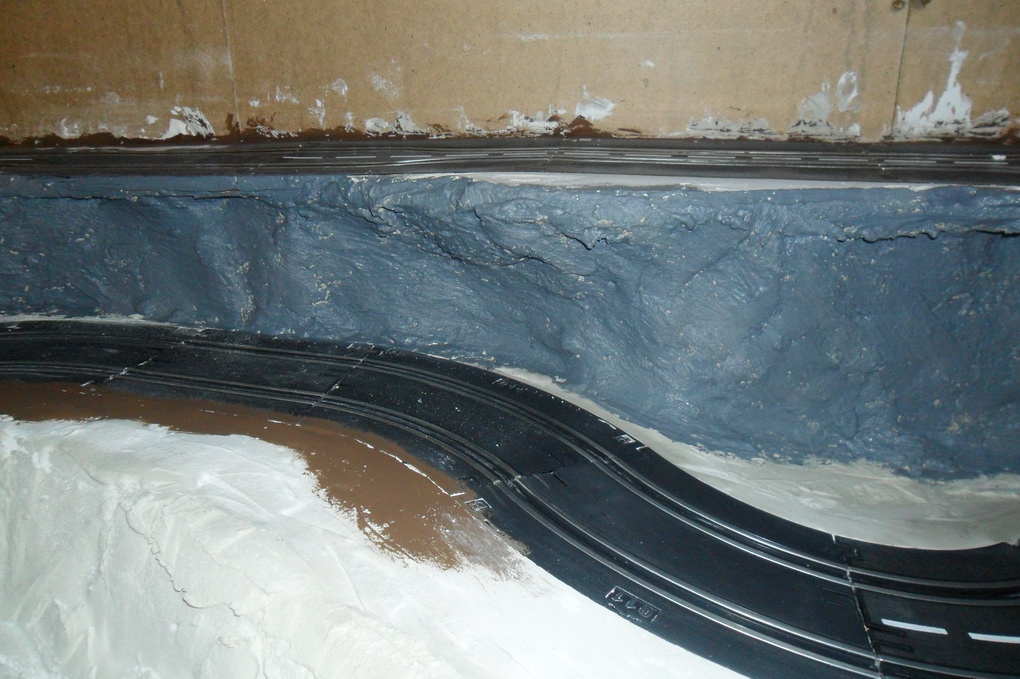
While I had the plaster mixed I also gave the foam under the underpass a thin coat. I then gave all the vertical rockfaces another thin coat of plaster including the foam under the overpass and the rockface on the righthand side.
rally in a shed 2 0354
rally in a shed 2 0355
rally in a shed 2 0356
rally in a shed 2 0357
rally in a shed 2 0358
rally in a shed 2 0359
rally in a shed 2 0360

rally in a shed 2 0361
rally in a shed 2 0362

rally in a shed 2 0363

rally in a shed 2 0364
rally in a shed 2 0365
rally in a shed 2 0366
rally in a shed 2 0367
rally in a shed 2 0368

rally in a shed 2 0369
rally in a shed 2 0370
rally in a shed 2 0371
rally in a shed 2 0372
rally in a shed 2 0373
rally in a shed 2 0374
rally in a shed 2 0375
rally in a shed 2 0376
rally in a shed 2 0377

rally in a shed 2 0378
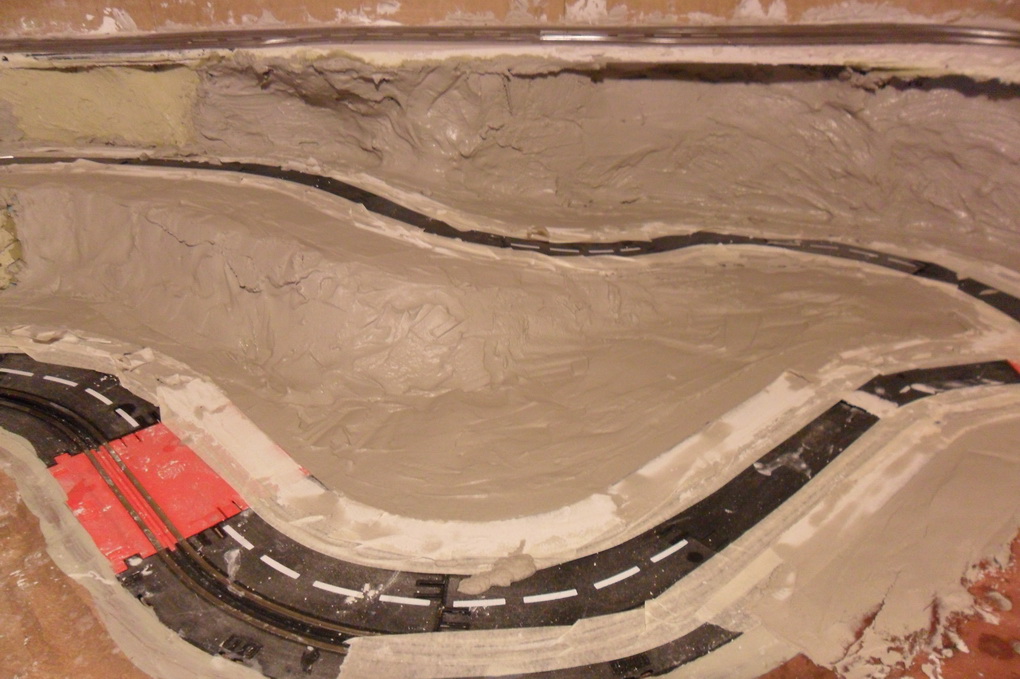
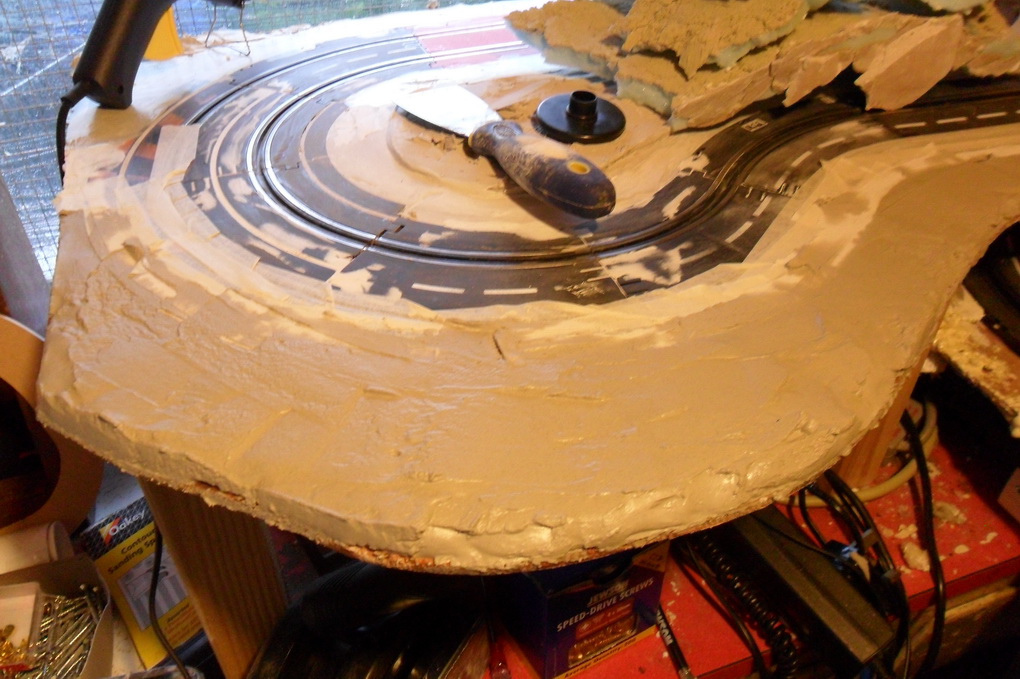
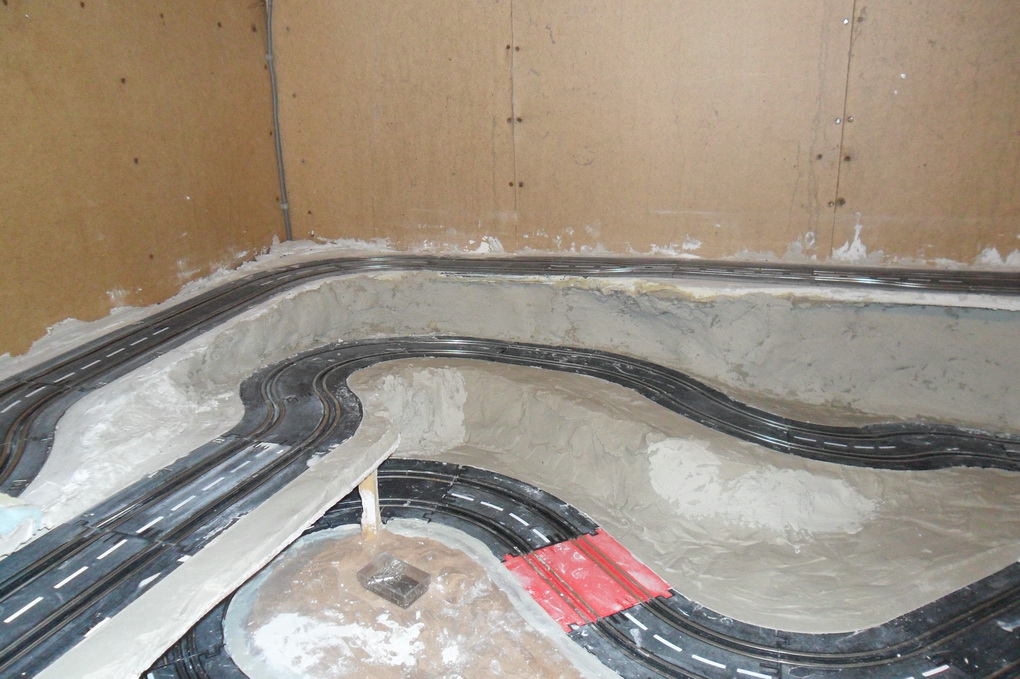
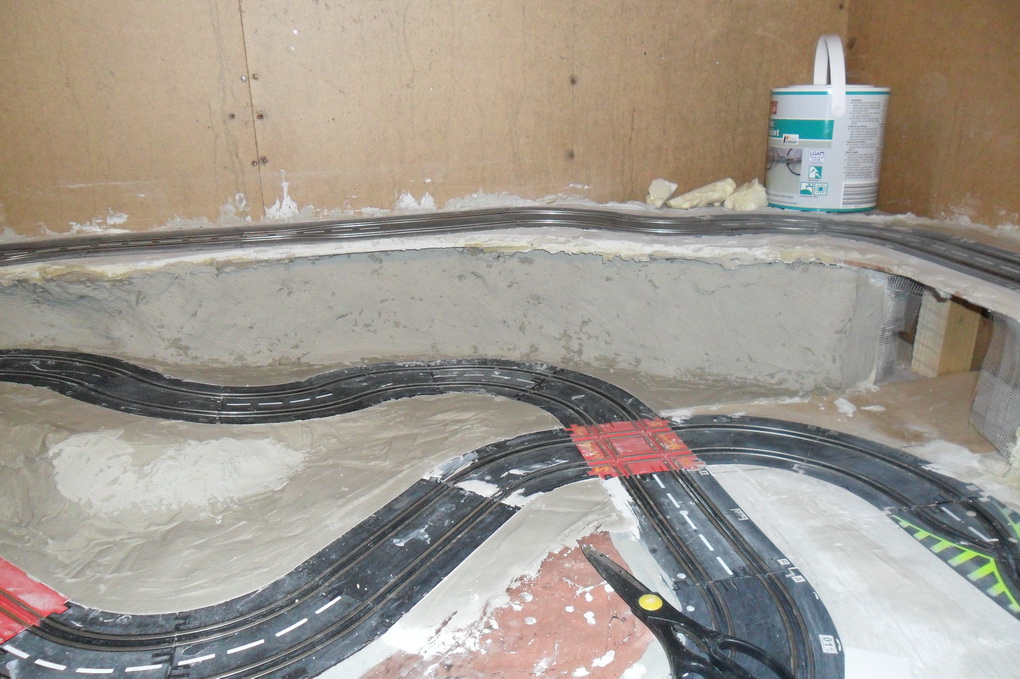
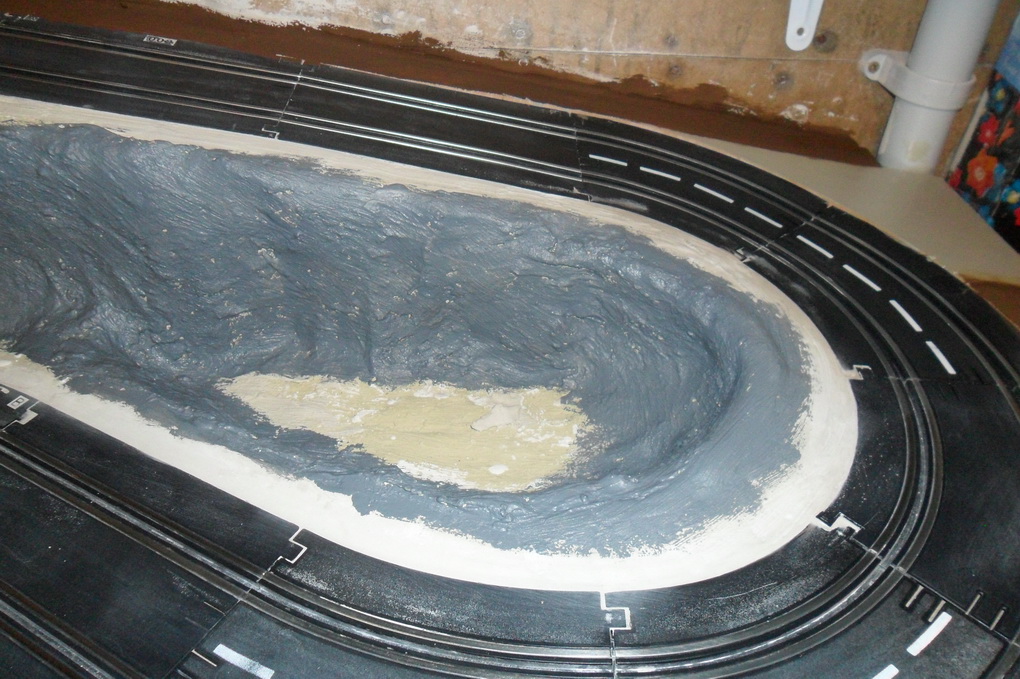
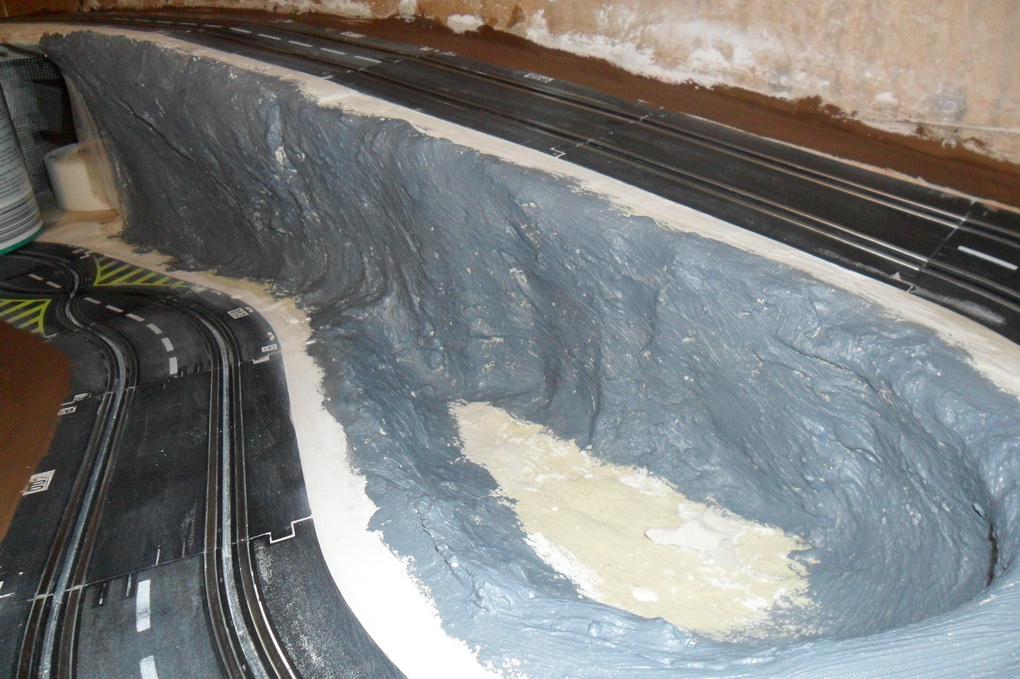
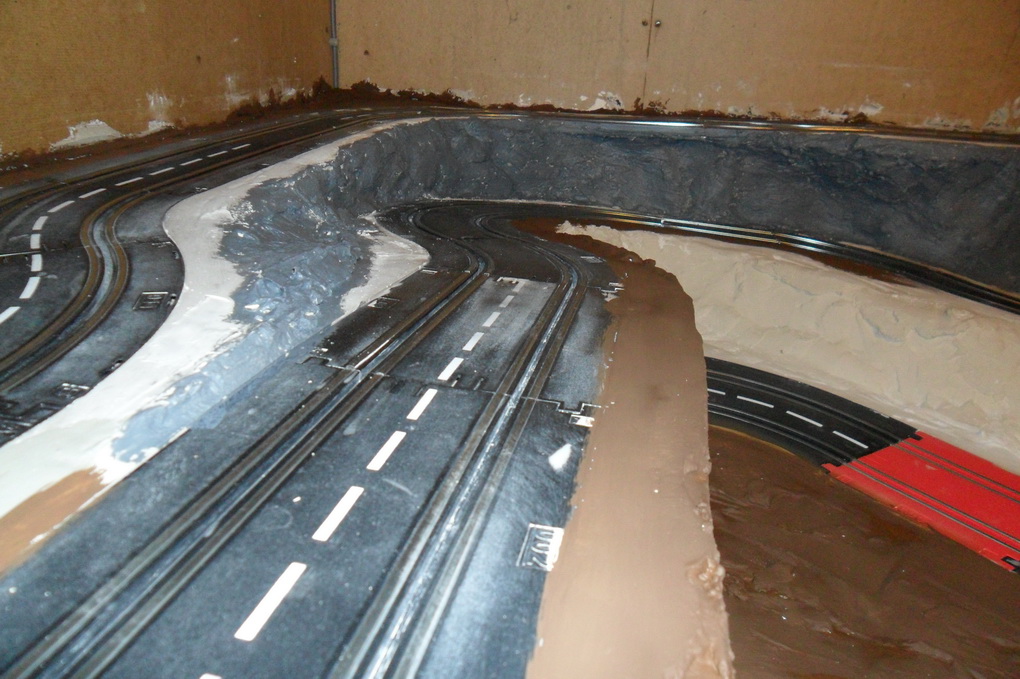
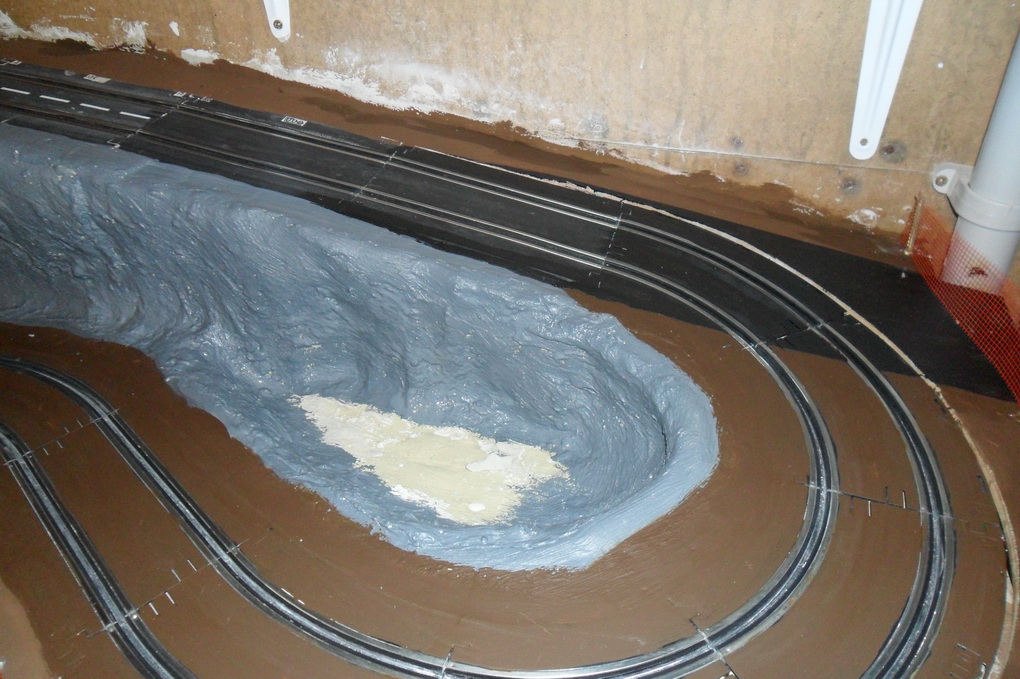
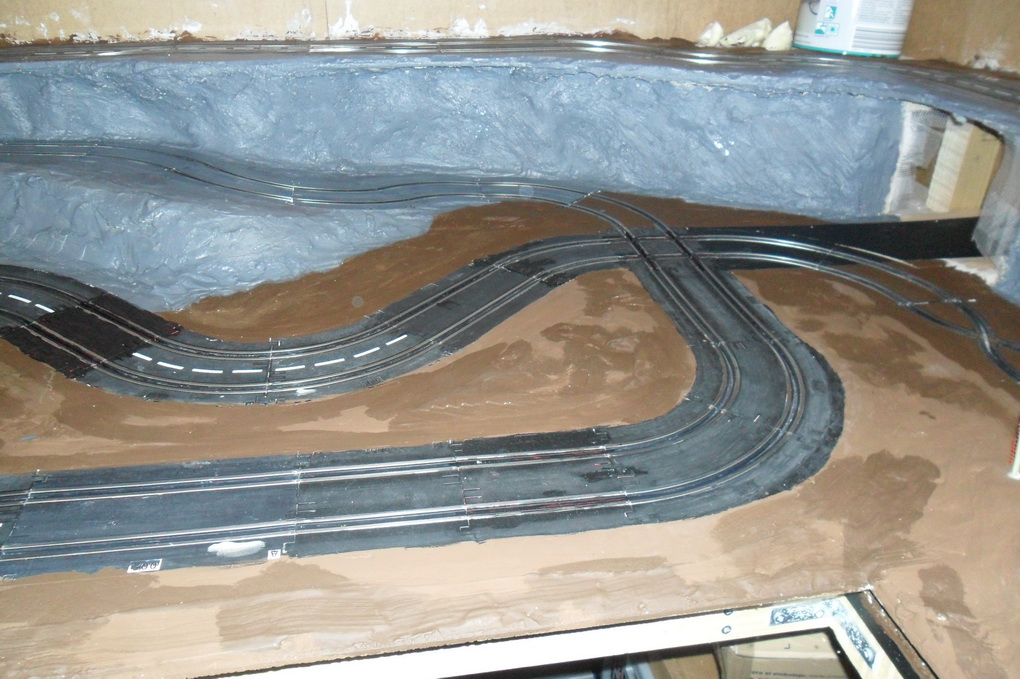
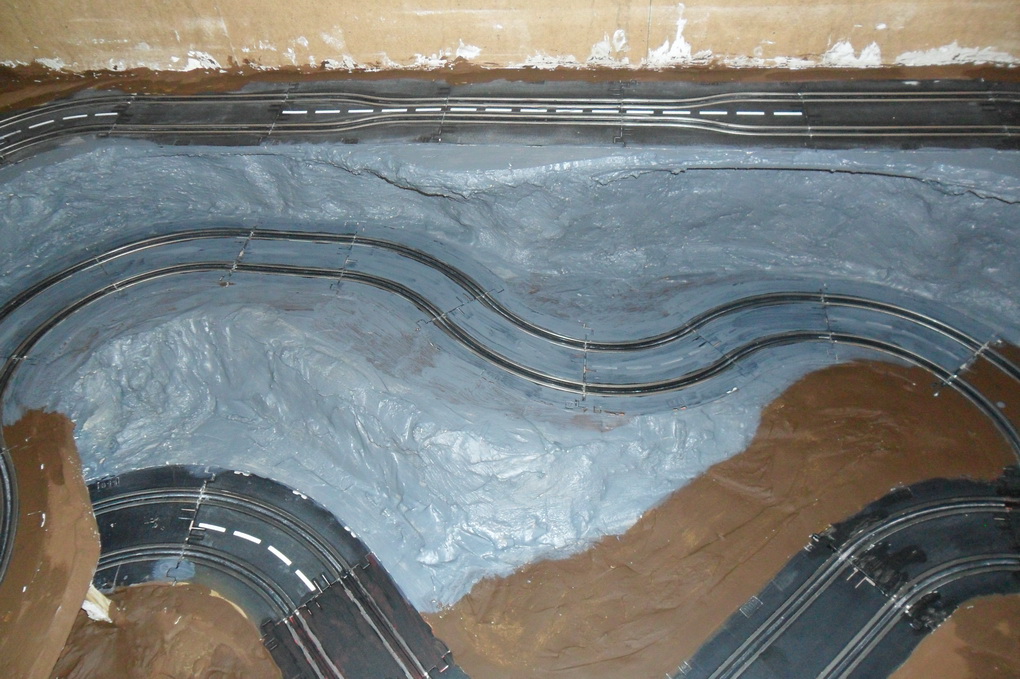
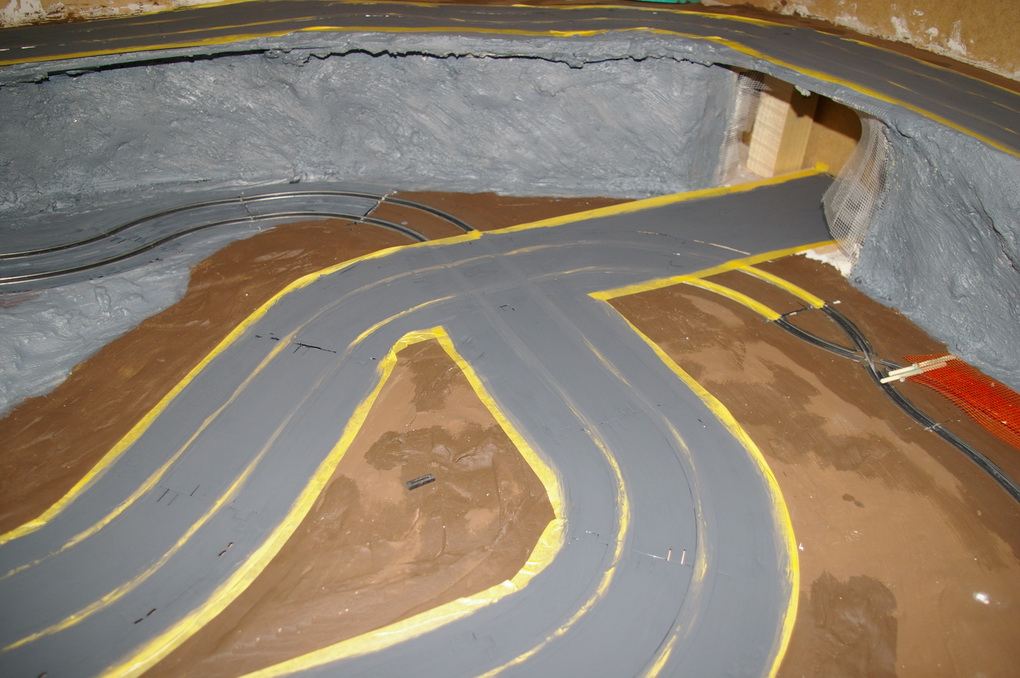
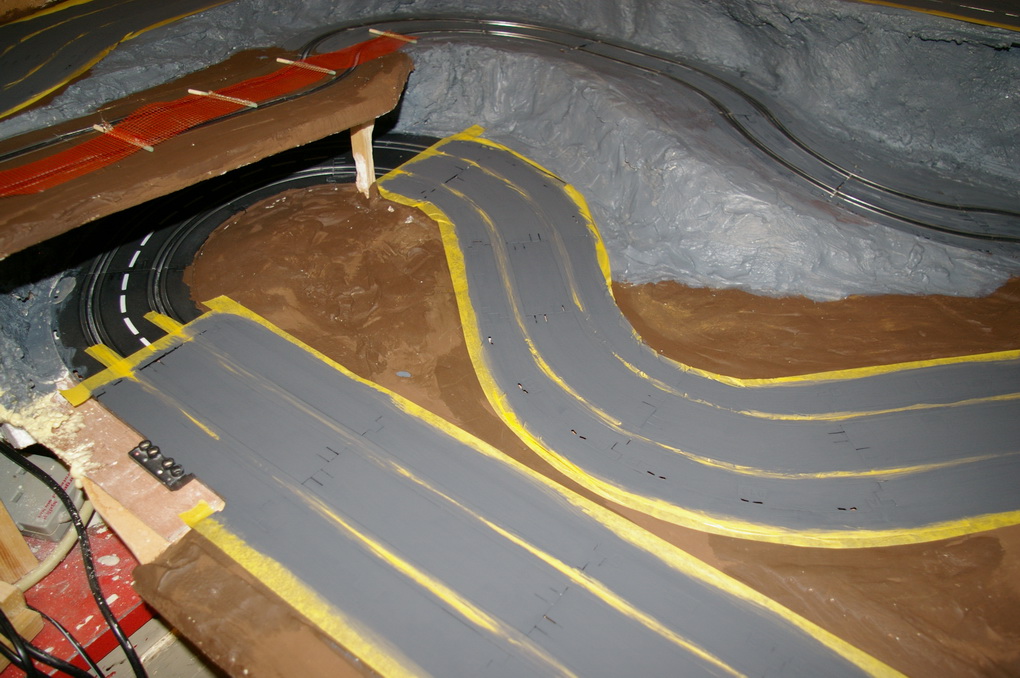
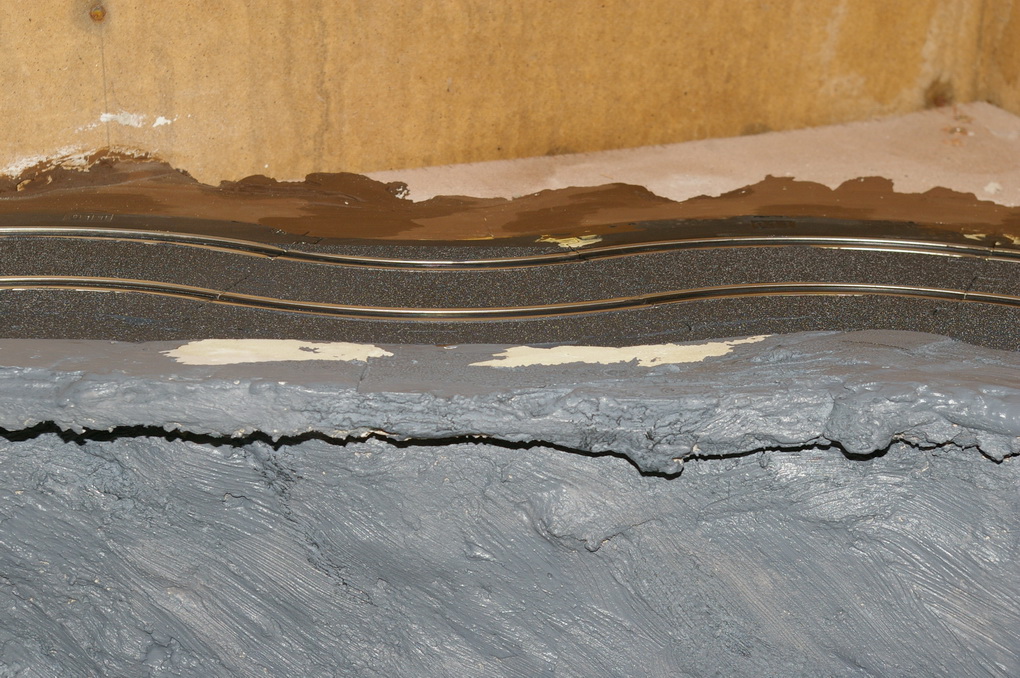
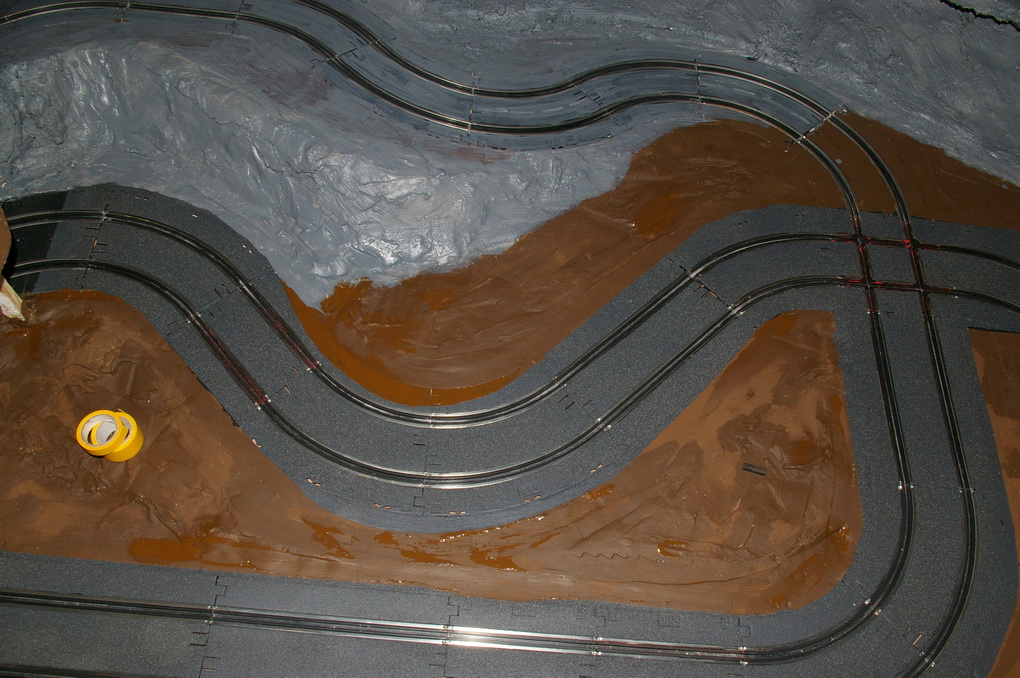
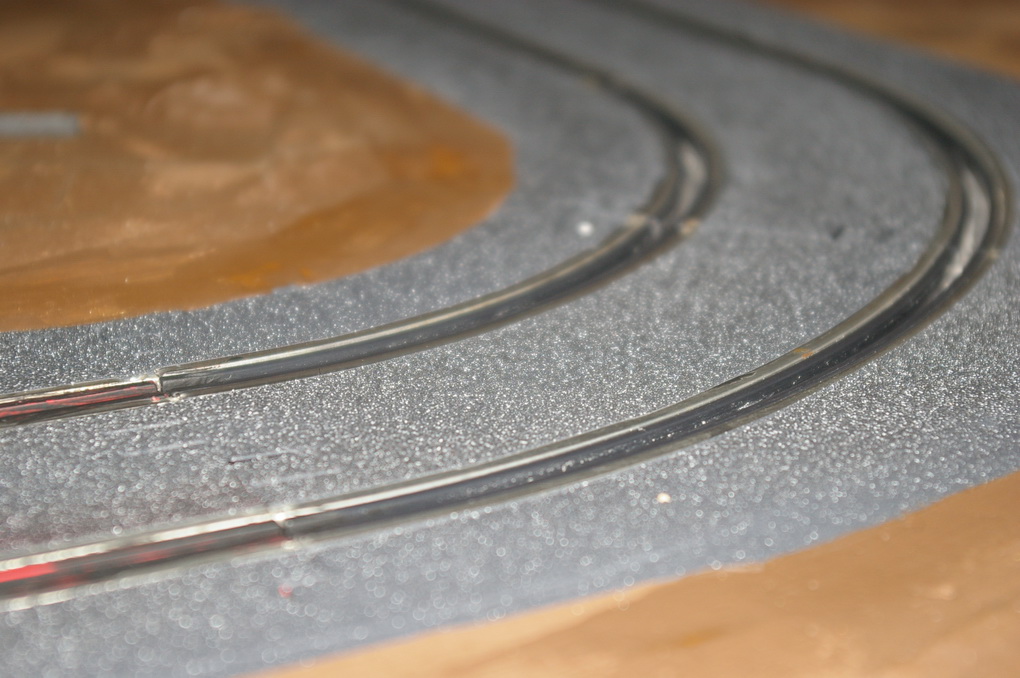
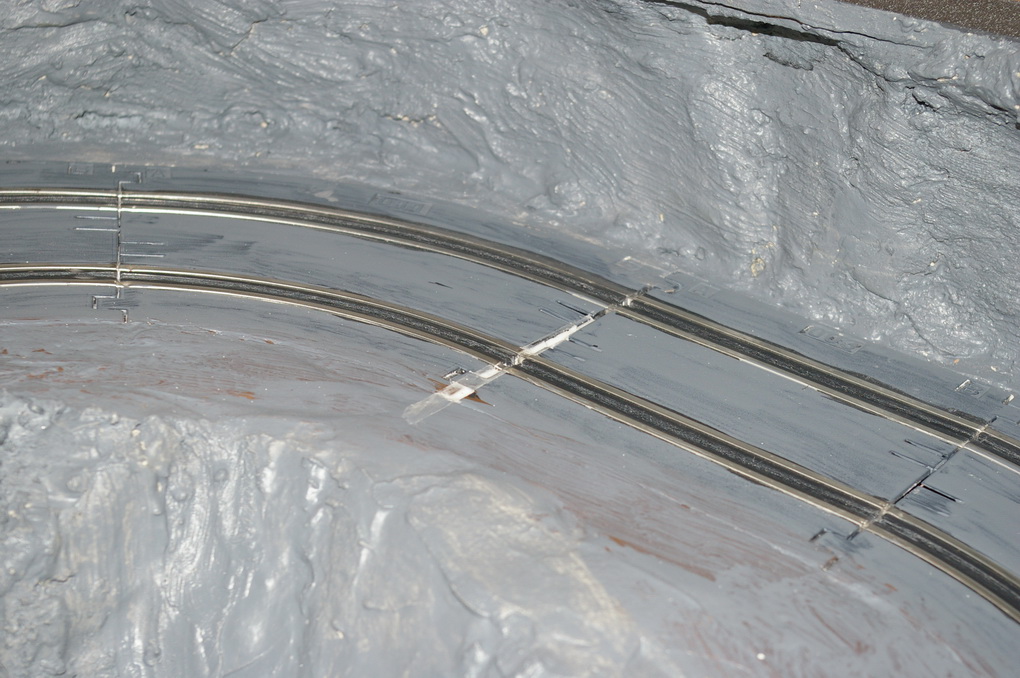
So now all the green coloured plaster has gone and we have a grey base to work with. The next job is to sand the new plaster around the edge of the track to widern the track width and give som run of areas so the cars can safely side. Hopefully the plaster when dry will be good enough to take some paint with out any further coats.
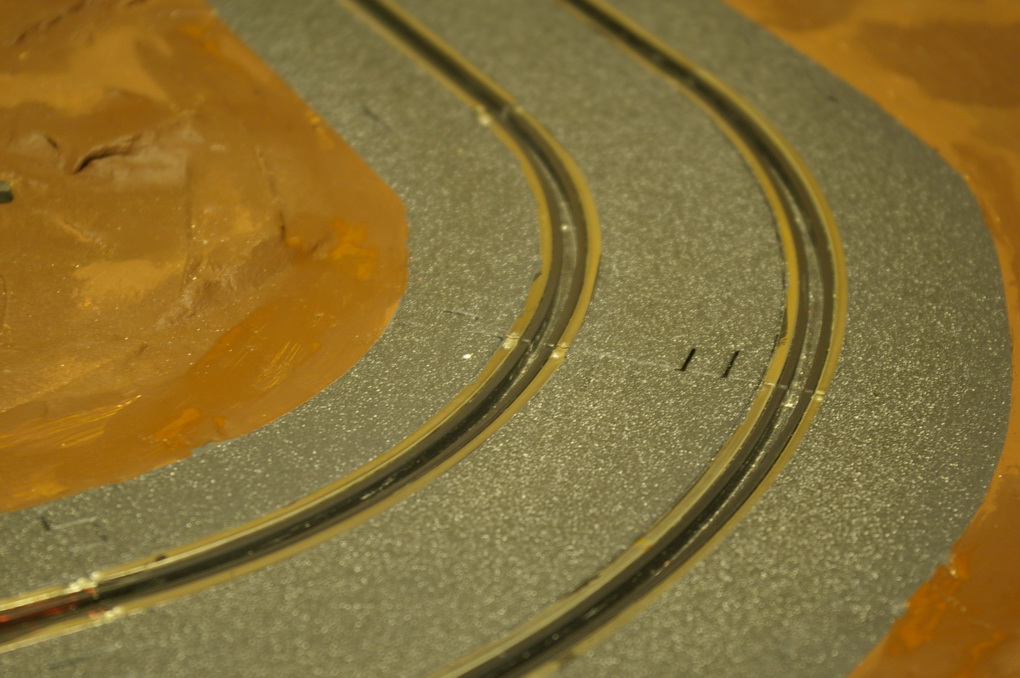
Plaster has had a week to dry and now I had to sand the plaster down around the track edge.This was the condition of the track after the plaster around the edge of the track has been sanded down. This was the condition of the track after the plaster around the edge of the track has been sanded down. I didn't sand the plaster as smooth as last time but I think it should still be ok. The track was then wiped down with a tac rag.
First thing to get painted was the rock faces with a darkish grey emulsion paint which should have a slight sheen to the finish. This will be the base coat for the grey sandstone cliffs. Next it was brown paint to do the earth areas most of which will probably disappear under grass and trees, again its emulsion paint but matt this time.
Up to now I had been using an Artin power supply to power the track but I'm not sure this has quite enough power for some cars. I have a Multi voltage power suppy that can be set to 5, 6, 7.5, 9, 12, 13.5 and 15V and can suppliy up to 3 amps depending on the voltage It is also a switched power supply. One other problem with the Artin supply was the apart from the Auto Art Evo which has a direction switch on the chassis all the cars run the wrong way around the track. So while the paint was drying I wired the power supply up with a DPDT switch in the power line to the track so I can run all the cars in either direction now.
Then it was time for a couple of experiments, first the track was given a clean with a heavy duty hand cleaning wet rag. This is designed to clean dirt, oil, grease and even paint from hands so I thought I would see how good they are at cleaning the track surface ready for painting.
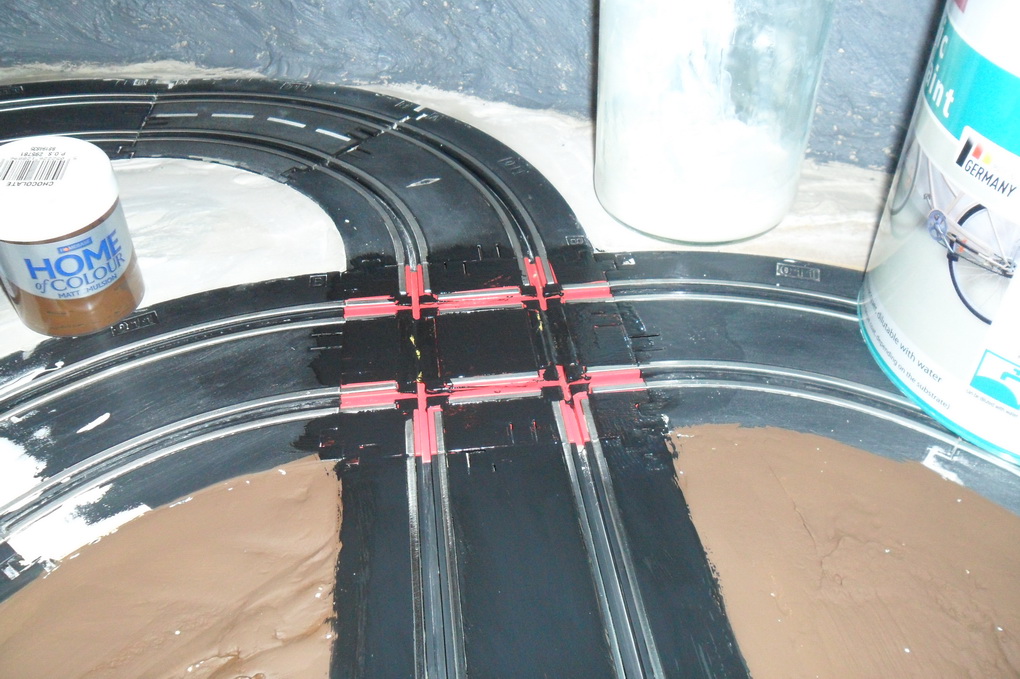
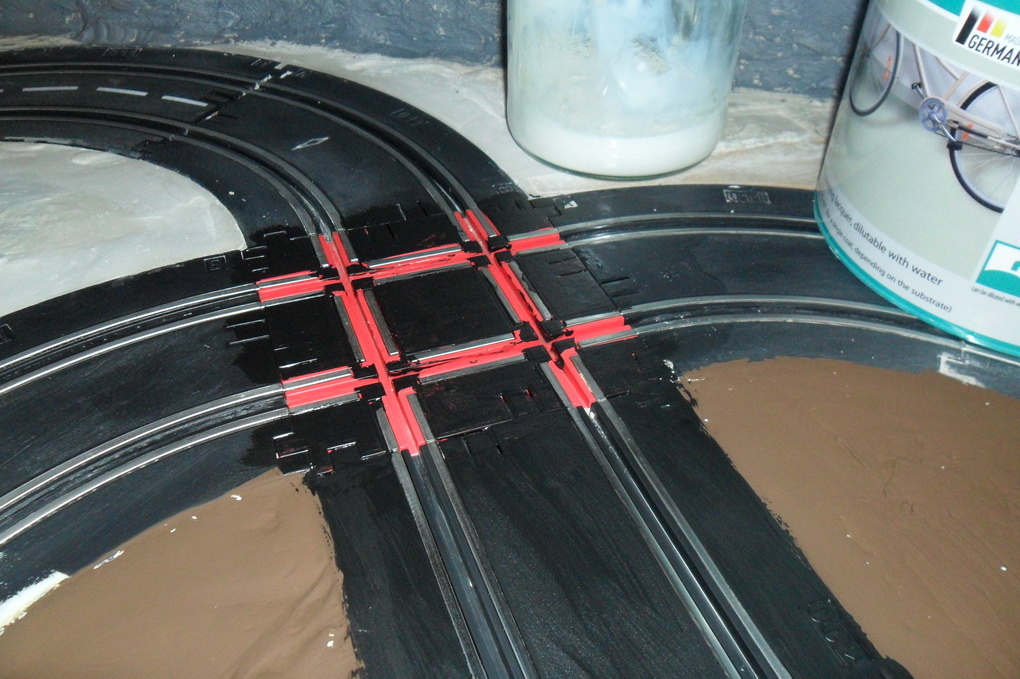
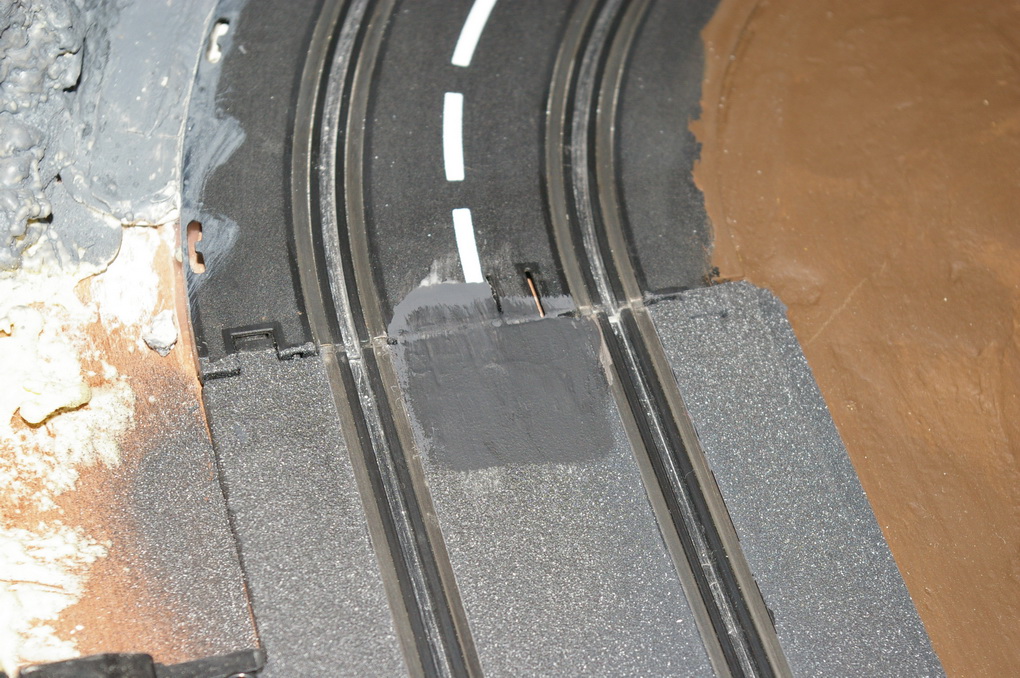
It is going to be a while I think before the plastic track gets painted so I thought it would be a good idea to lose the red pieces of track and paint in the road extentions going to the edge of the track and may be even the tunnel road. I therefore masked of the slot and rails and painted the track from the cross roads to the red piece at the front. As you can see the red plastic does present one problem in the the slot and plastic in side the rail now stick out like a sore thumb. I think I may have to try giving this area a thin coat of paint.
The road by the lefthand loop has also been painted. The black colour will not be the final finish but I want to see how this Heavy duty paint holds up to being run on. I may also paint the tunnel road and the road at the bottom of the righthand climb. But as I said the is an experiment to see how the paint takes being run on and how good the hand cleaning cloths are at cleaning the track to take paint. The paint certainly appears to have taken to the cleaned surface with no problems.
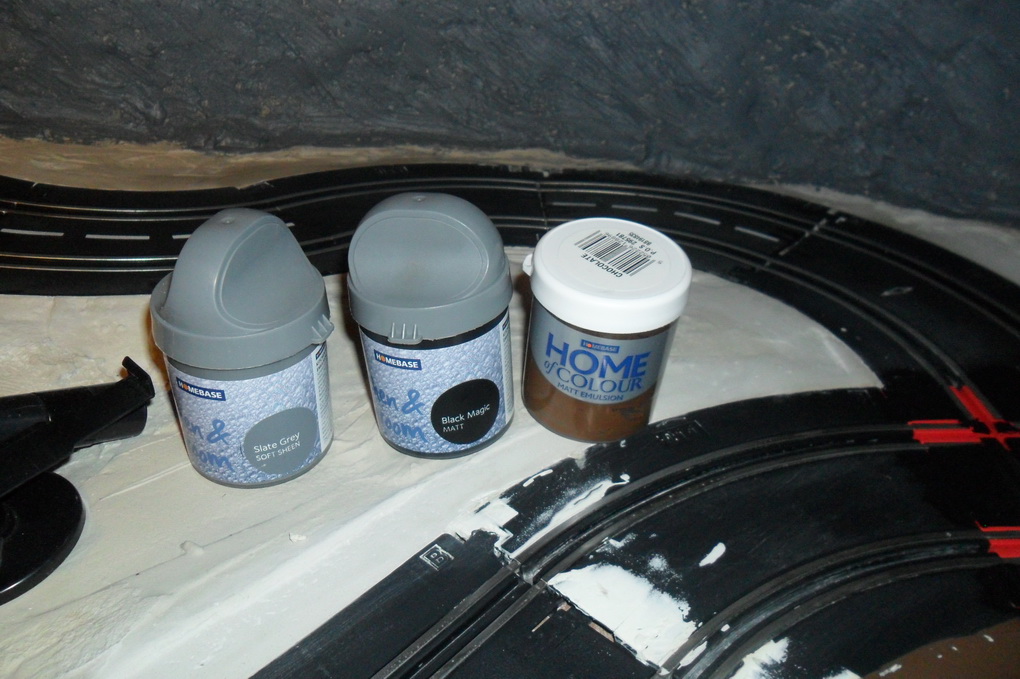
I keeping with my building to a very tight budget 3 pots of paint testers £1.59 each and it was discount weekend at Homebase and some other offer on the paints so total cost £3.29. I need to get some more brown and grey and some lighter shades of grey for the cliffs. The black and the grey are both a heavy duty emulsion designed for kitchen and bathrooms and are supossed to be hardwearing.
rally in a shed 2 0379
rally in a shed 2 0379 1
rally in a shed 2 0380
rally in a shed 2 0381
rally in a shed 2 0382
rally in a shed 2 0383
rally in a shed 2 0384
rally in a shed 2 0385
rally in a shed 2 0386
rally in a shed 2 0387
rally in a shed 2 0388
rally in a shed 2 0389
rally in a shed 2 0390
rally in a shed 2 0391
rally in a shed 2 0392
rally in a shed 2 0393
rally in a shed 2 0394
rally in a shed 2 0395
rally in a shed 2 0396
rally in a shed 2 0397
rally in a shed 2 0398
rally in a shed 2 0399
rally in a shed 2 0400
rally in a shed 2 0401
rally in a shed 2 0402
rally in a shed 2 0403
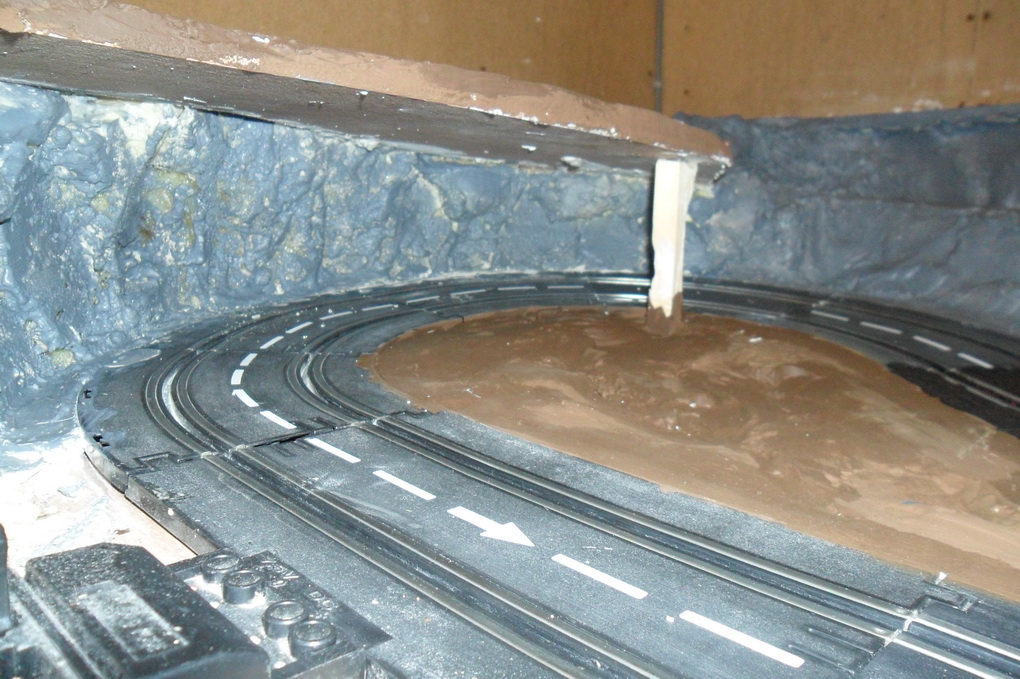
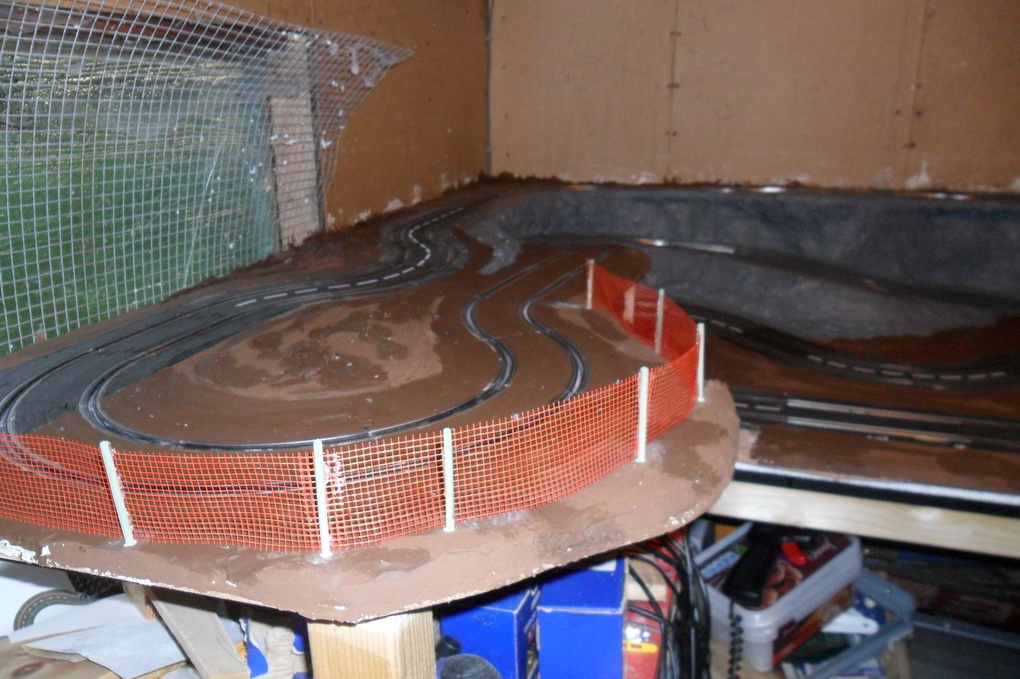
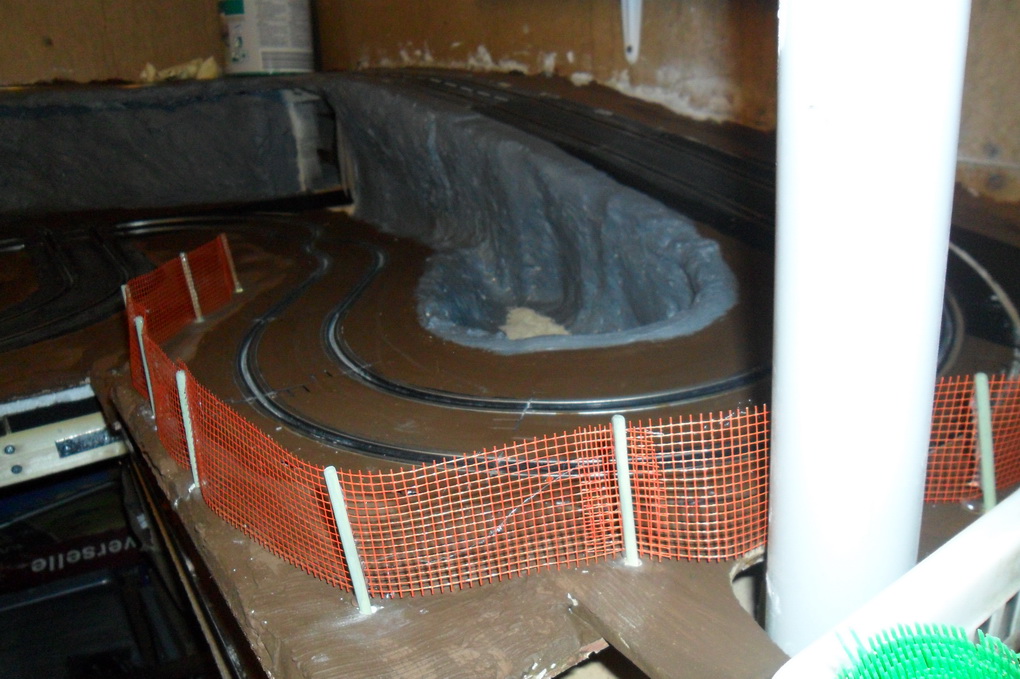
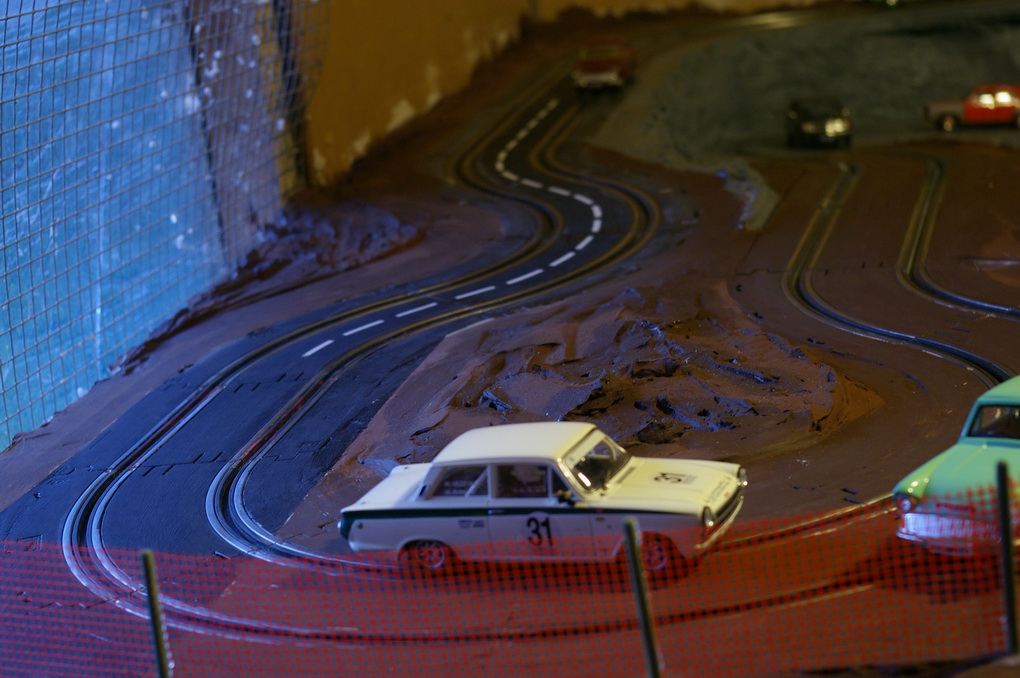
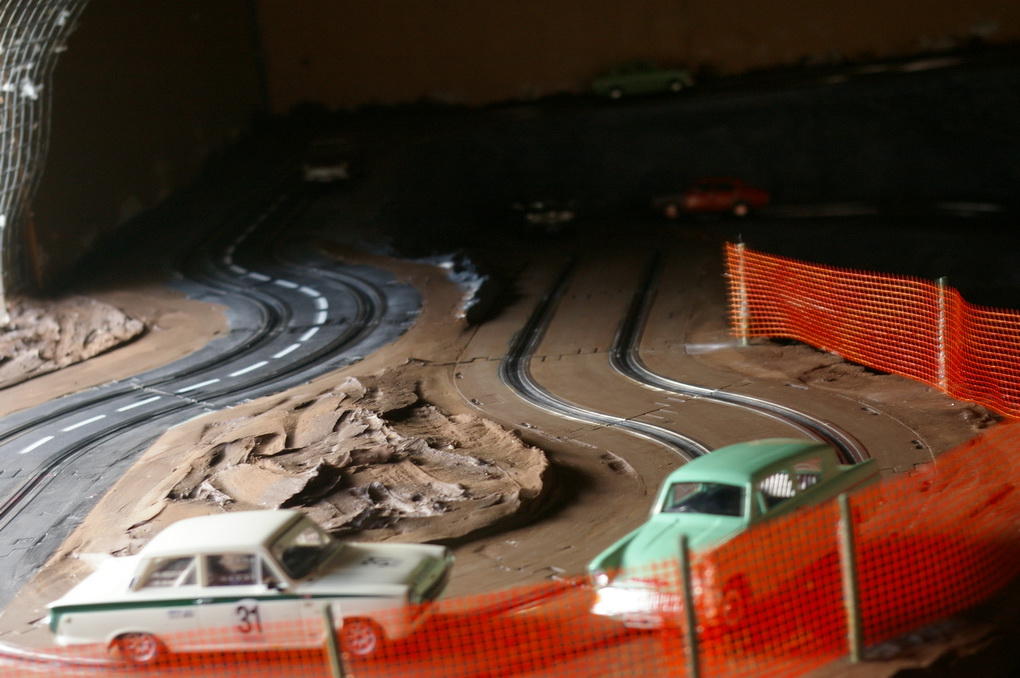
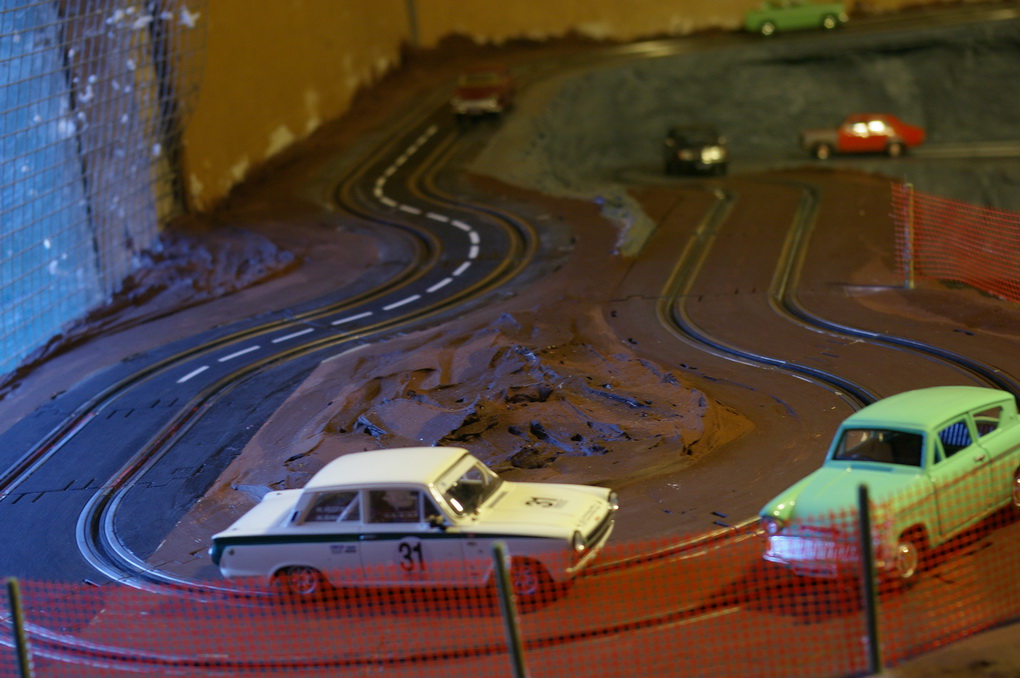
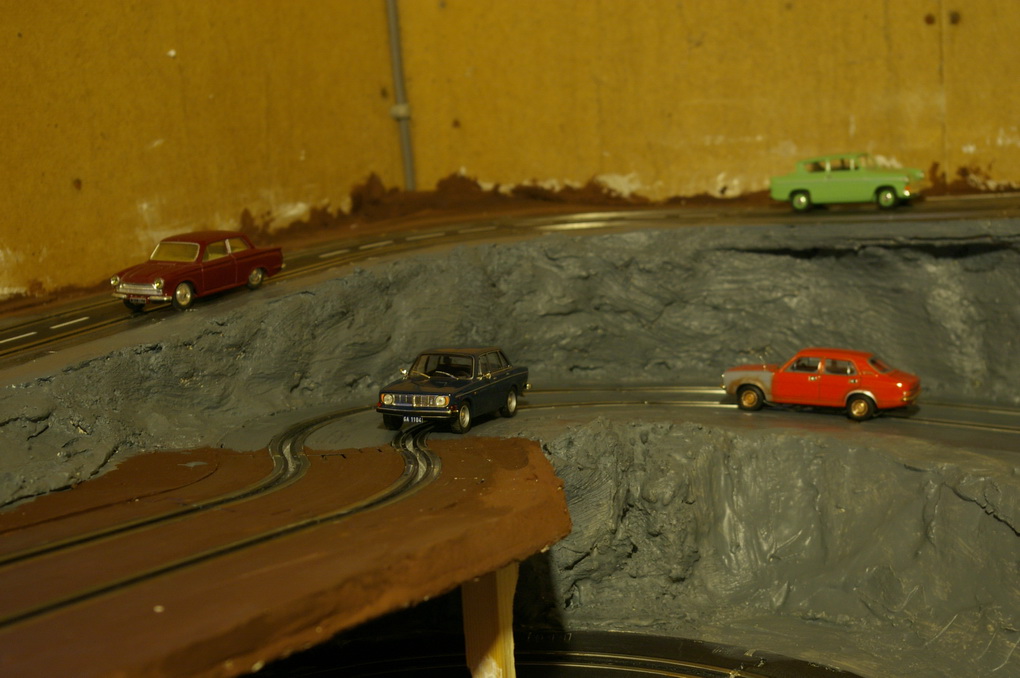
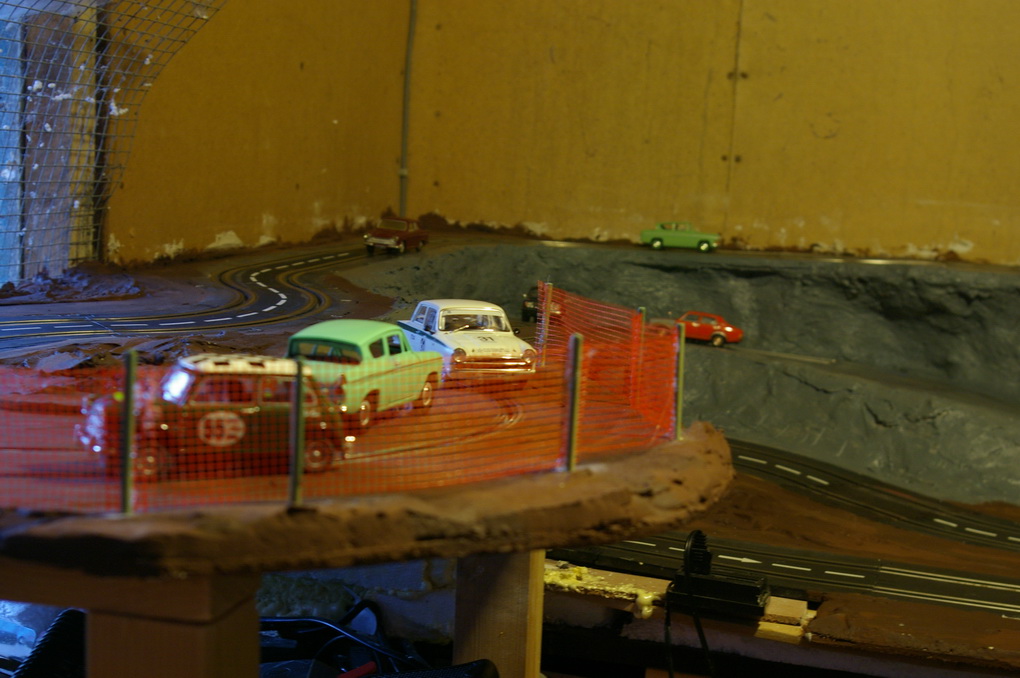
My general secnic plans are for the section in the middle of the front oval to be trees, with them also running part way up the slope behind this with grass around the edges of this section and earth for the rest of it. The area to the right will be all grass with either a gravel road surface or earth / mud. The rear raised section, righthand climb, left hand outer and all the front oval going on under where the tunnel will be area all going to be tarmac road. From the end of the road the lefthand / rear slope will be gravel. The tarmac and gravel surfaces are going to be finished with Plasti-Cote Stone effect paint (dark grey for tarmac and light grey and or pinkish for gravel which will be what is called MOT type 1 over here, crushed limestone). Part of the chicane at the back will be painted as muddy road as there will be a farm gate leading in to the farm fields beyond, this muddy area will be painted with Johnston Clear to give a shine to the road and reduce the grip here. Any othwer areas that get a muddy effect will also get the clear treatment to give the effect of a slippery surface. The rough area just under the over hang will be coated in Clear as this area will be muddy ( water dripping down from the overhang). I'm also thing of filling the dip inside the righthand loop with water effect of some sort. The way I see it the tarmac road areas need to be finished before the the border areas around it so mud and gravel etc get pulled on to the tarmac but the grave road surface need to be done last as the gravel will spread out in to the borders. Road edge barriers are at the moment looking like being Armeco along the tarmac raised sections. Dry stone walling at the front for the track. Orange safety barrier fencing around both loops. With hedges, straw bails and road cones in other places. The thing also is that at all time it must look ok for 1/32 and 1/43 scale cars so for instence I can't make the road surface to wide but as it's all country lanes or tracks this is not a real problem (narrow lanes in 1/32, wide lanes in 1/43).
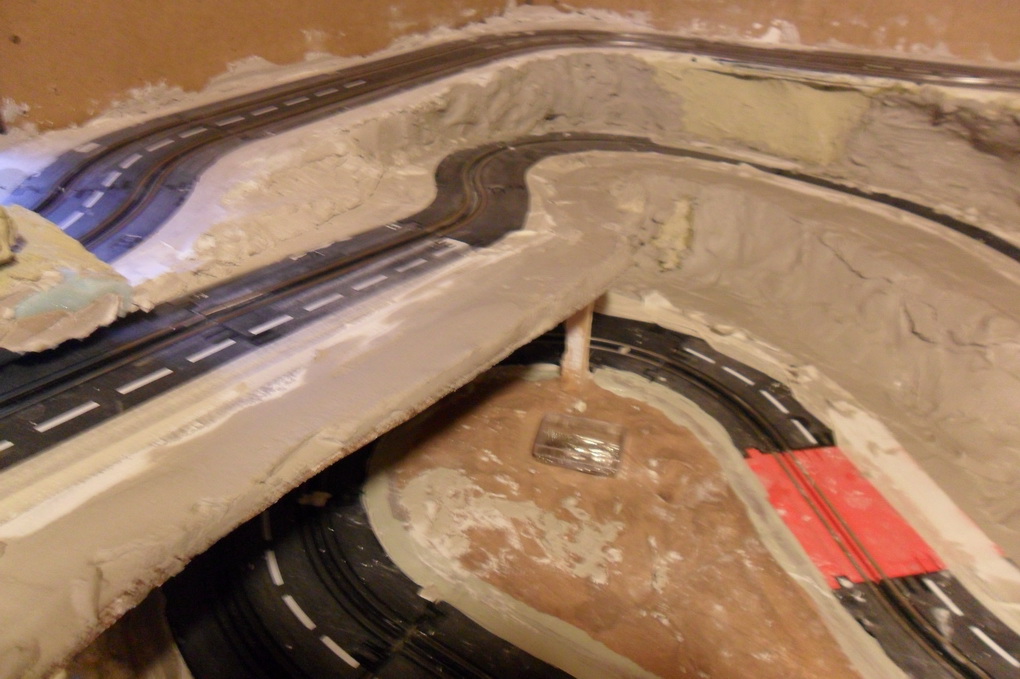
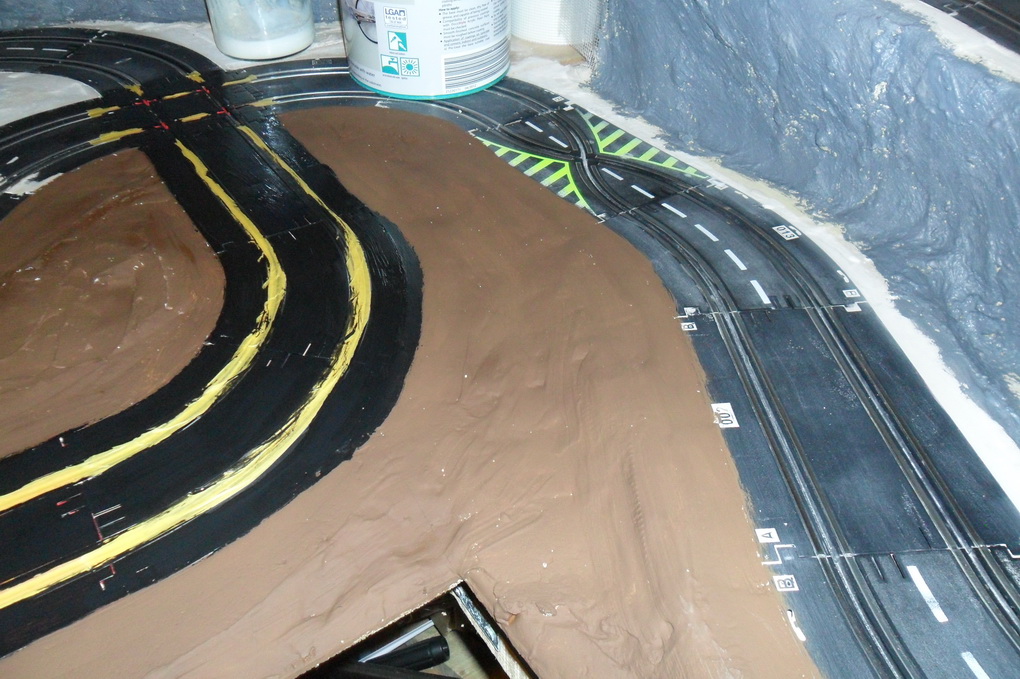
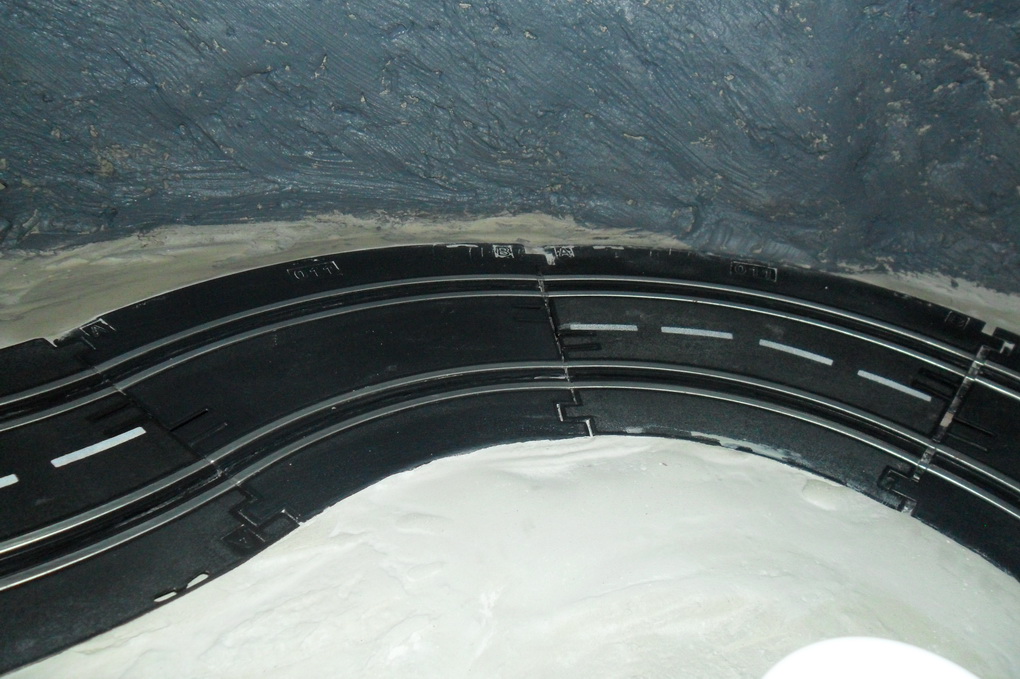
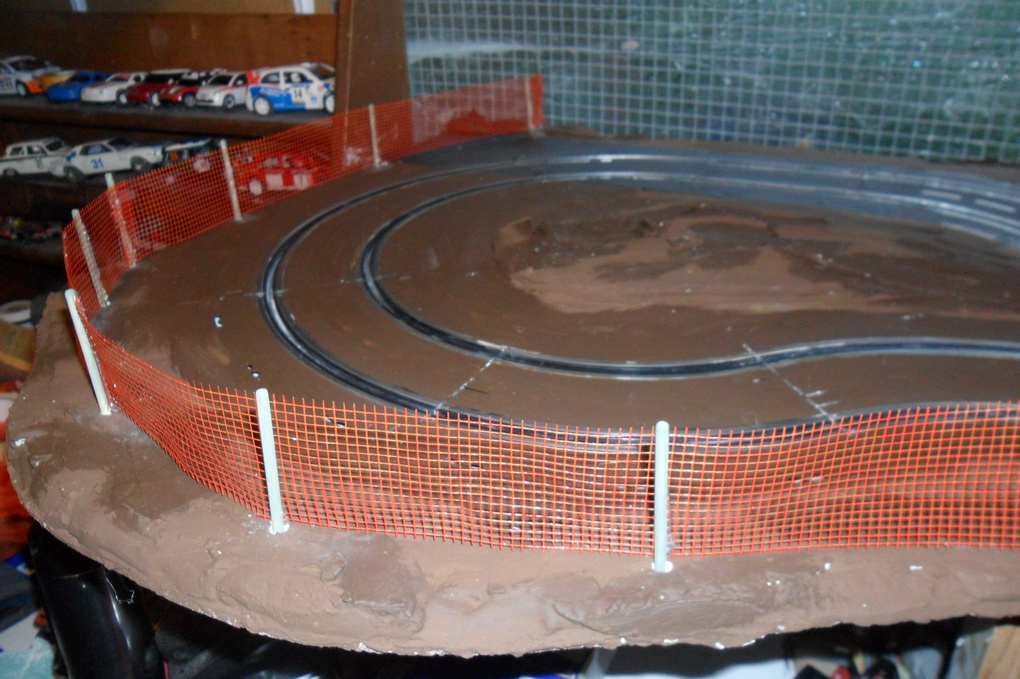
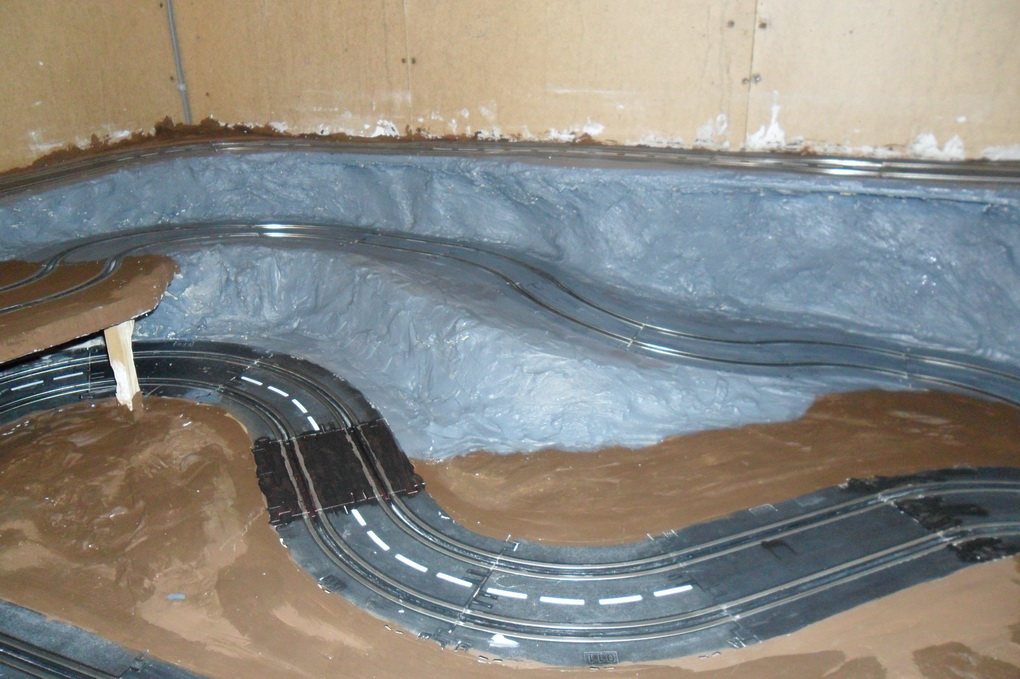
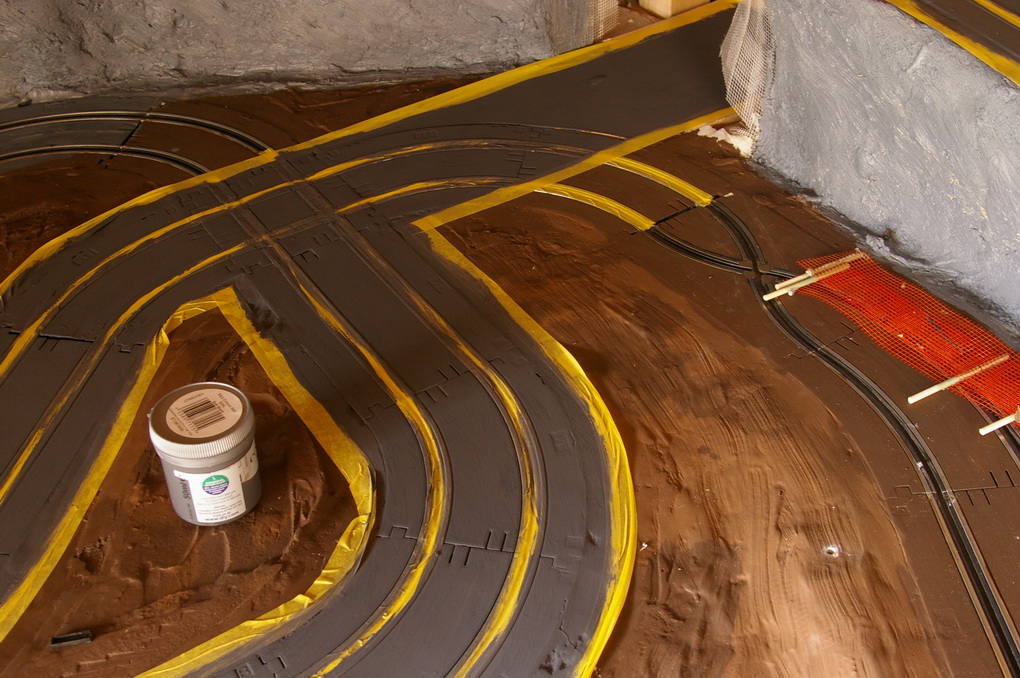
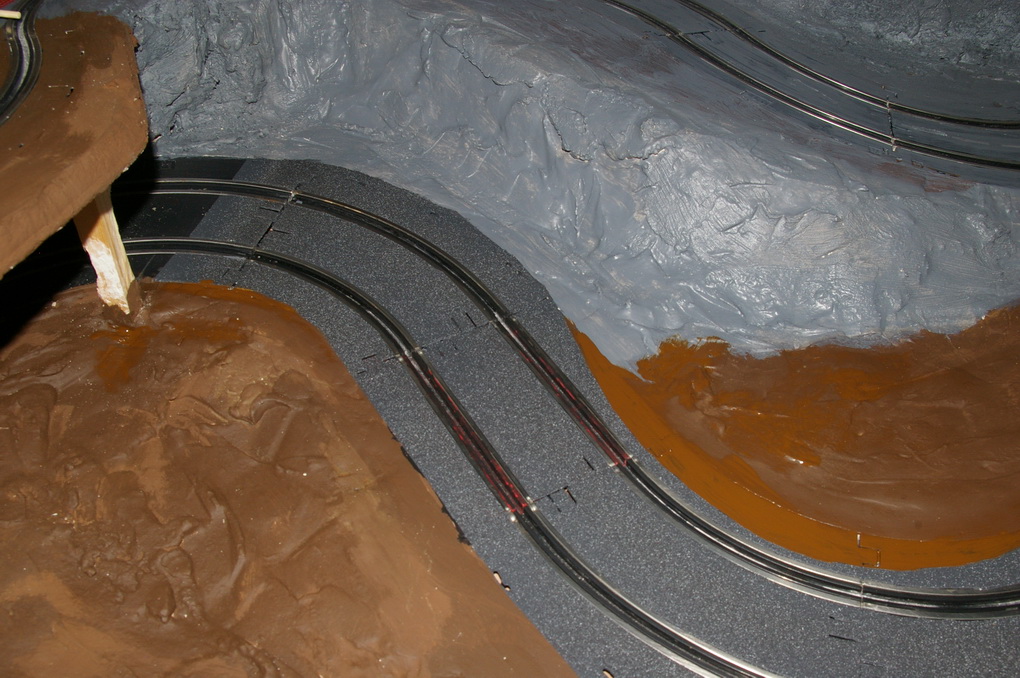
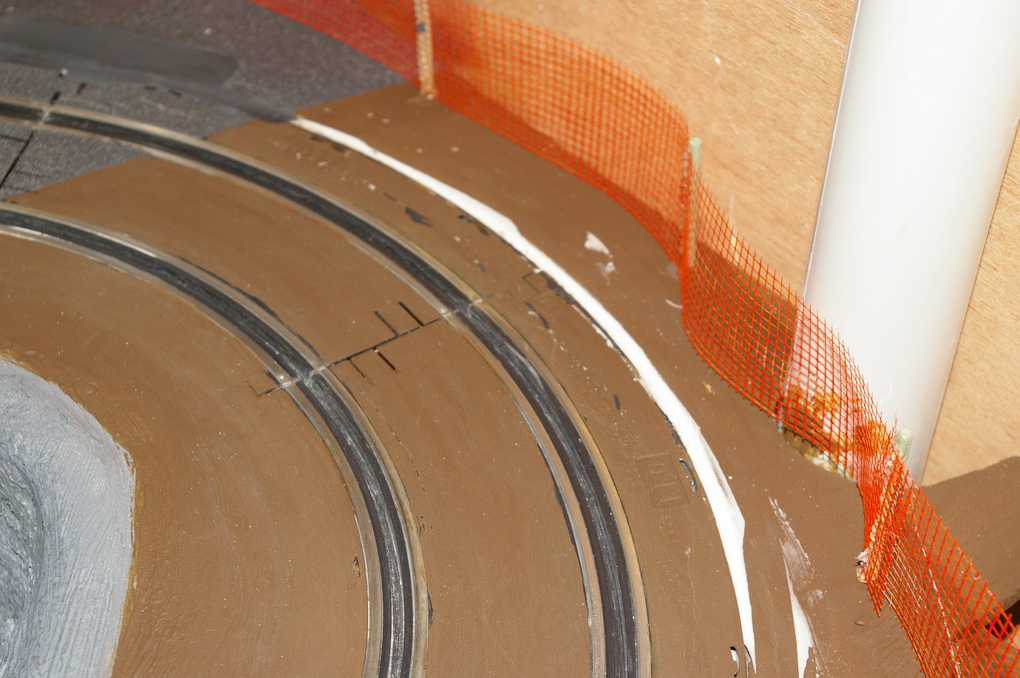
I've been thinking about how the area my track is in would have been built up in real life. The base layer is the grey sandstone and on to this a layer of earth would have been built up. In to this is cut the tarmac road which to start with would have had a nice straight edge but as anyone who knows English country lanes will tell you the edge soon starts to break away. The right hand side of the track is a grass field with a gravel track running through it and with this in mind I have given the track here a brown base coat.
Also as you can see I have painted in the road continuation at the loop and from the crossroads going in to what will be the tunnel. I have also done th same on the lefthand loop.The rear slope is in an area were the sandstone has been quarried so the gravel track here is laid directly on the sandstone surface so I have give the track here a base coat of the same grey as used on the rockface.
I also gave the rockface a second coat of grey paint thin this time so it was easier to get in the small cracks in the plaster, I also painted under the overhand. Boy is this a difficult area to paint, I had to work by torchlight to see what I was doing and because of how I make the rockface in the area it is very uneven with lots of holes and pockets. It will need a few more coats of paint before it's ok.
I have also given the slots in the red track pieces a coat of black paint, only a thin wash a couple of more coats will be needed but at least it's looking better.
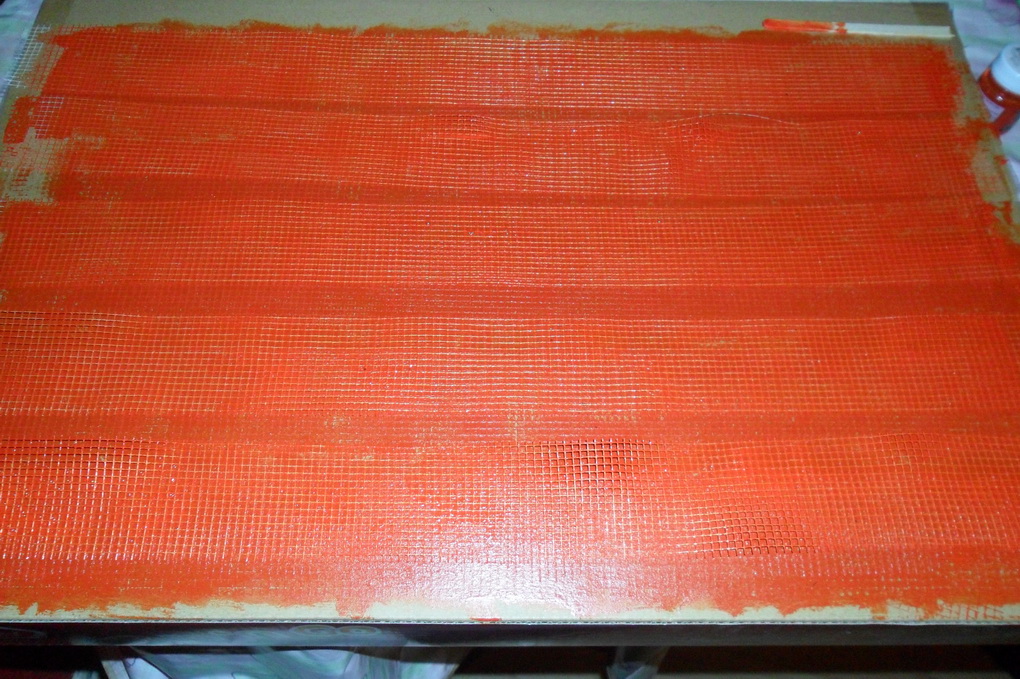
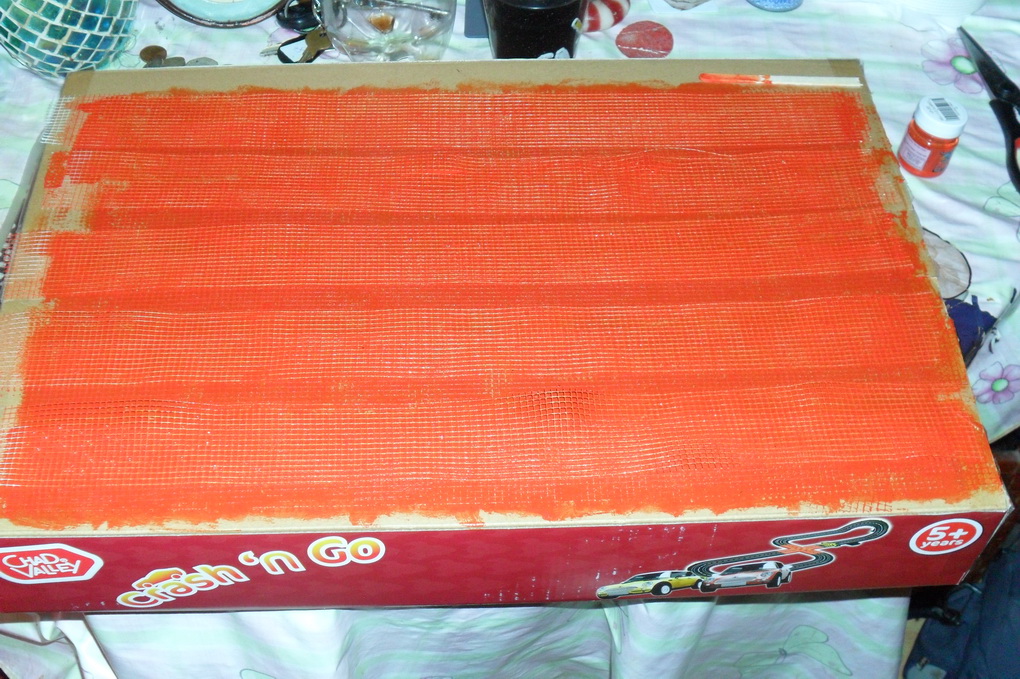
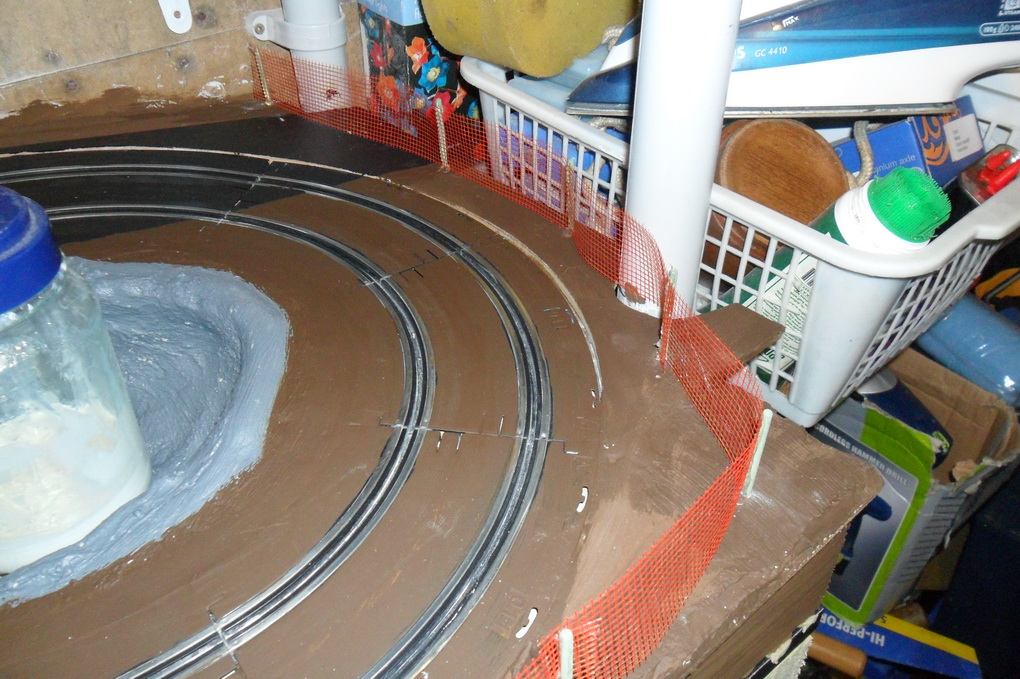
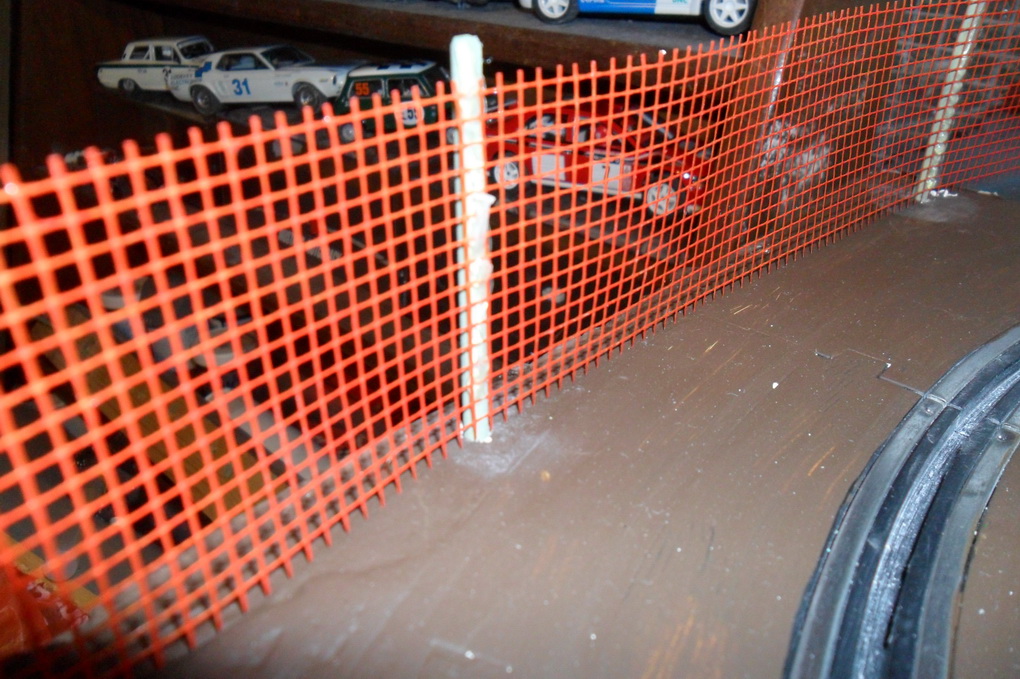
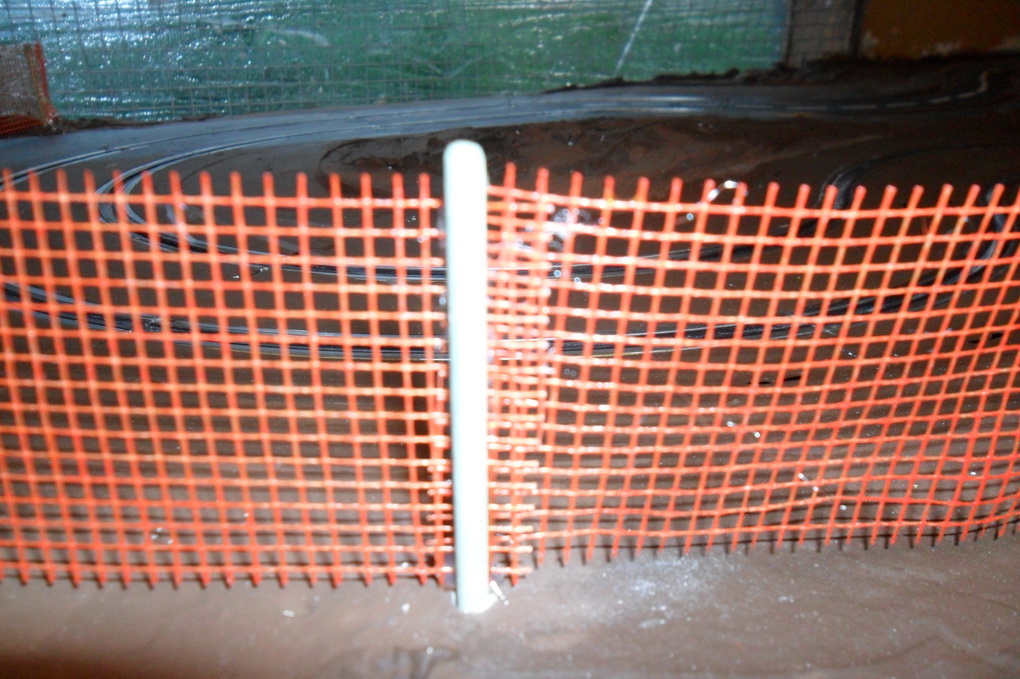
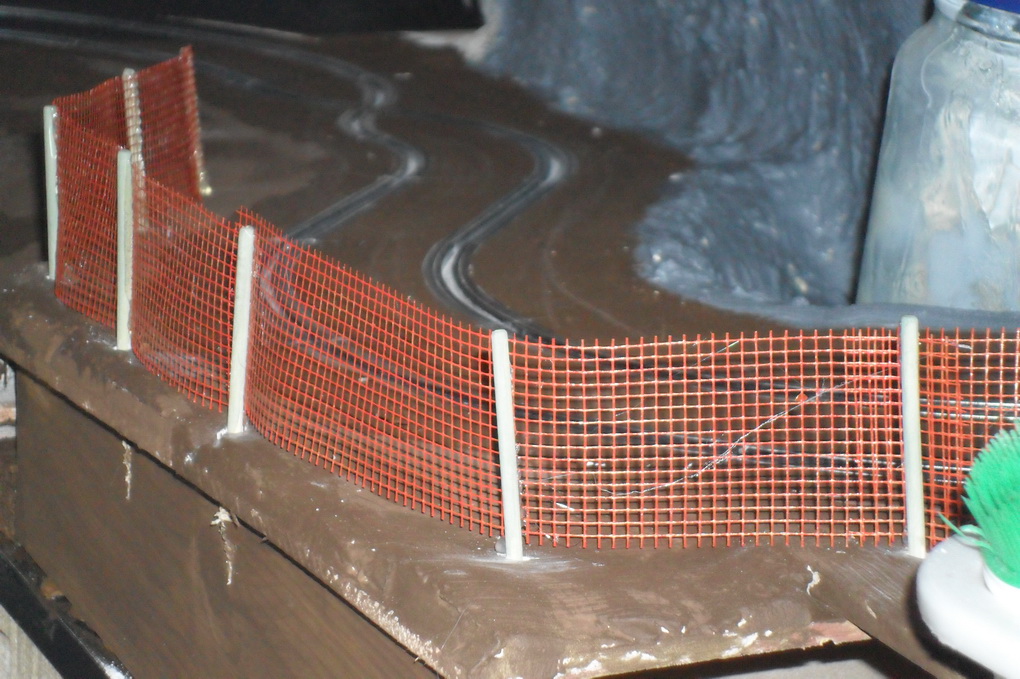
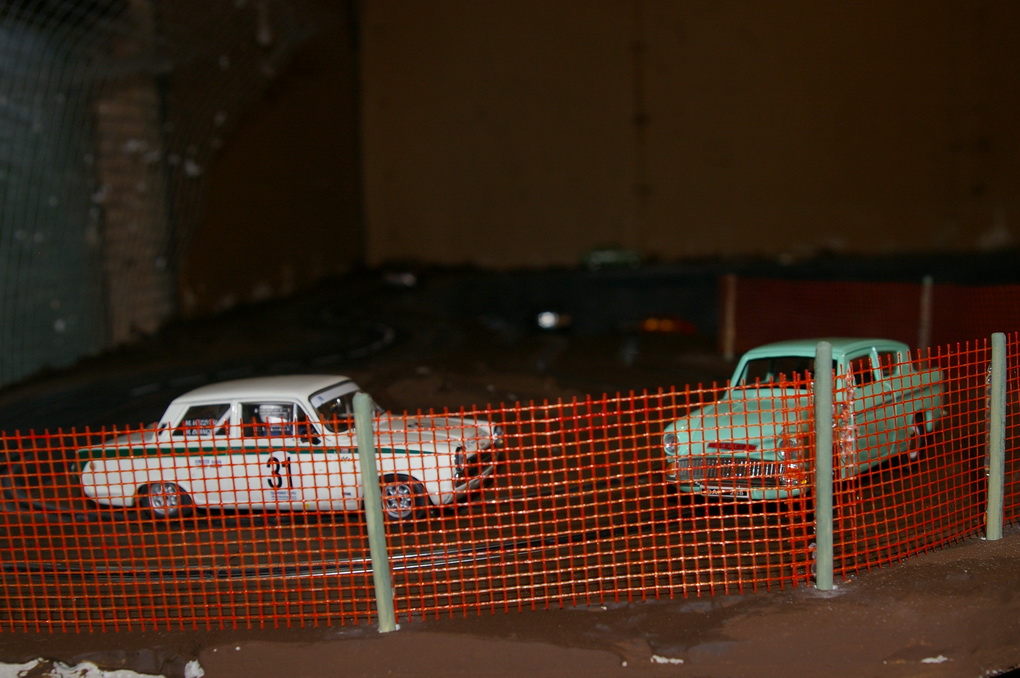
As I showed earlier I had a go at making some barrier fencing using the plaster scrim tape and I have now obtained some orange paint. Then I cut some BBQ skewers down to make poles, I got three out of each skewer. These I gave a thin wash of green paint so they look like new pressure treated timber. Holes were then drilled in the baseboard and finally the fence was glues to the poles with a glue gun. Due to the flash you can't see the colour of the posts.
rally in a shed 2 0404
rally in a shed 2 0405
rally in a shed 2 0406
rally in a shed 2 0407
rally in a shed 2 0408
rally in a shed 2 0409
rally in a shed 2 0410
rally in a shed 2 0411
rally in a shed 2 0412
rally in a shed 2 0413

rally in a shed 2 0414

rally in a shed 2 0415

rally in a shed 2 0416
rally in a shed 2 0417
rally in a shed 2 0418
rally in a shed 2 0419
rally in a shed 2 0420
rally in a shed 2 0421
rally in a shed 2 0422
rally in a shed 2 0423
rally in a shed 2 0424
rally in a shed 2 0425
Gave the rock faces a wash of slightly lighter dark grey first to add a second colour to the surface. Secondly to help cover some of the small areas of bare plaster that the original base coat was to thick to brush into. This also did a much better job on the rockface under the overhang.
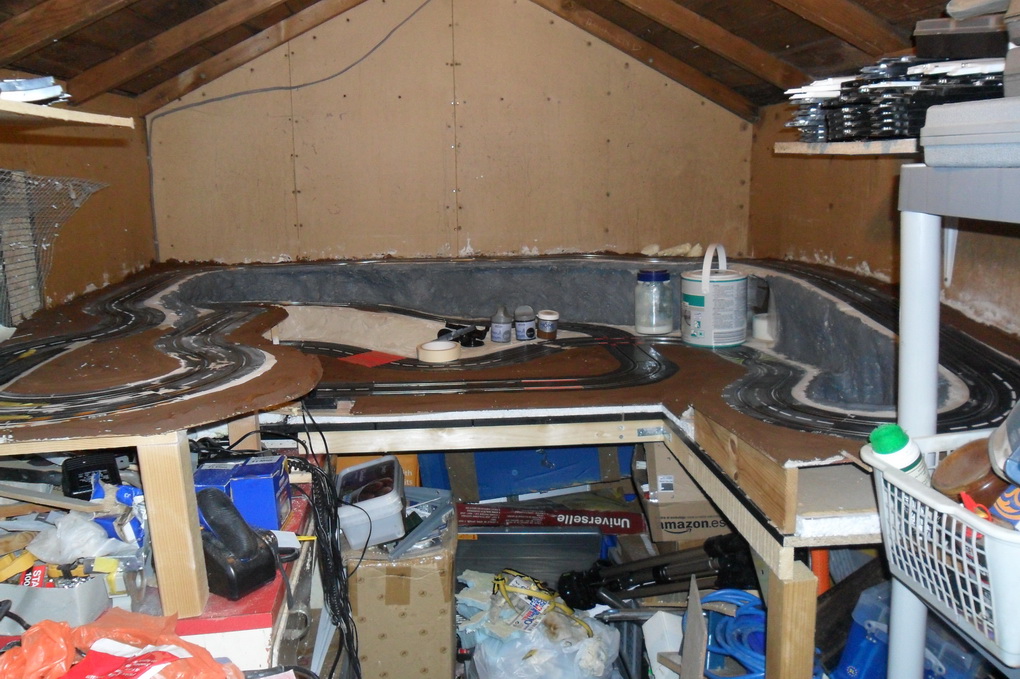
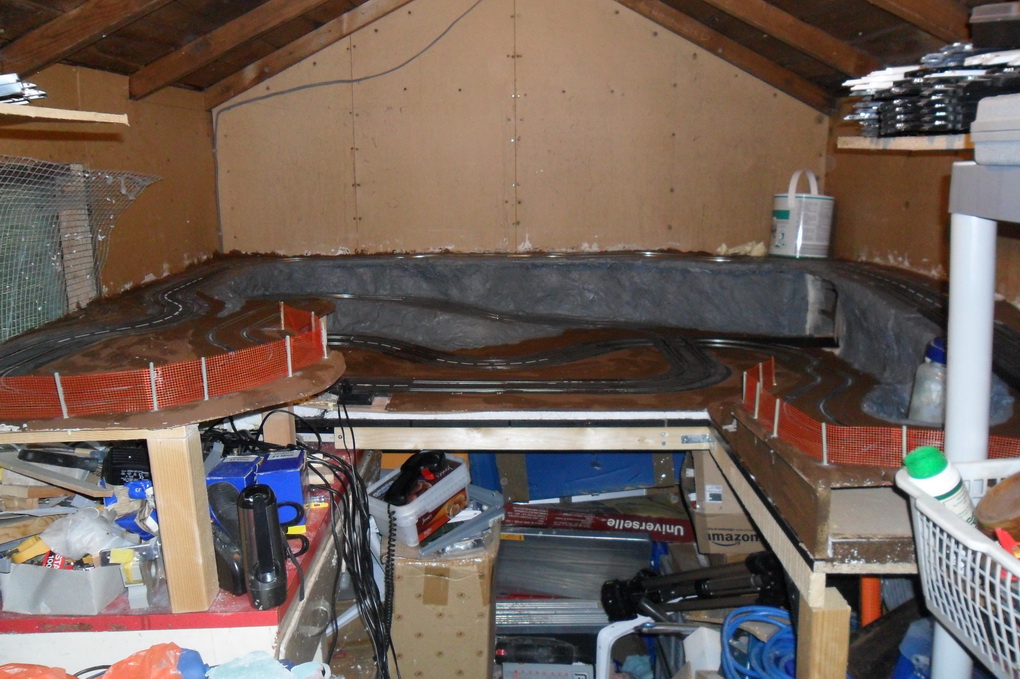
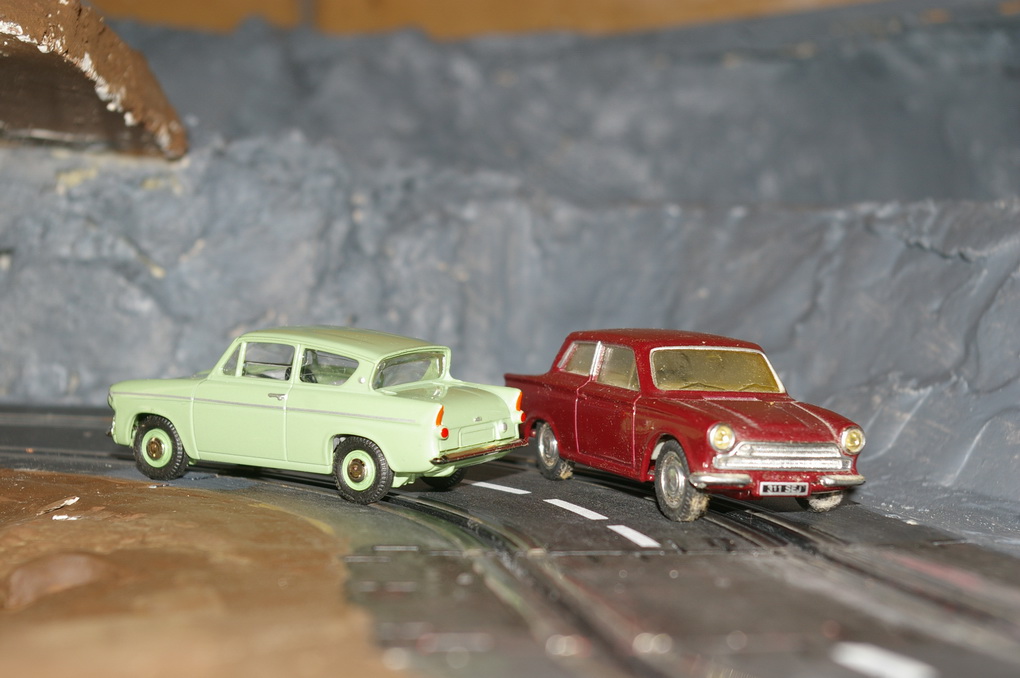
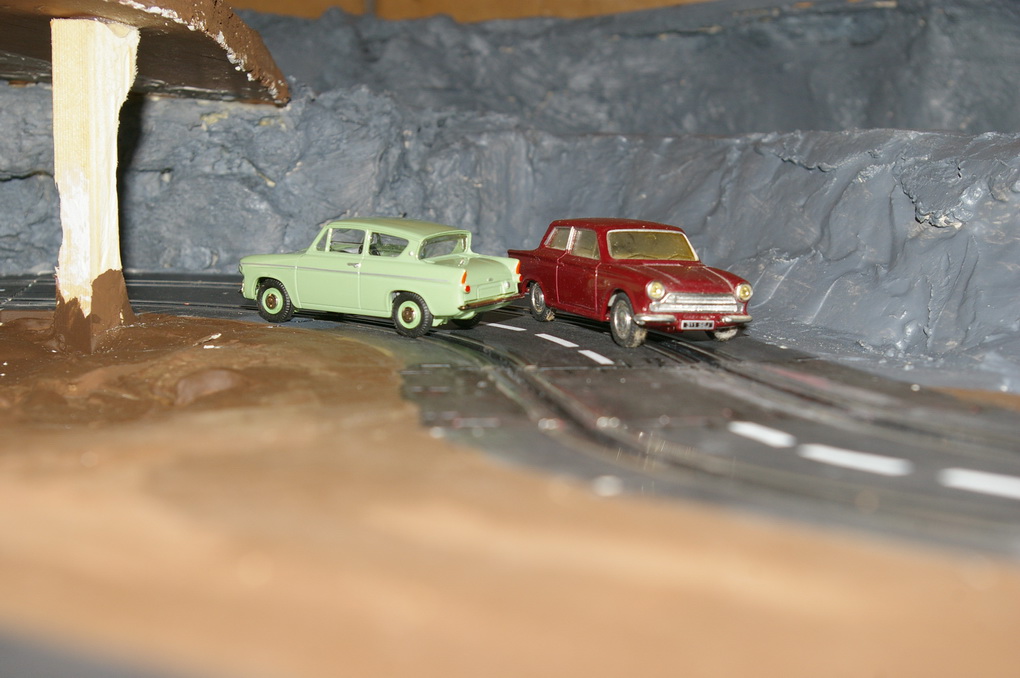
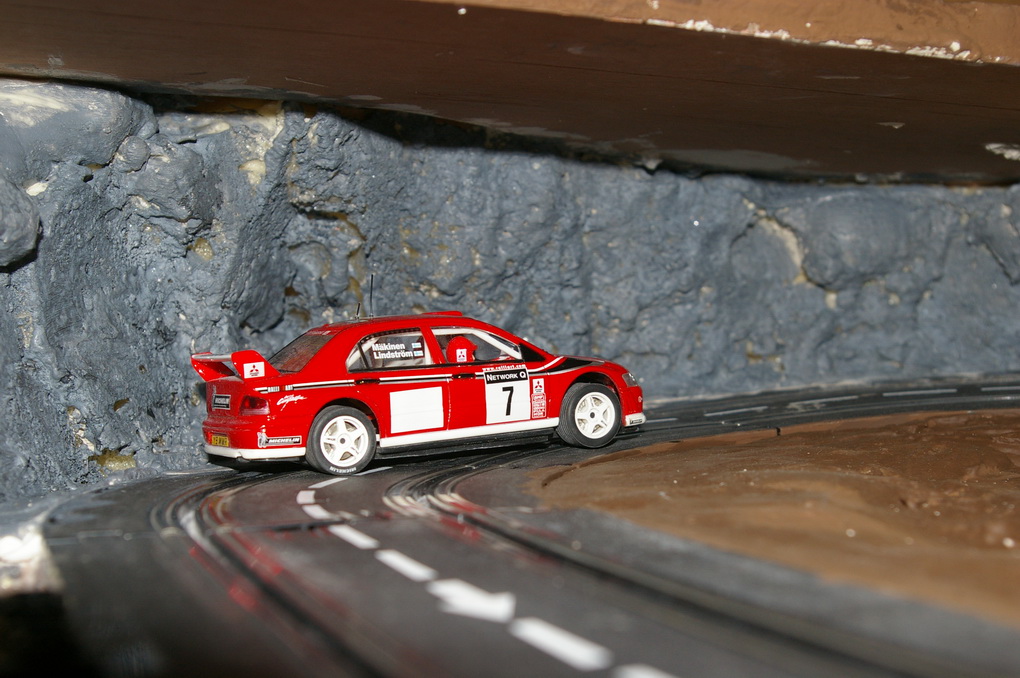
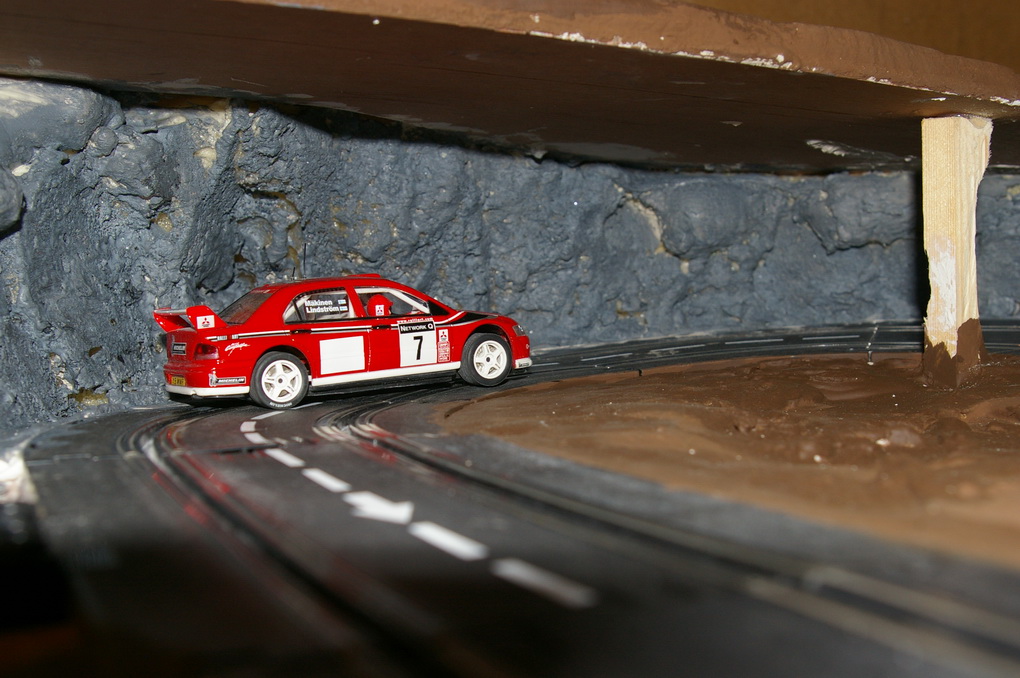
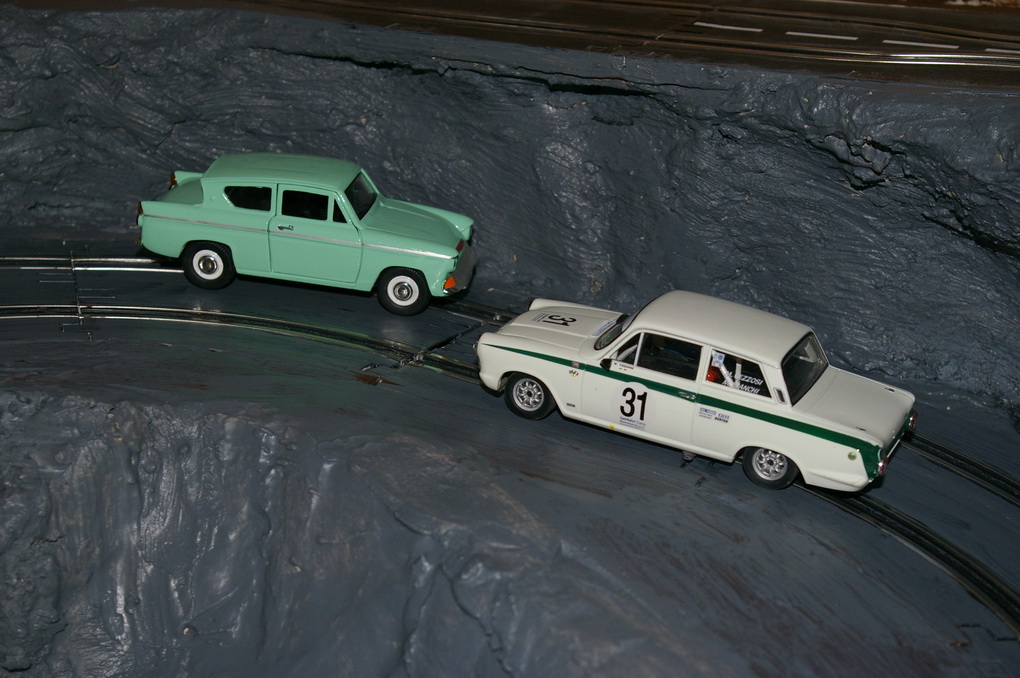
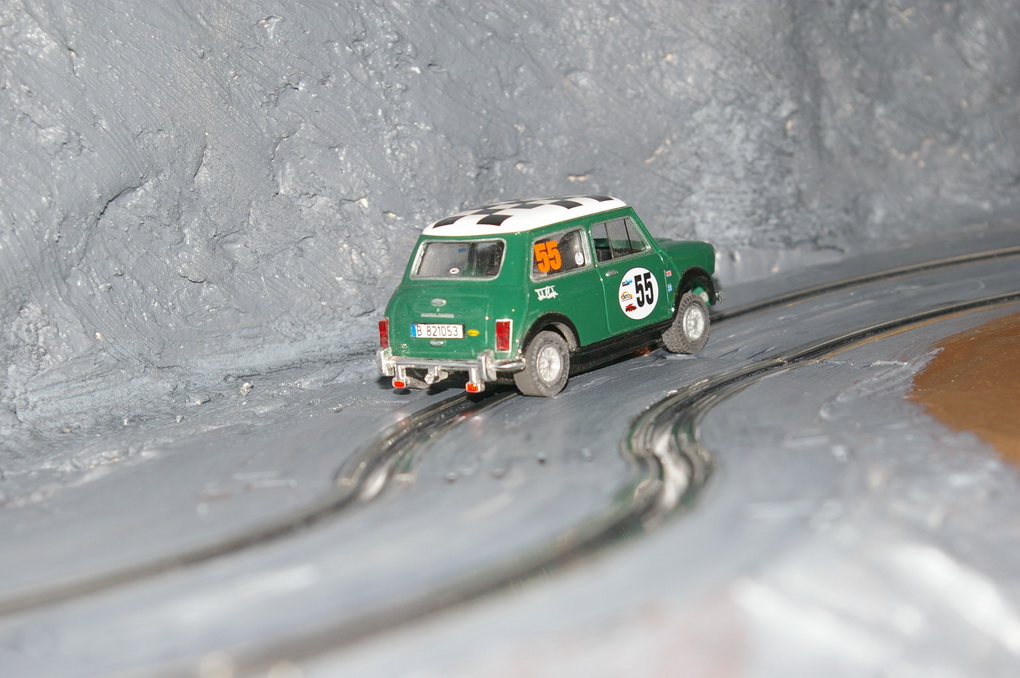
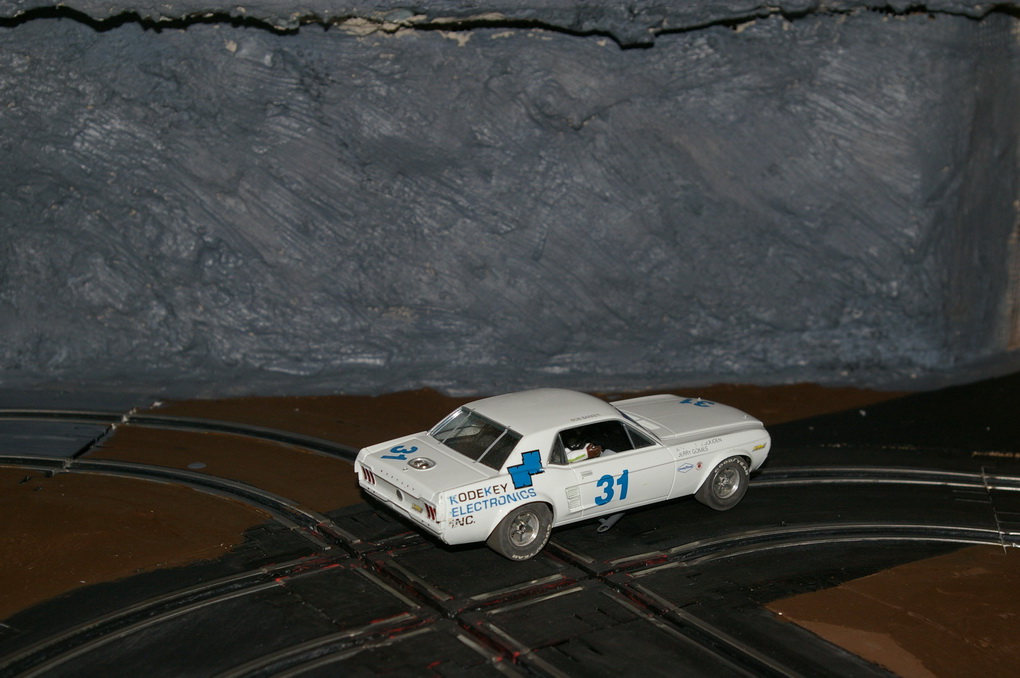
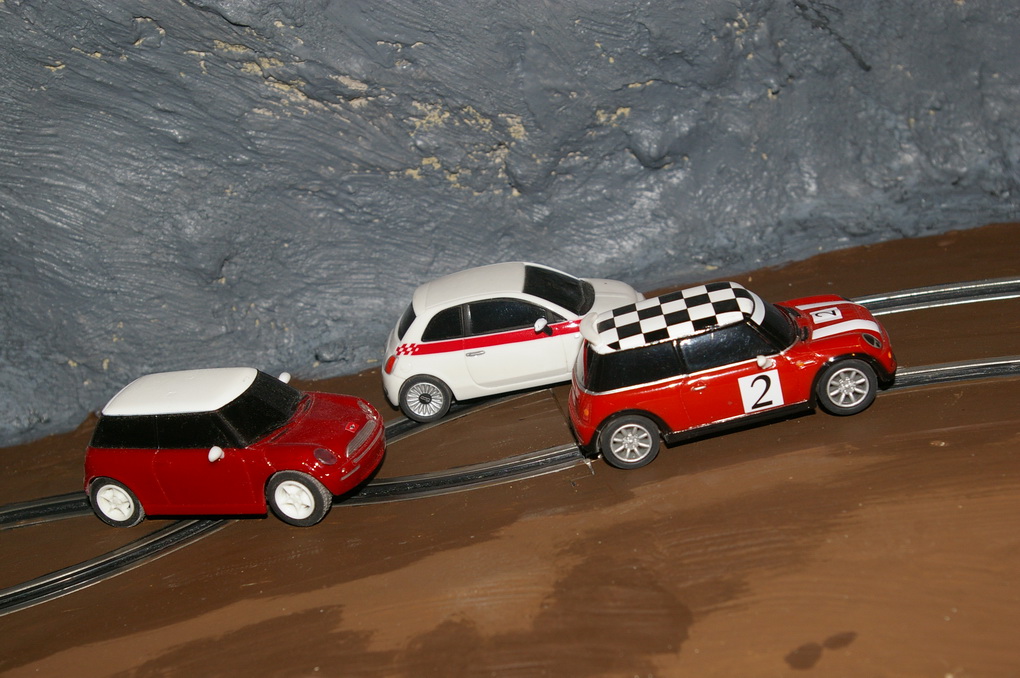
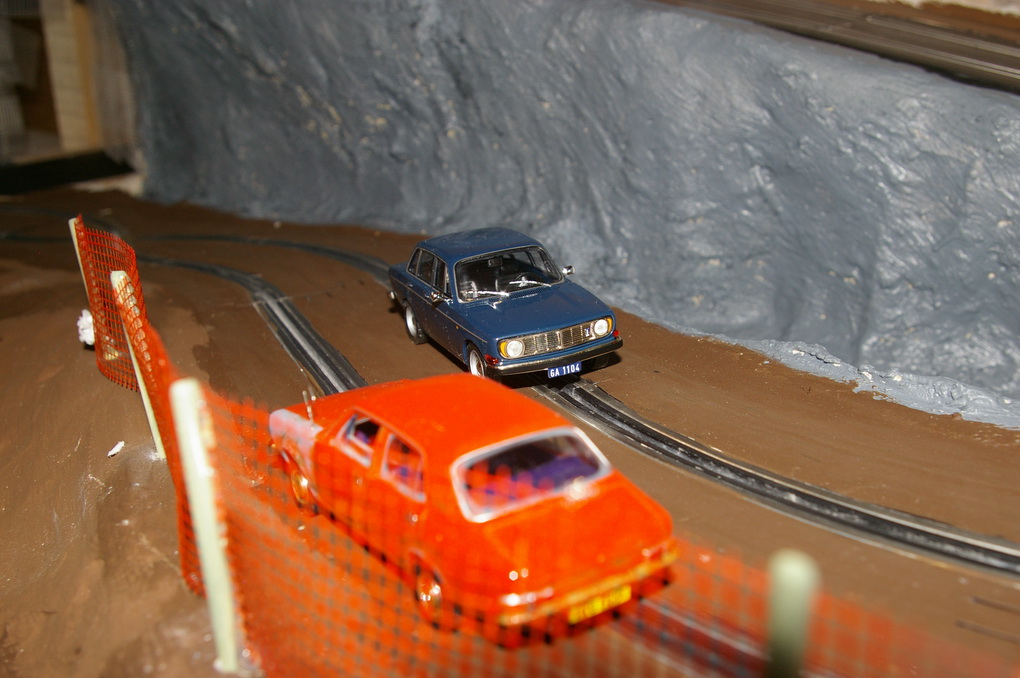
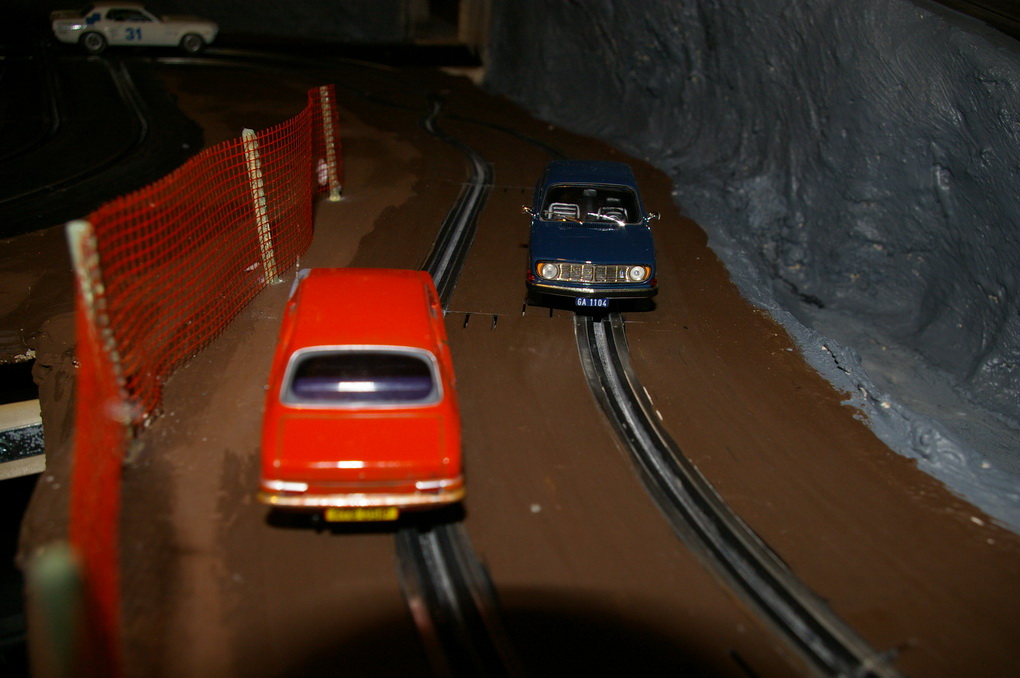
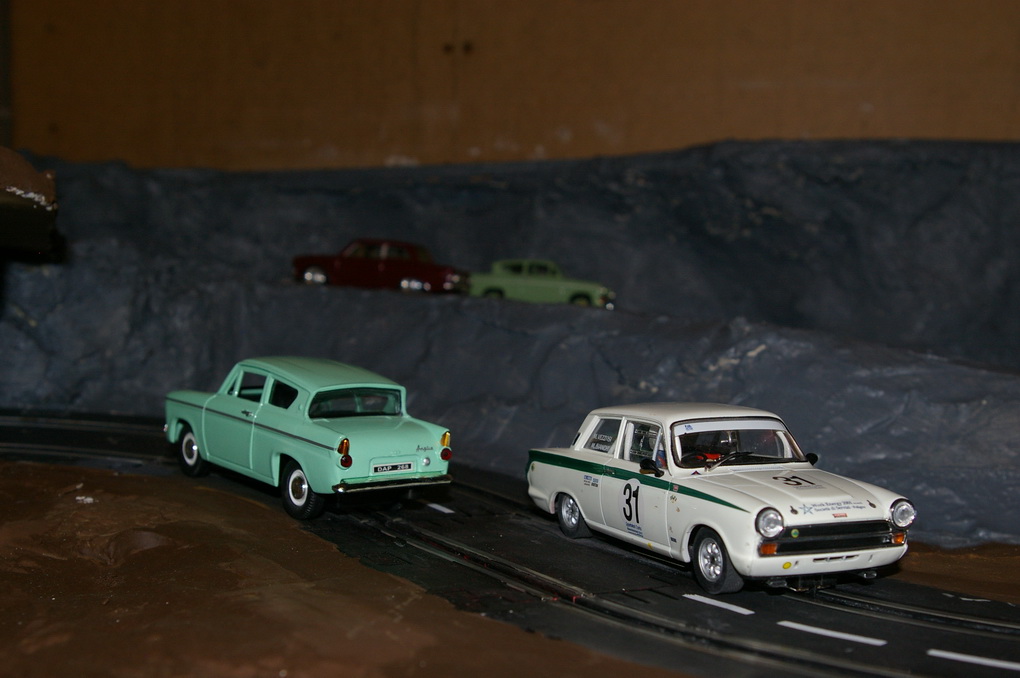
Also some general shots taken around the layout.
rally in a shed 2 0426
rally in a shed 2 0427
rally in a shed 2 0428
rally in a shed 2 0429
rally in a shed 2 0430
rally in a shed 2 0431
rally in a shed 2 0432
rally in a shed 2 0433
rally in a shed 2 0434
rally in a shed 2 0435
rally in a shed 2 0436
rally in a shed 2 0437
rally in a shed 2 0438
rally in a shed 2 0439
rally in a shed 2 0440
rally in a shed 2 0441
rally in a shed 2 0442
rally in a shed 2 0443
rally in a shed 2 0444
rally in a shed 2 0445
rally in a shed 2 0446
rally in a shed 2 0447
rally in a shed 2 0448
rally in a shed 2 0449
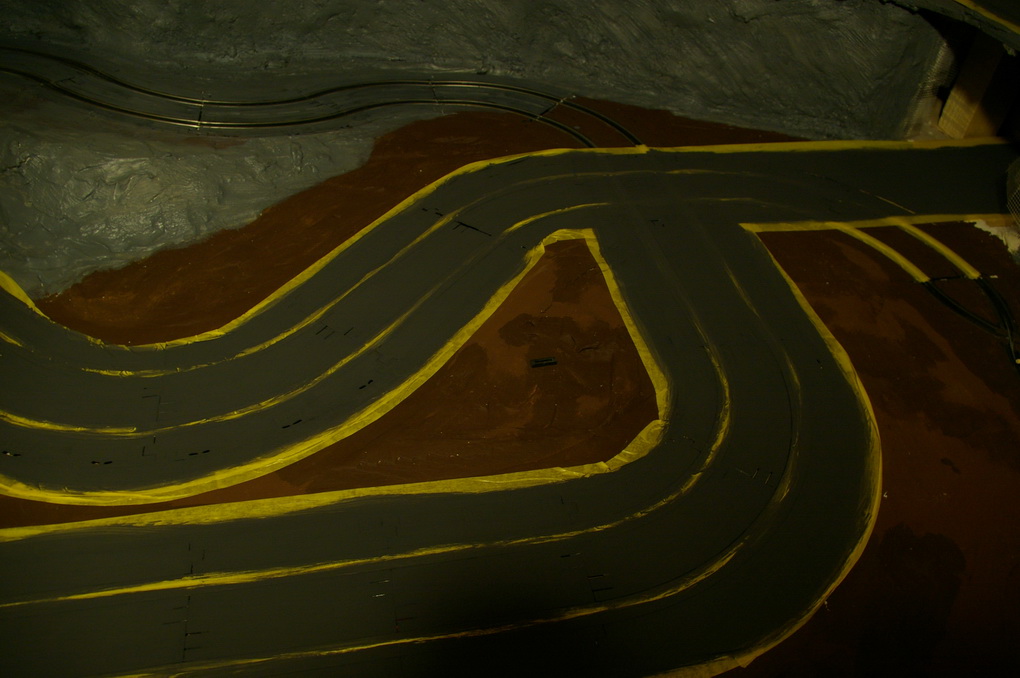
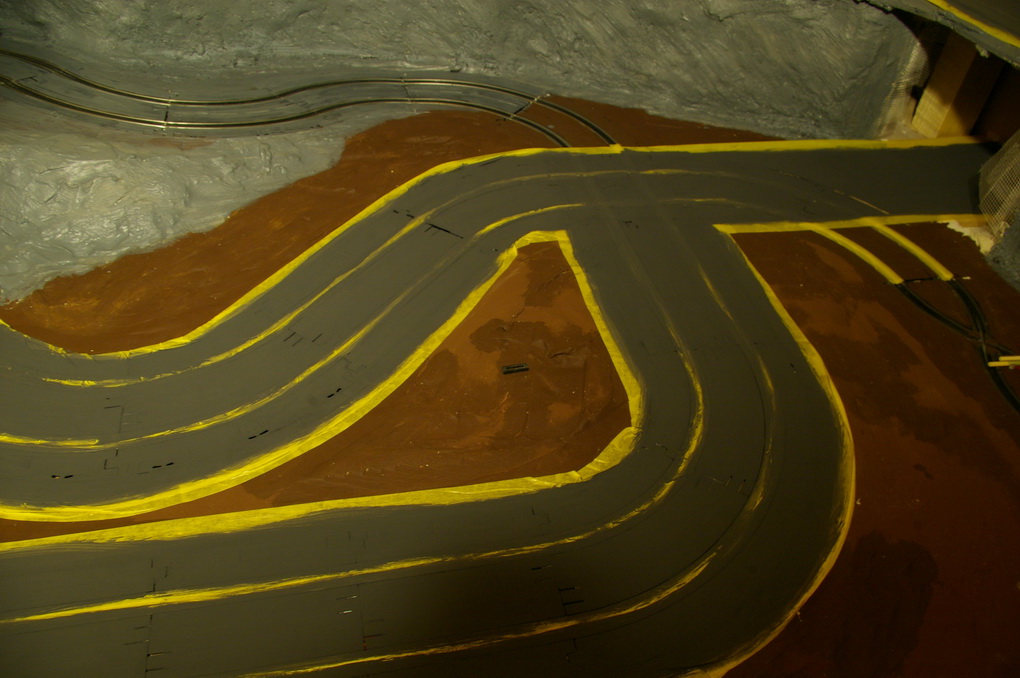
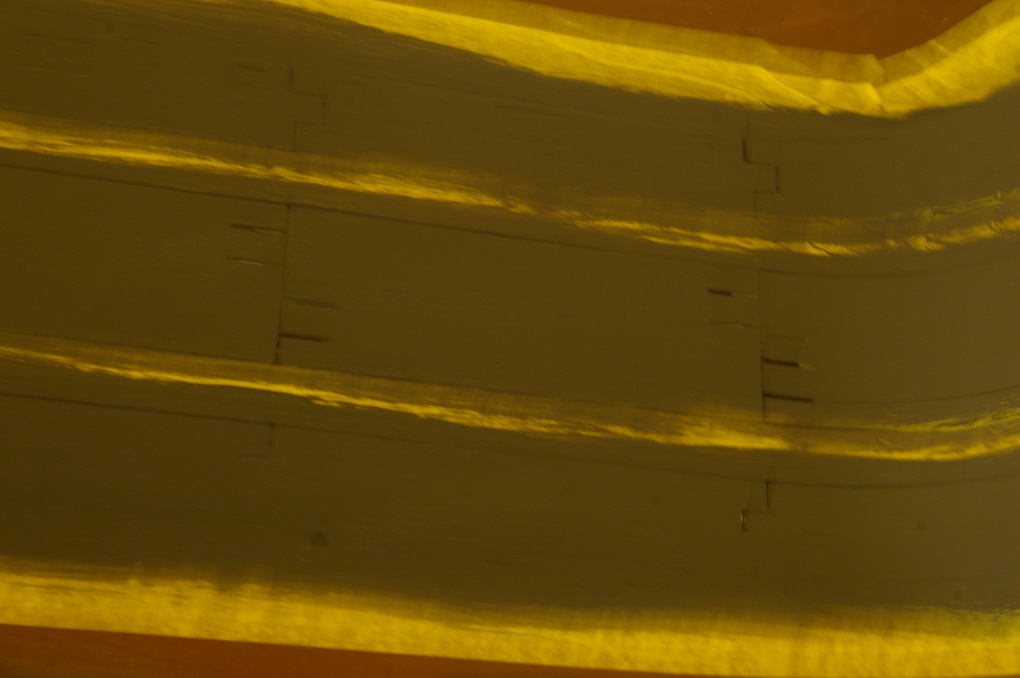
Tracks been masked with yellow Tamyia masking tape, I used a 10mm wide tape and it is wonderful stuff. If you stretch it a bit as you apply it it will follow outside curves with no problem and very little difficulty with inside curves. As it was 10mm wide I had to put two runs down one on each rail but at least there is no cutting to width so made the masking job fairly quick.Then the tarmac areas have been painted with an emulsion paint called Soft Black which is really dark grey. First coat straight out of the pot and second coat thinned with water not quite 50/50. Next will be an over spray with the texture paint.
rally in a shed 2 0450
rally in a shed 2 0451
rally in a shed 2 0452
rally in a shed 2 0453
rally in a shed 2 0454
rally in a shed 2 0455
rally in a shed 2 0456
rally in a shed 2 0457
rally in a shed 2 0458
rally in a shed 2 0459
rally in a shed 2 0460
rally in a shed 2 0461
rally in a shed 2 0462
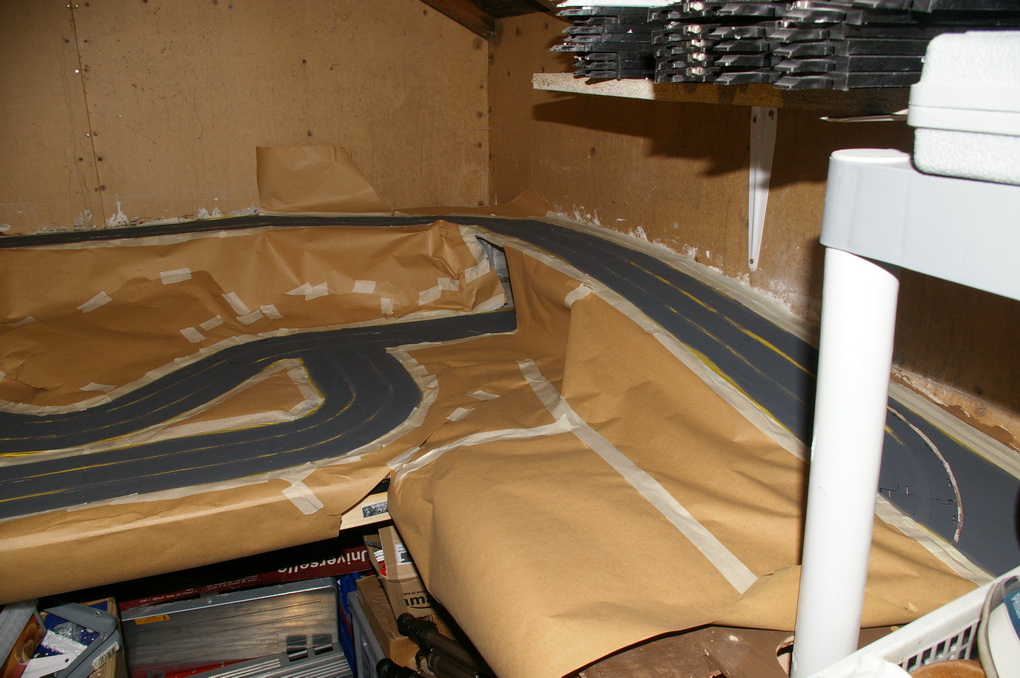
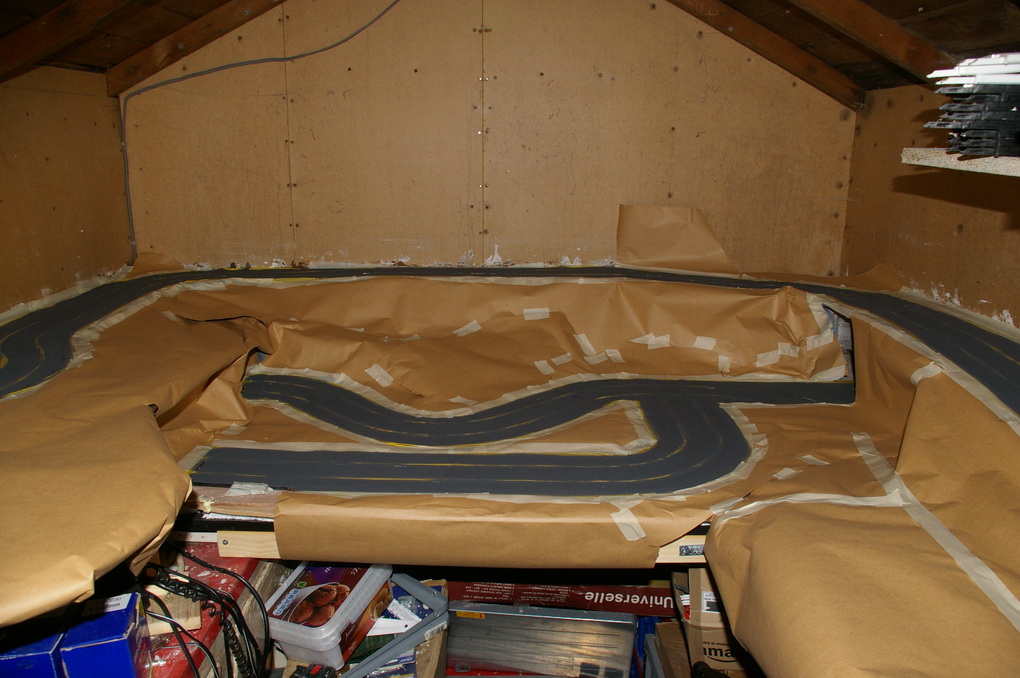
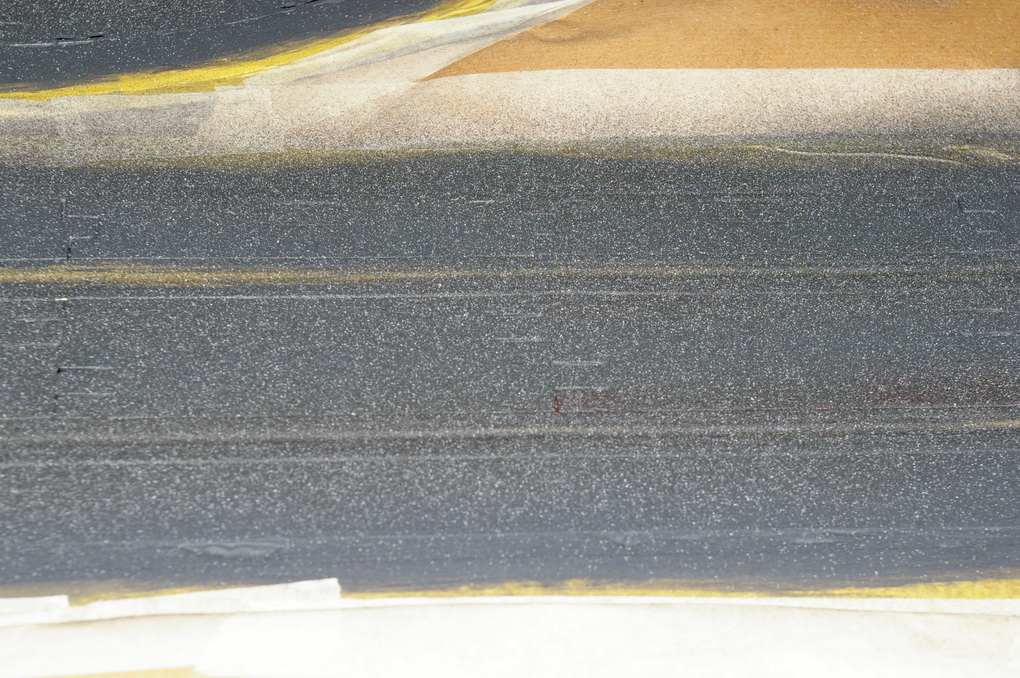
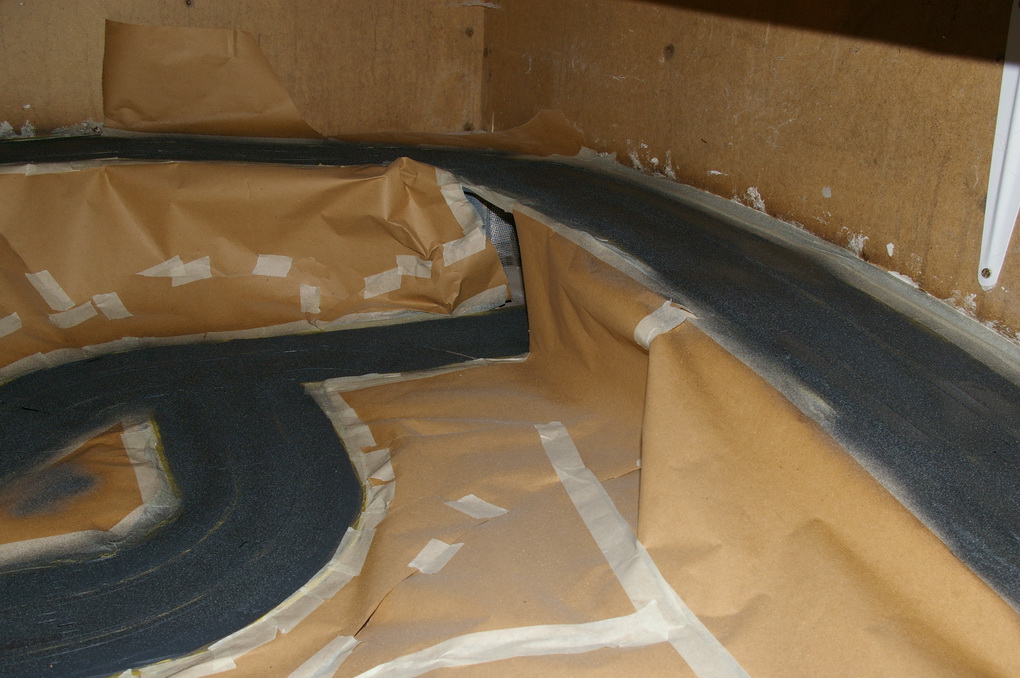
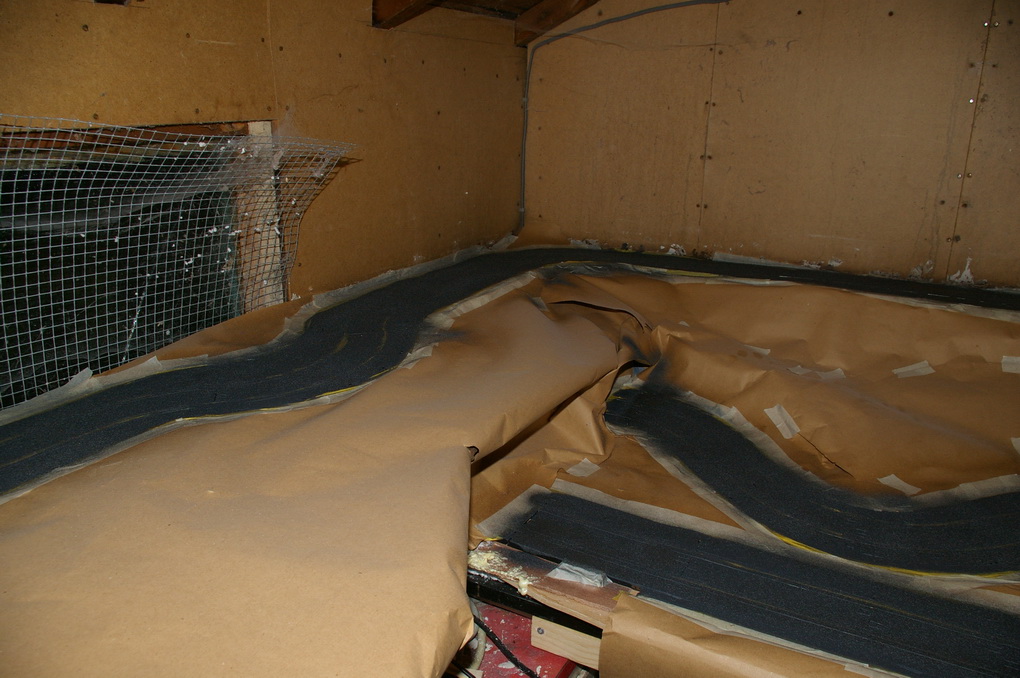
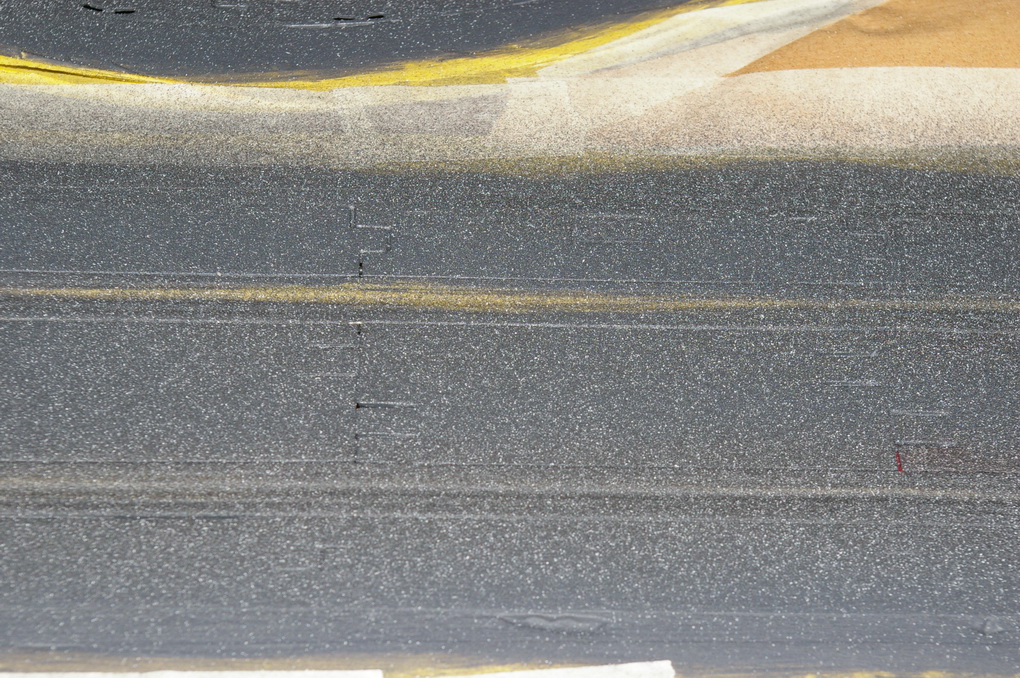
getting ready for spraying the tarmac area of the track so got some paper out and low tack masking tape and covered all the non tarmac parts of the track. Then it was on with a dust mask shake rattle n roll till the paint was mixed up in the can. Long time since I done any spraying so it ended up a bit heavy in places. I just got away with one can of paint, luckly I didn't need too thick a coat of paint although it is thick in some places (hope it doesn't cause any problems).
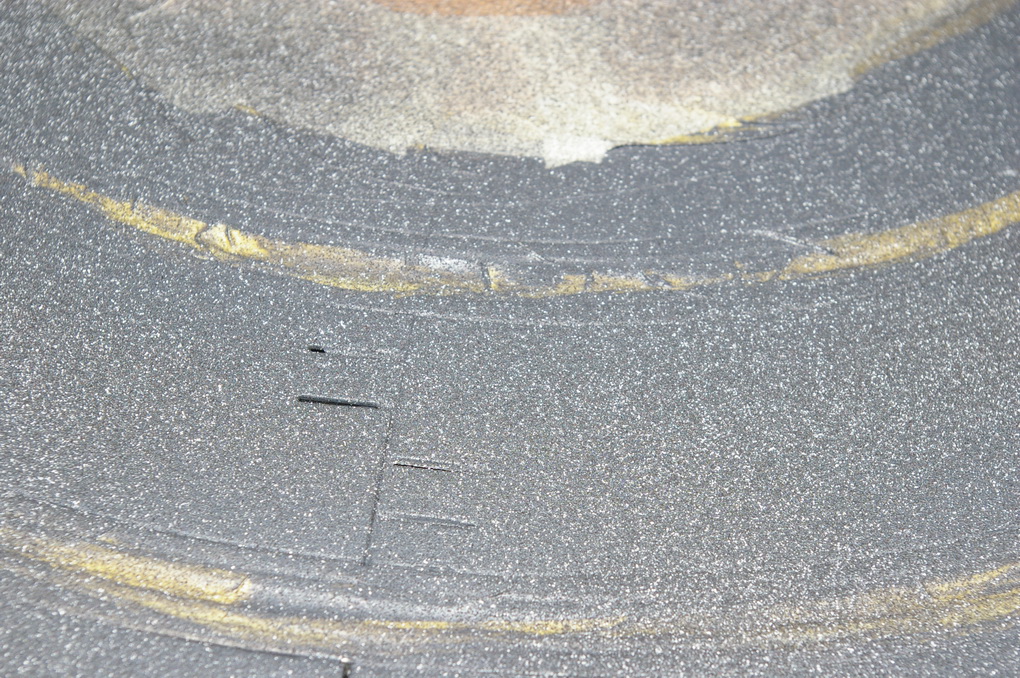
While the paint was wet it just looked like grey paint but as it dried it changed to a speckled finish.
Then once it was touch dry off with the paper and masking tape. There were a couple of little problems, the areas that I painted with the floor paint are the main problem, the acrylic floor paint hasn't taken to the plaster very well and tends to lift up in sheets.
As you can see the road dosn't follow the slot anymore in a few places.

rally in a shed 2 0463

rally in a shed 2 0464
rally in a shed 2 0465
rally in a shed 2 0466
rally in a shed 2 0467
rally in a shed 2 0468
rally in a shed 2 0469
rally in a shed 2 0470
rally in a shed 2 0471
rally in a shed 2 0472
rally in a shed 2 0473
rally in a shed 2 0474
rally in a shed 2 0475
rally in a shed 2 0476
rally in a shed 2 0477
rally in a shed 2 0478
rally in a shed 2 0479
rally in a shed 2 0480
rally in a shed 2 0481

rally in a shed 2 0482
rally in a shed 2 0483
rally in a shed 2 0484
rally in a shed 2 0485
rally in a shed 2 0486

rally in a shed 2 0487
rally in a shed 2 0488
rally in a shed 2 0489
rally in a shed 2 0490
rally in a shed 2 0491
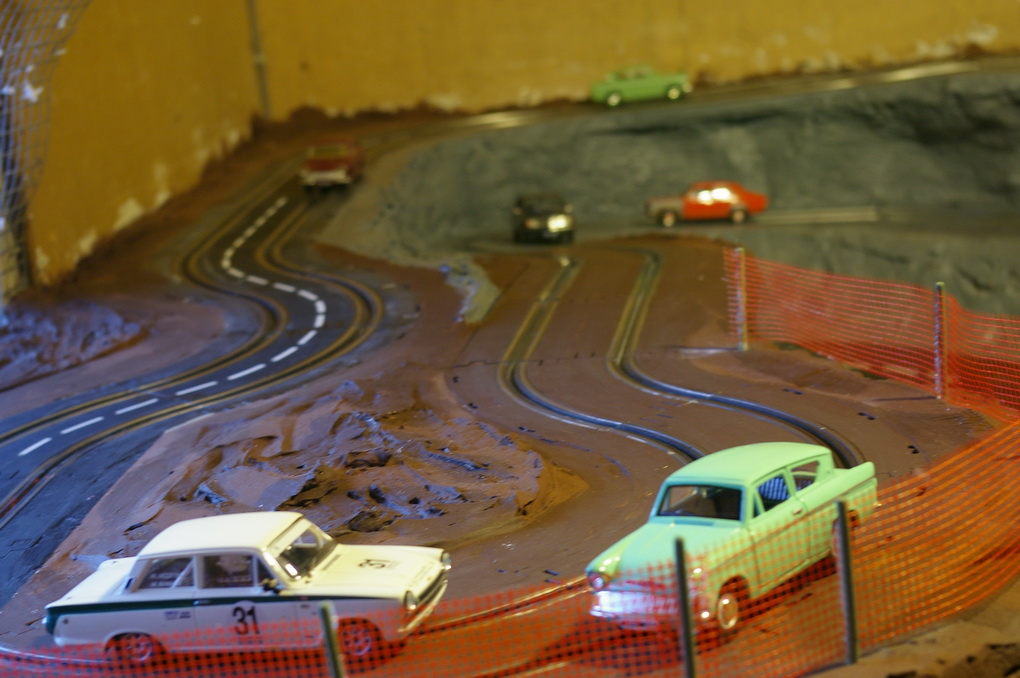
I decided to let the textured paint dry for a couple of days before running on it so yesterday I gave the earth areas another coat of the darker mocha emulsion paint only this time it was a well watered down and was a thin wash. The lighter colour still shows through but I think it looks a lot better with the darker shade over it as it blends in a lot better.
Gave the track a test with most of my cars in both directions and it looks like I am going to have to play about with the weights added to the cars. I removed most of the magnets again and had weighted the cars down to improve grip on the plastic and painted track. As the track does not need a lot of speed I had added quite a bit of weight to all the 1/32 cars except the Mustang. The mustang is still behaving much the same on the textured paint, not so much tail end out but no other problems. The other cars are behaving very differently on the textured paint so it looks like it's time to reduce some weight.
I'm also wondering if the stone paint is the right way to go for the gravel sections. Need the cars to be looser on the gravel sections than on the tarmac sections. But then I do like the look of the stone paint so may use the stone paint and then a few coats of matt or satin or even a mix of the two to fill the texture and reduce the grip of the stone paint. Another possibility is to build up the gravel effect with layers of stippled paint, take a bit of sponge dip it in the paint get it almost dry and then stipple the surface in random patterns and colours. My main worry is if the stone paint goes wrong how easy will it be to remove it.
The next thing to do I am very uncertain about, where the gravel tracks meet the tarmac the gravel track will fade to earth / mud which will need to be pulled onto the tarmac and if I get it wrong I will have ruined the tarmac. So I think I need to paint up a peice of scrap ply and experiment. One idea I have is to get a foam mini roller and cut it down to leave a pair of tyres and dry roller the paint to give the effect of wheel tracks. if this works I could also use this to drag mud over the grave in places, worth a try anyway.
The safety barrier has been "tested" a couple of times now and seems to be working fine.
rally in a shed 2 0492
rally in a shed 2 0493
rally in a shed 2 0494
Utility services had been out digging holes in the road and filling with rake and roll tarmac. Why is it every new bit of tarmac has to be dug up.
And had to do a bit more filling.
rally in a shed 2 0495
rally in a shed 2 0496
rally in a shed 2 0497
rally in a shed 2 0498
rally in a shed 2 0499
rally in a shed 2 0500
rally in a shed 2 0501
rally in a shed 2 0502
rally in a shed 2 0503
rally in a shed 2 0504
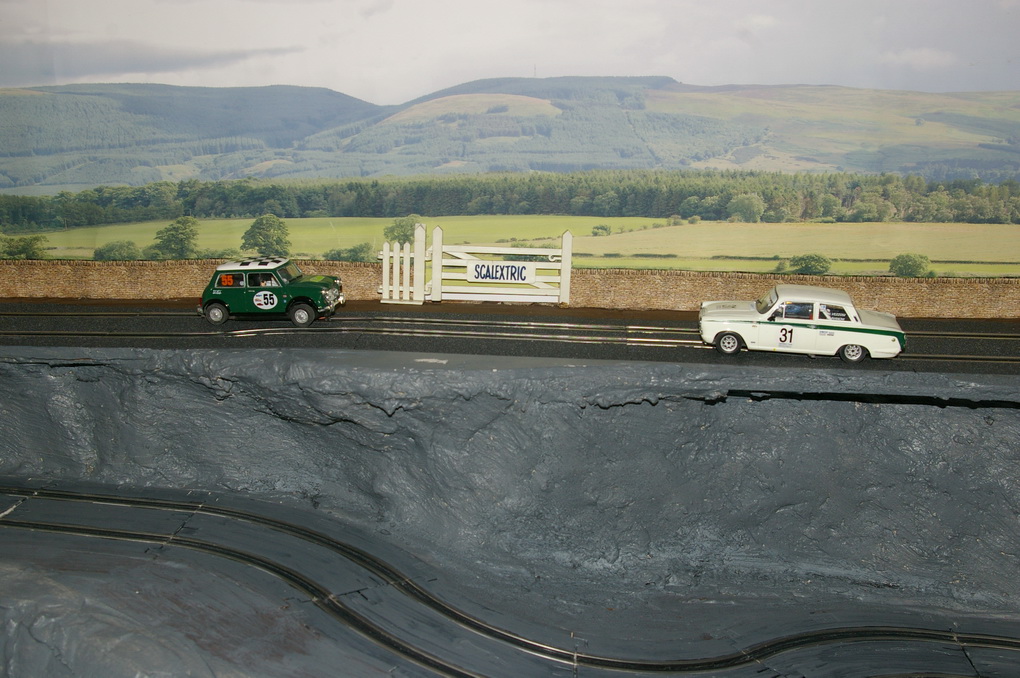
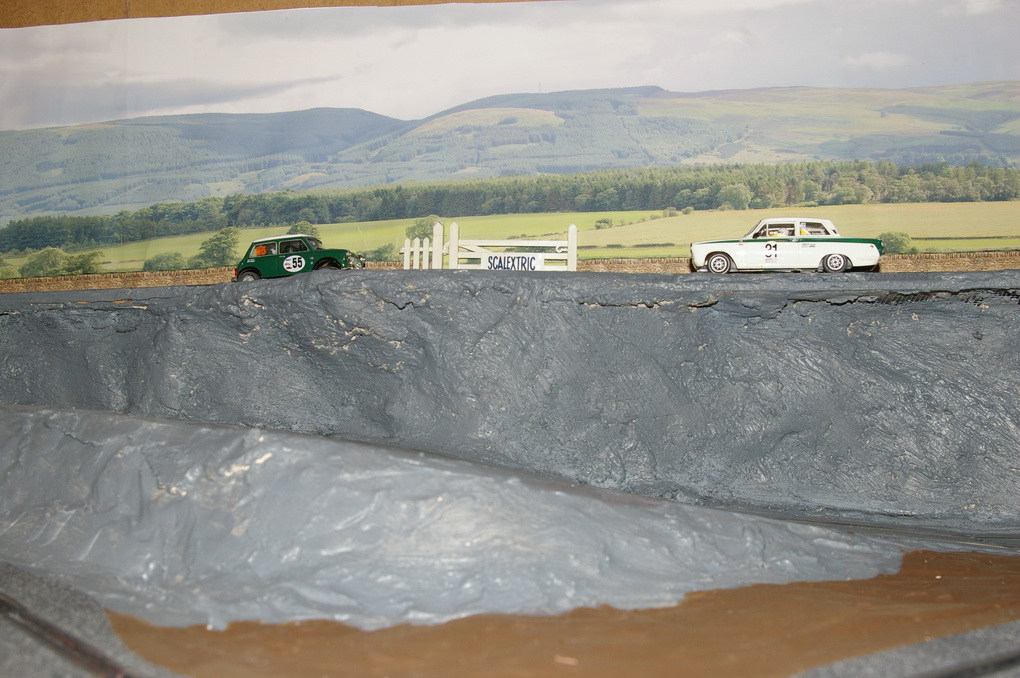
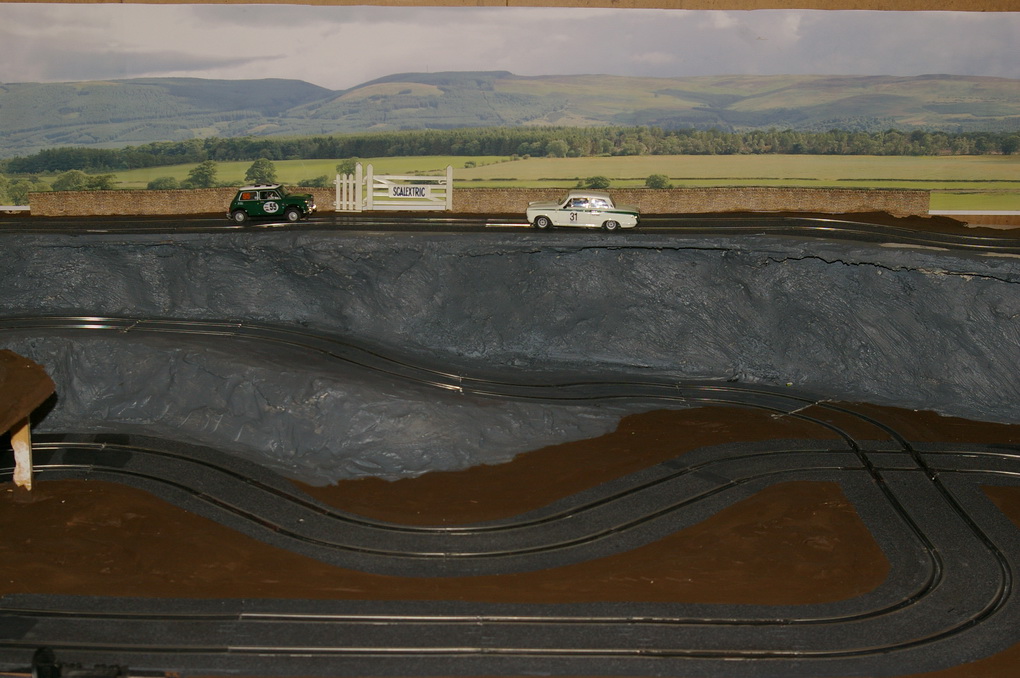
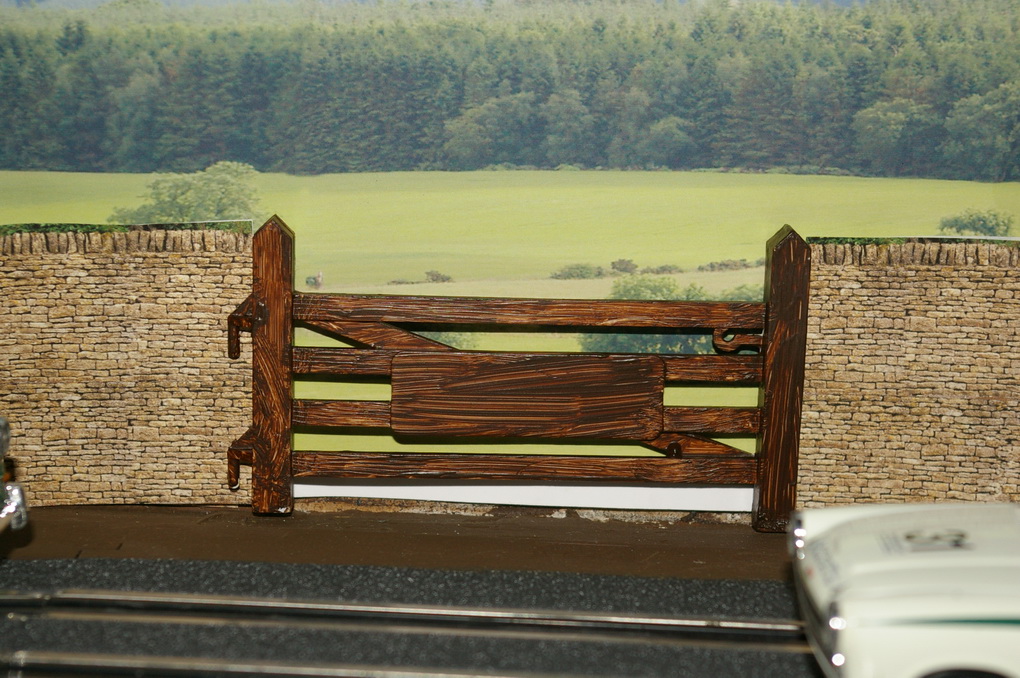
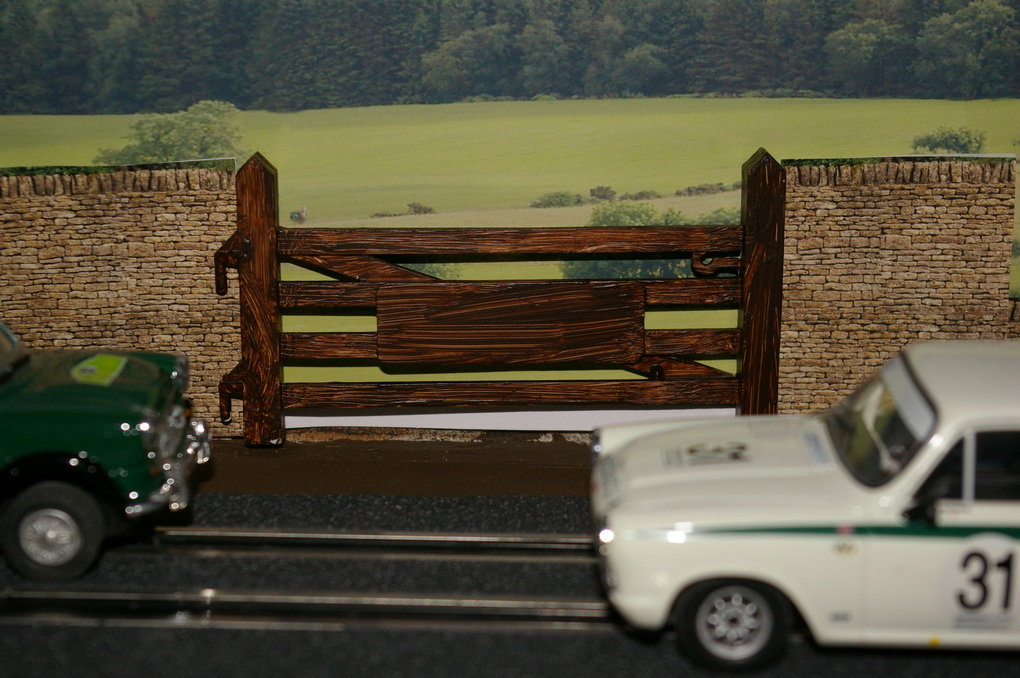
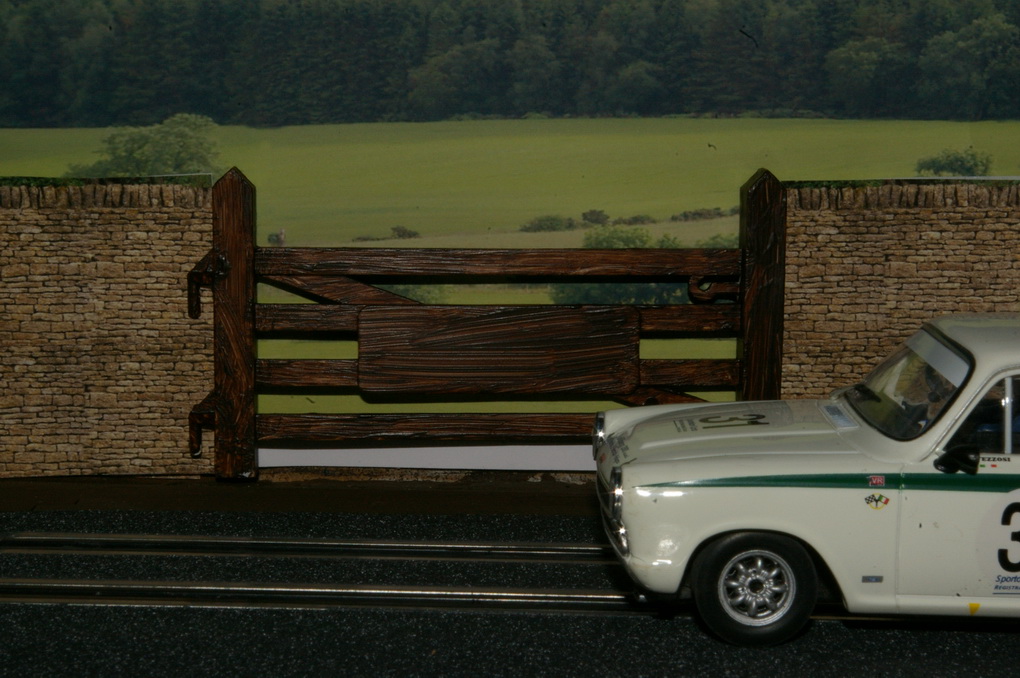
Decided to put the backdrop up and added the dry stone walling to help blend it in to the track. The back drop has been fixed to the shed wall with double sided carpet tape which I hope will prove sucessful. The only possible problem with the tape is that one side is like a normal sticky tape but the other has a low tack adhesive. Luckly for me who ever put the shed up, it was here when we moved in, had lines the inside with hardboard.I have stuck the normal side to the hardboard and the low tack side to the backdrop. The only question is do I go with just an opening in to the fields beyond or install the gate, if I go with the gate I will remove the word Scalextric from it and paint it brown to look like wood. The plan is to put some mud down from the entrance going on the tarmac in one direction and then to coat the area with Johnson Klear to give a wet look to the road. Hopefully this will also reduce the grip over part of the chicane that is here. Although the wall is just printed on sticky paper as the hardboard backing is not flat and there is also a bit of plaster on the hardboard the dry stone wall in not dead flat and does have a bit of life to it. Still got a small portion of backdrop to install on the lefthand side and may come down the side as well.

rally in a shed 2 0505
rally in a shed 2 0506
rally in a shed 2 0507
rally in a shed 2 0508
rally in a shed 2 0509
rally in a shed 2 0510
rally in a shed 2 0511

 2024
2024